Summary
Voice Messages are used to upload and send custom voice messages to customers. This preference is useful for sending out a custom voice message to an individual customer, or even a group of customers in bulk. This guide will show how to access and use the Voice Messages‘ Preference.
Important Points:
- The voice messages uploaded here are not for appointment reminders. To configure the appointment reminder voice message, go to Admin > Preferences > Customer Communication.
Accessing the Voice Messages Preferences
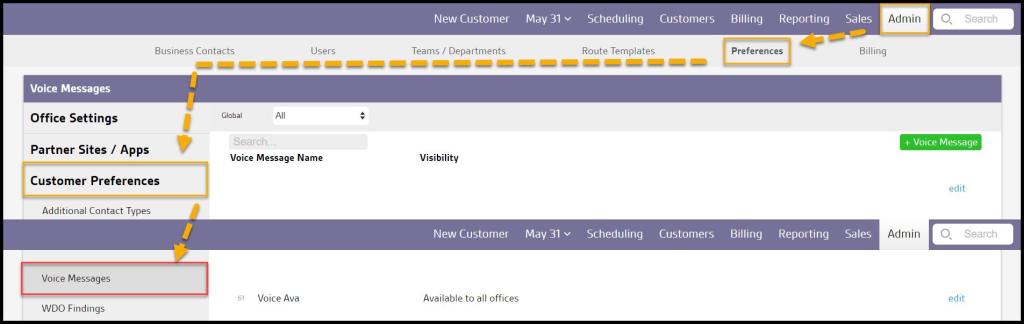
To access the Voice Messages Preferences, go to:
Admin > Preferences > Customer Preferences > Voice Messages.
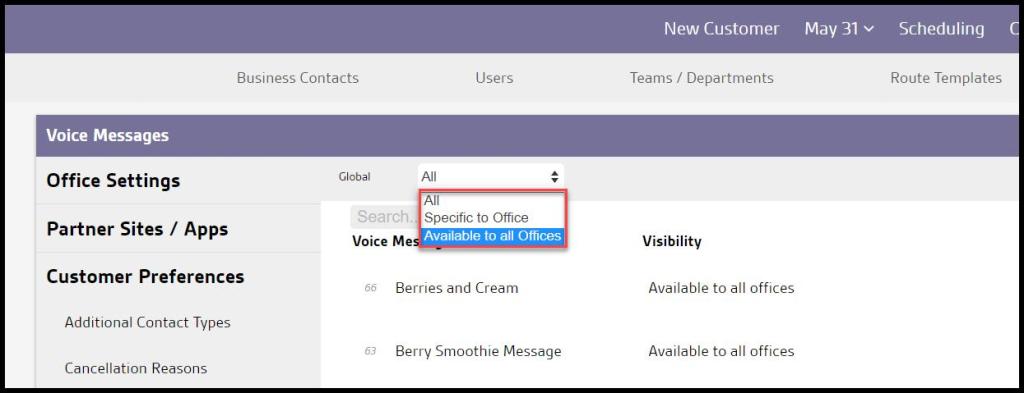
Filtering the Voice Messages Preferences
To filter Voice Messages, select the Global Filter.
- Global: Filter voice messages by their availability to certain or all offices.
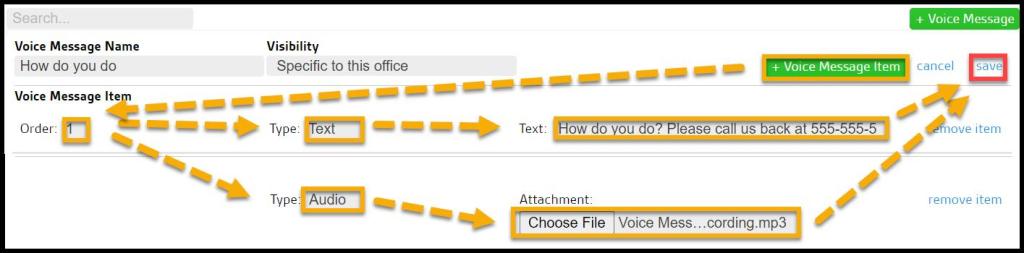
Adding a New Voice Message or Editing Existing Messages
To add a new voice message, select “+ Voice Message” at the top, or to edit an existing voice message, select Edit.
- Voice Message Name: Enter the name of the voice message.
- Visibility: A user from an office with multiple branches can select the box next to “Global Voice Message” to make this voice message available in all offices.
- + Voice Message Item: Add voice message items.
Once finished, select Save to save any changes to the voice message or select the “+ Voice Message Item” button.

Adding Voice Message Items
Once the voice message name has been entered, click the green “+ Voice Message Item” button to add multiple items to the custom voice messages.
- Order: Select what orders the items will be displayed in. Select “1” for the 1st item.
- Type: Select whether to create a voice message item via text-to-voice or provide audio. To use a pre-recorded voice message in a .mp3 file, select “Audio.” Choose “Text” to type the voice message out and have a computer-generated voice say the message.
- Audio: Use this button to select and upload the .mp3 file for the voice message.
- Text: Use this field to type the voice message out. The user can also use the dynamic placeholders below at the bottom of the page for their text voice message.
Once finished, select Save to save any changes to the voice message.
Sending Voice Messages to Customers Via Customer Card or Customer Report
There are two different ways to send the voice messages that have been uploaded here to customers:
- Individually through the Customer Card.
- In bulk via Customers report.
Sending Voice Messages to Customers Individually Via Customer Card
To send a voice message to a customer via the Customer Card, go to:
Customer Card > Notes > Send Voice.
This will allow the voice message to be chosen and sent to the customer.

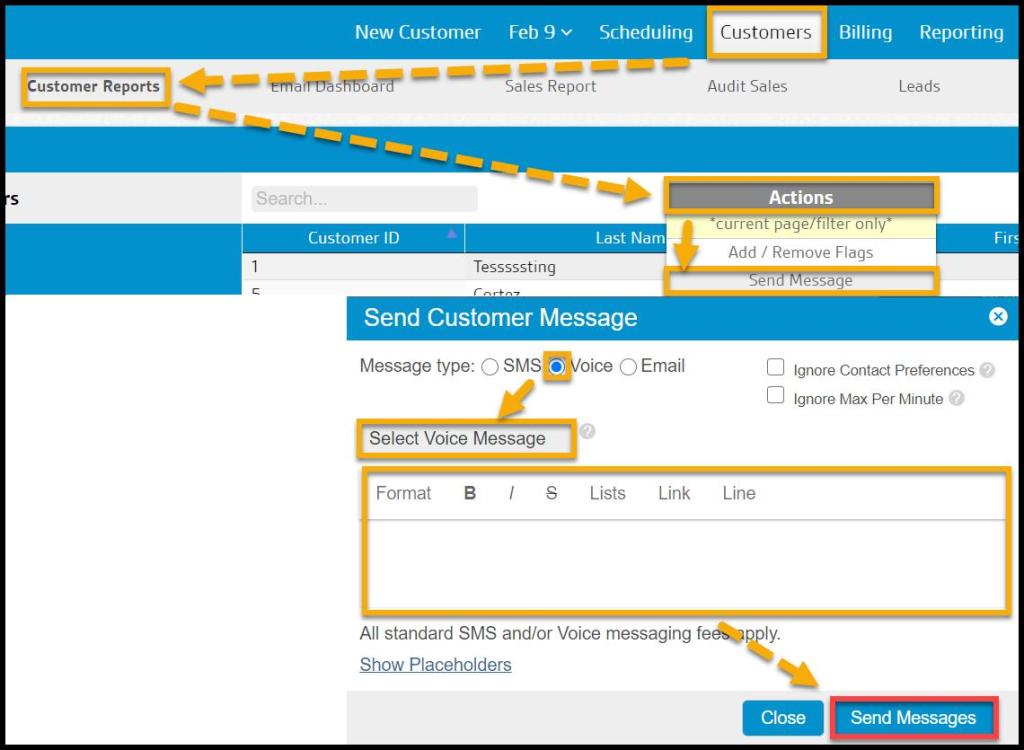
Sending Voice Messages in Bulk to Customers Via Customer Report
To send a voice message to customers in bulk, go to
Customers > Customers Report > select the Actions Button > Send Message > Voice. Please see the guide on the Customers report for more information.