Understanding the Customer Invoice
Summary
Invoices are generated automatically in the Operations Suite when an appointment is Completed. Copies are emailed to customers, stored in the Invoice tab on their Customer Card, and listed on the Customer Portal > History tab. It is presented to the end customer as a digital or printed PDF that aims to provide clarity and communicate services provided, dates of those services, payments received, and/or expected payment amounts.
This guide provides a detailed explanation of what information is presented on the Customer Invoice so that companies using the platform can better respond to customer questions.
The Invoice Overview
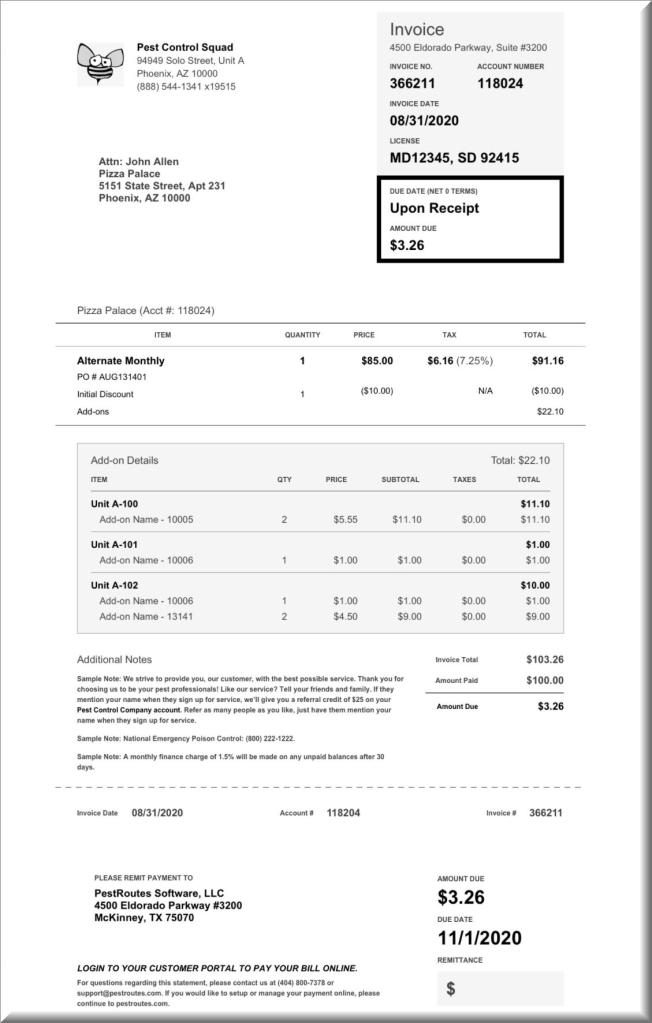
The Invoice document is designed to clarify all services and expected payment information for the end customer. Areas include a Summary, Itemized Service Charges, and a Perforated Remittance Section.
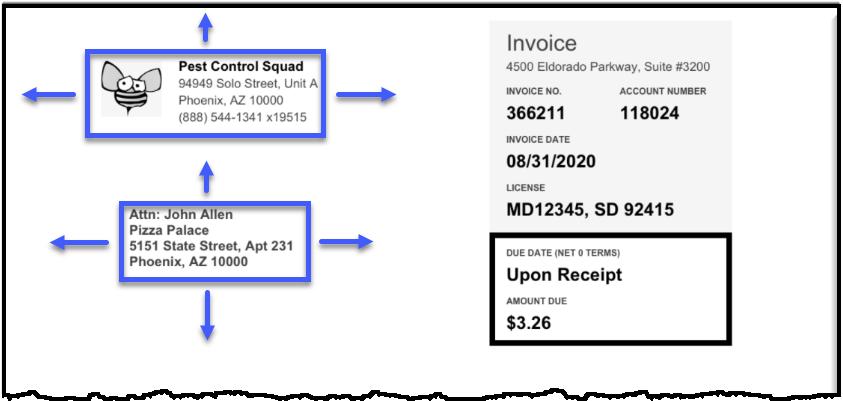
Section 1: Adjust the Address Positions
With numerous commercial envelope sizes, the location of mailing and return addresses can be moved independently to provide the best match for the address windows on a given #10 envelope.
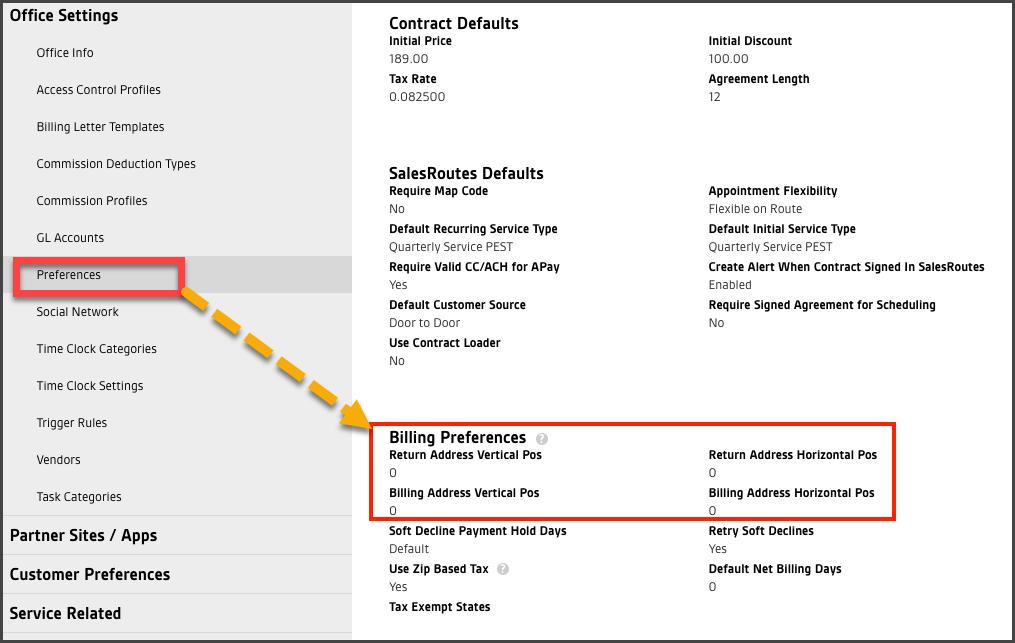
To adjust the positions, open:
Admin > Preferences > Office Preferences > Under the Billing Preferences area, increase or decreases the values of the Return Address and Billing Address Vertical Pos and Horizontal Pos settings as needed. Save the settings once the respective addresses print in the correct position to view through the envelope windows.
Section 2: Primary Information Summary
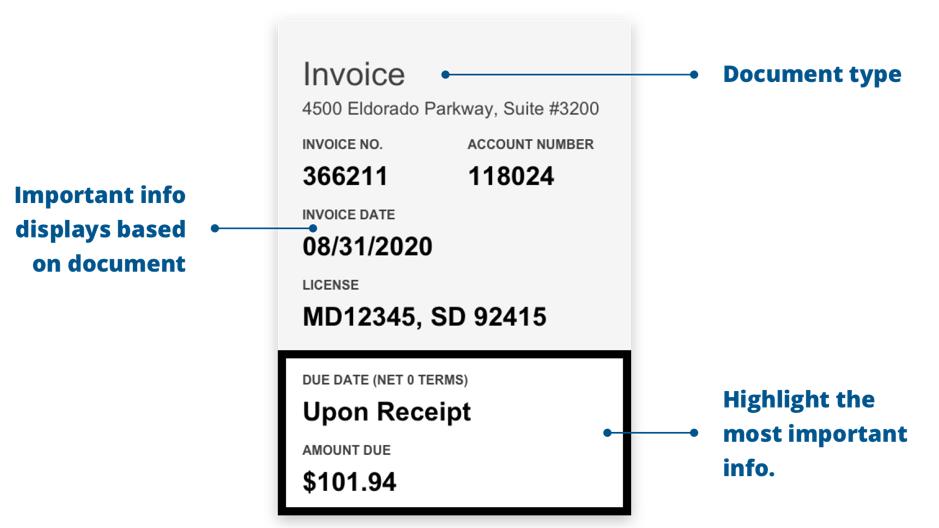
On the Invoice document, the most important information is provided in a summary box at the top of the invoice for easy reference.
- Document Type: Displays the type of document = Invoice.
- Business Address: Shows the billing address of the responsible payer,
- Invoice Number: Displays the document number of the Invoice.
- Account Number: Shows the customer’s account number.
- Invoice Date: Shows the date the Invoice was generated, it should be the date the service was marked as Completed.
- License Number: Displays the operating license number of the company.
- Due Date: Shows the date payment is due.
- Amount Due: Shows the outstanding balance due.
Section 3: Itemized Service Charges
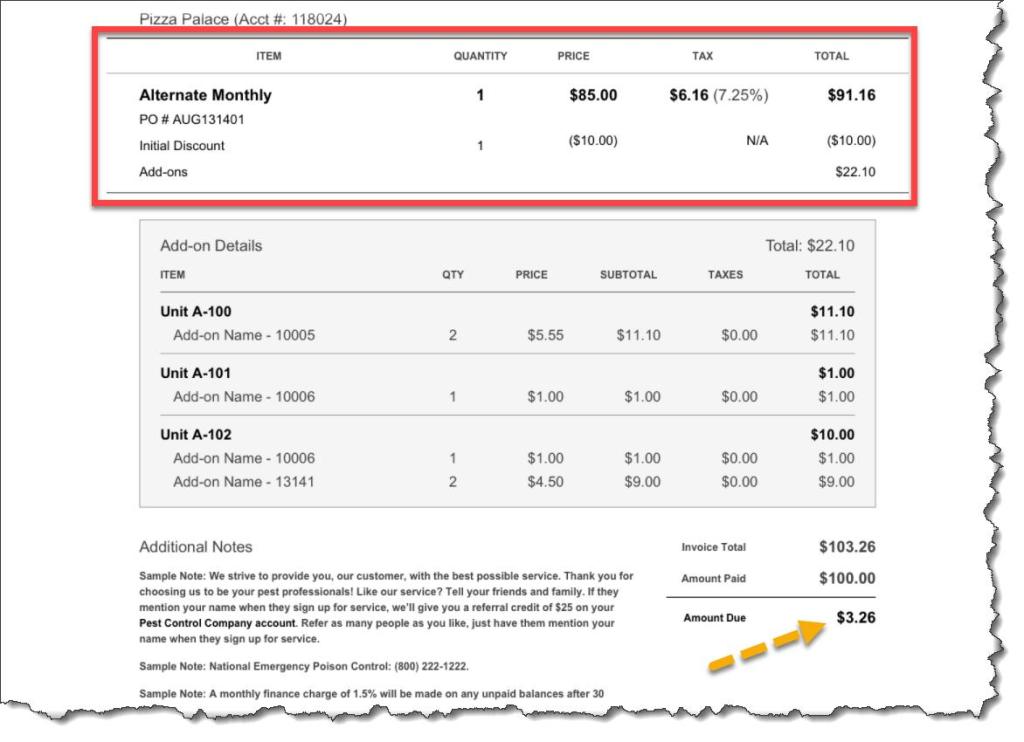
The invoice body contains the following details.
- Customer/Account ID: Shows the Customer’s or Account’s identification number.
- Item: Shows the Service, Add-on, or Discount items on the invoice.
- Quantity: Shows the number of items.
- Price: Shows the per unit price of the service or add-on.
- Tax: Shows the sales tax amount and effective rate.
- Total: Shows the overall cost of the service with tax included.
- Table with Add-on Details: If complex Add-ons or multi-unit properties are involved, an itemized table will appear explaining the charges.
- Additional Notes: Serves as a space for notes on the invoice the customer may need.
- Amount Due: Displays the Invoice Total minus any Amount Paid for an expected payment amount.
NOTE:
Some Invoices require much more itemized data if several invoices, services, or a multi-unit property are involved. In these cases, a table containing the itemized data is included in the document. With a priority on text size and readability, we used the Web Content Accessibility Guidelines (WCAG) to provide maximum details while maintaining legibility.
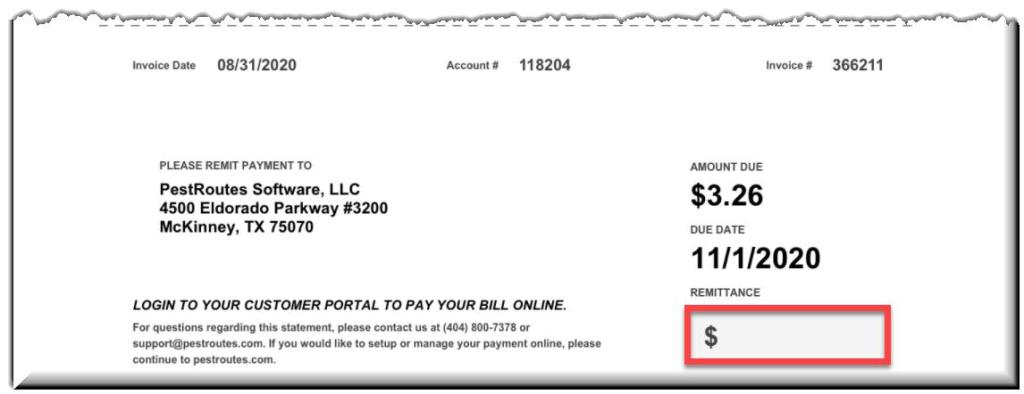
Section 4: The Perforated Remittance Section
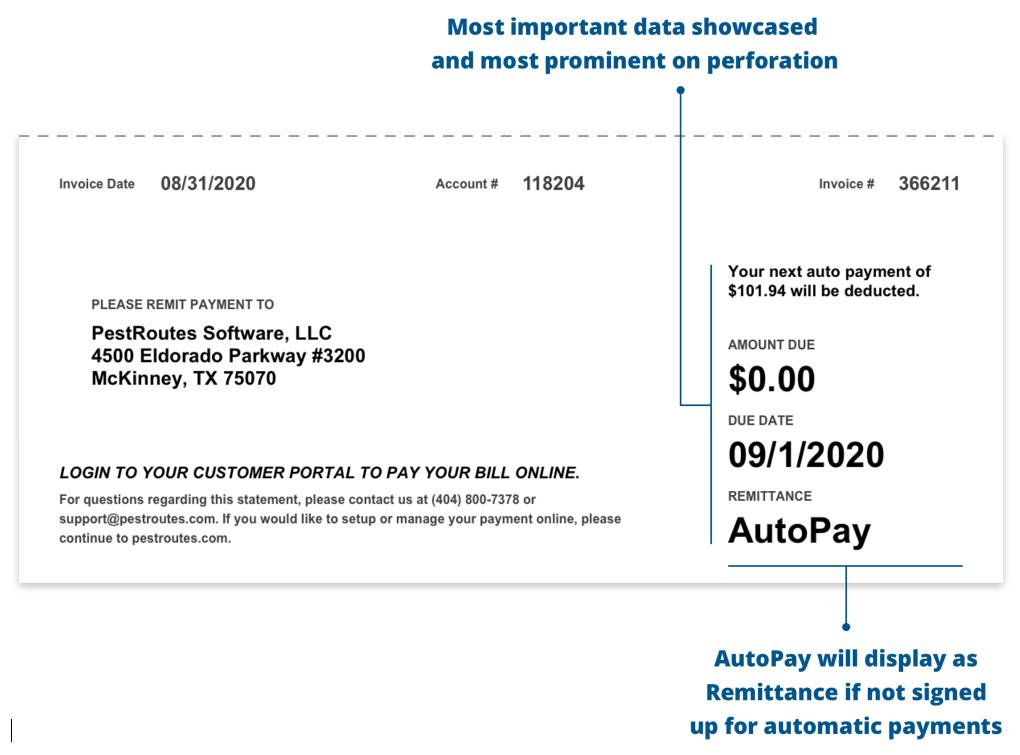
On the form, the lower portion of the Invoice PDF is separated by a dotted line representing a perforation section that could be removed and returned with a customer payment if a paper check is sent. As in the summary box at the top of the document, the perforation section shows only the most important information:
- Invoice Date
- Account #
- Invoice #
- Remittance Address
- Amount Due
- Due Date
- Remittance Space
If the customer uses the AutoPay feature, the Remittance field will display the word “AutoPay,” the Amount Due will show $0.00, and a message will be displayed regarding the planned AutoPay amount.
NOTE:
The bottom statement here on the Remittance Sheet is hard-coded and not user-configurable. It pulls the company’s contact information from Admin > Preferences > Office Info and adds the Customer Portal address based on their company database.
If AutoPay is not involved, the Remittance box will allow the customer to include the amount of the check payment being made.