The Customer Card: Documents Tab
Summary
The Document Tab stores documents in a customer account in the Customer Card. It can store images of damage, service agreements, contracts, schematics, and other forms.
Important Points:
- There is a list of files to the left.
- Contracts, including the digital signature, are saved in this tab.
- If a document, file, or image name is misspelled or is inaccurate, use the Edit button to update the name.
- Customers can upload images through the Customer Portal.
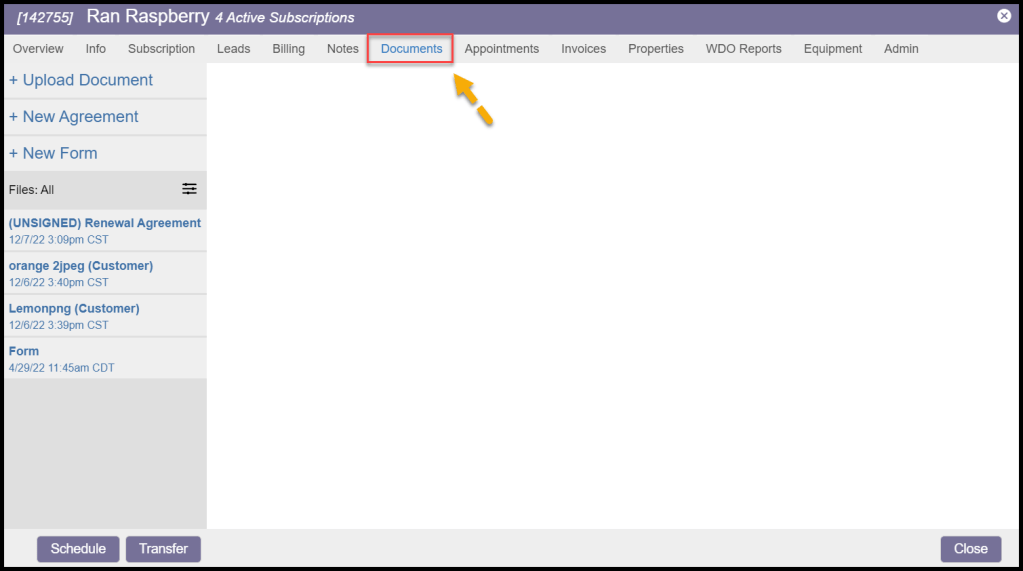
Accessing the Documents Tab
To access a customer’s documents, go to:
Customer Card > Documents.
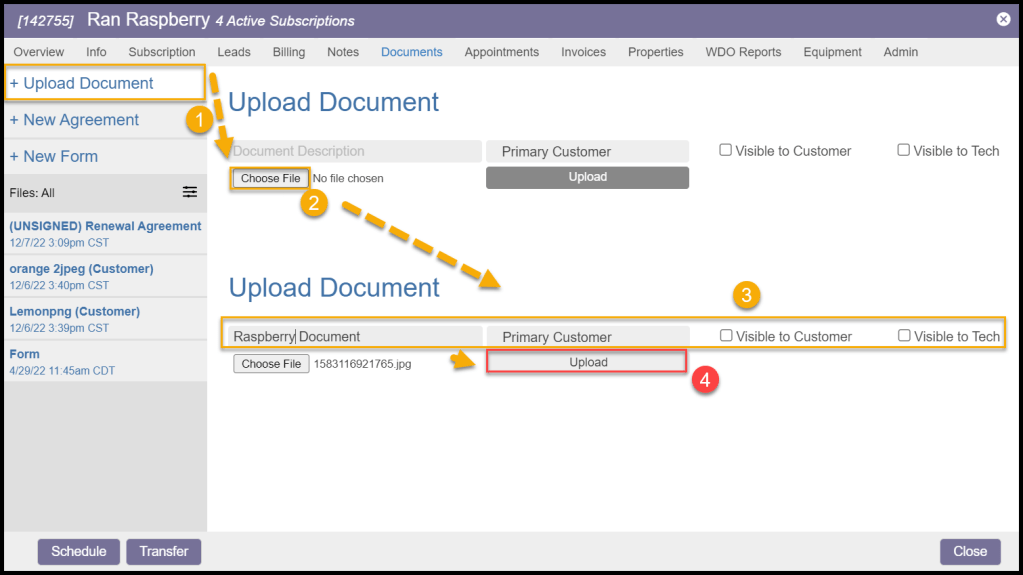
Adding a New Document
Select + Upload Document from the left side to add a new document.
- Document Description: Create a short description for the document. This will serve as the visible title of the document from the pane.
- Primary Customer: The customer is the primary customer.
- Visible to Customer: Display to or hide the document from customers. Files uploaded through the Customer Portal will always be visible to the customer.
- Visible to Tech: Display to or hide the document from technicians.
- Choose File: Choose the desired file to upload. Note: there is a 32 MB limit to the file size that can be uploaded.
Select the Upload button to upload the file when finished.
Note:
There is a 32 MB limit to the file size that can be uploaded.
Editing a Document
Once the document is uploaded to the Customer Card, it will show up on the left side under the options to add documents with the description as the title with a time-stamp of when it was uploaded.
- Visible to Customer: Display to or hide the document from customers.
- Visible to Tech: Display to or hide the document from technicians.
- Primary Customer: The customer is the primary customer.
- Delete Document: Remove the document entirely from the system.
- Email to Customer: Email the document to the customer.

Editing Document File Names
To change a document, file, or image name is misspelled or is inaccurate, select the Edit button, enter the name, and select Save when finished.

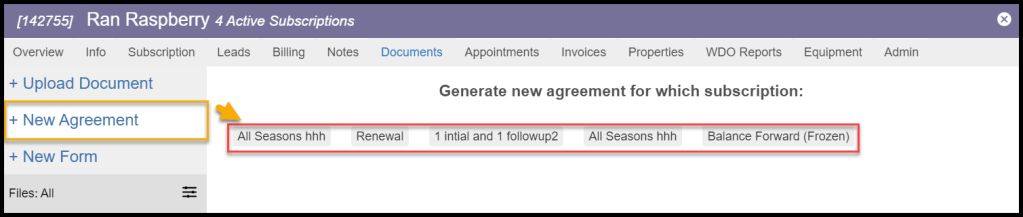
Adding a New Agreement
Select + New Agreement from the left side to add a new service agreement. The available options for a new service agreement will be limited to already existing subscriptions and leads.
- Printable Version: Open a printable version of the agreement in a new tab.
- Edit Contract Notes: Edit the notes that replace the notes placeholder in the agreement template. Click the Generate Contract button to re-generate a new contract with the edited notes.
- Create Signed Agreement: Add an Agreement box that can be signed to the Agreement.
- Request Customer Signature
- Send via Email: Request the customer’s signature by email.
- Send via SMS: Request the customer’s signature by SMS.

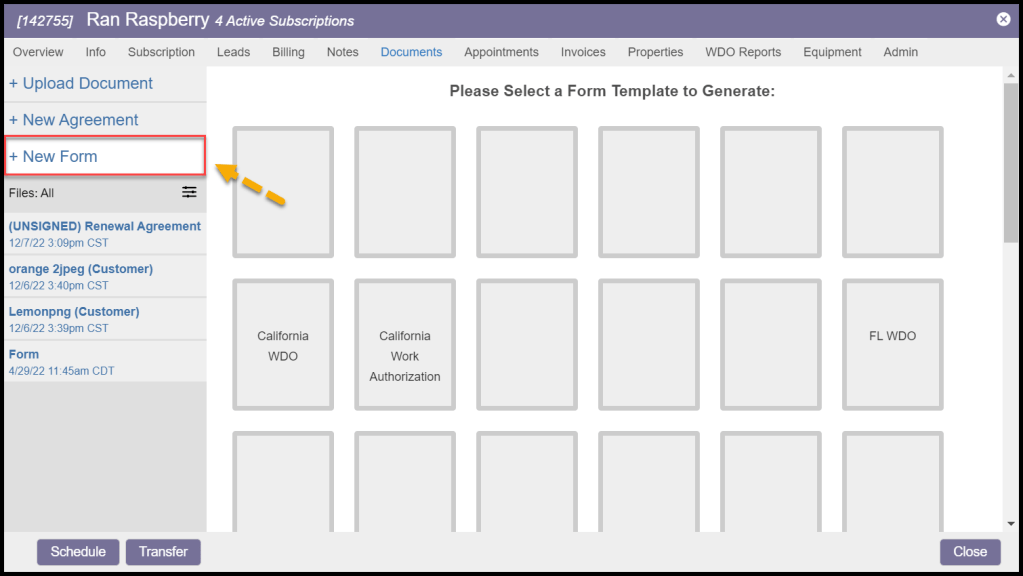
Adding a New Form
Forms such as state WDIs can be managed in the Documents tab of the Customer Card by clicking + New Form. The forms can be required to be approved by a manager before they are sent to the customer.
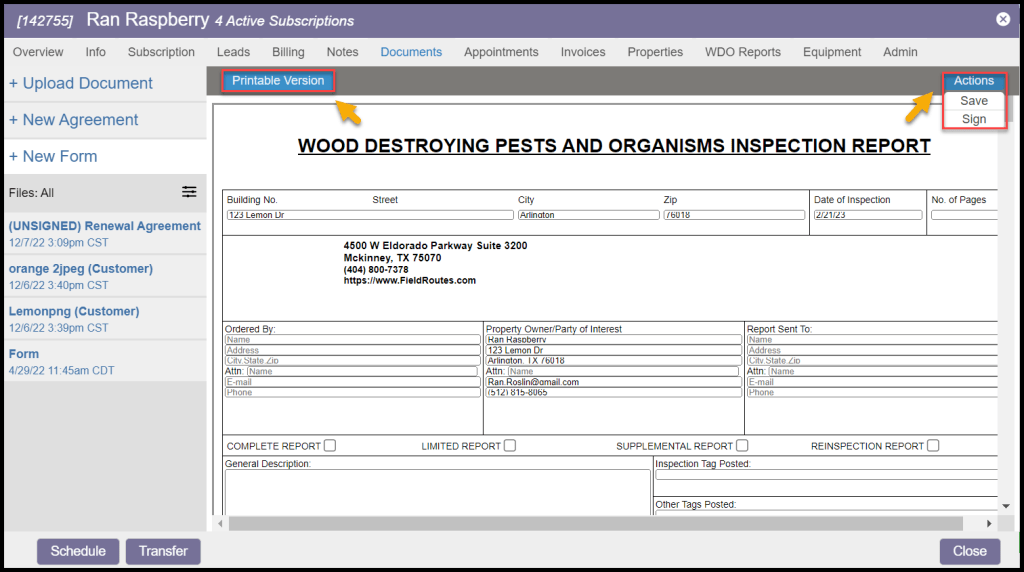
Using Form Actions
A form can be selected to be filled out in the desktop application or be filled out in the mobile application. Once a form has been created, you can open a printable version in a new tab or perform several actions.
- Actions
- Save: Save the form as-is, and will give it a state of Work In Progress. Other form states are Approved, Not Approved, Pending Approval, Changes Requested, Waiting on Customer Signature, and Completed.
- Sign: Allow the form to be signed.
- Request Customer Signature: Sends the form in an email requesting a customer signature.
- Printable Version: Open the form in a new window for printing.
If approval is required, the technician must sign the form before approval can be requested.
Saving and Sending the Form
After saving the form, the actions button will have some new options.
- Edit: Make any changes to the form before sending it to the customer.
- Approve: Approve the form and send it to the customer.
- Delete: Delete the form.

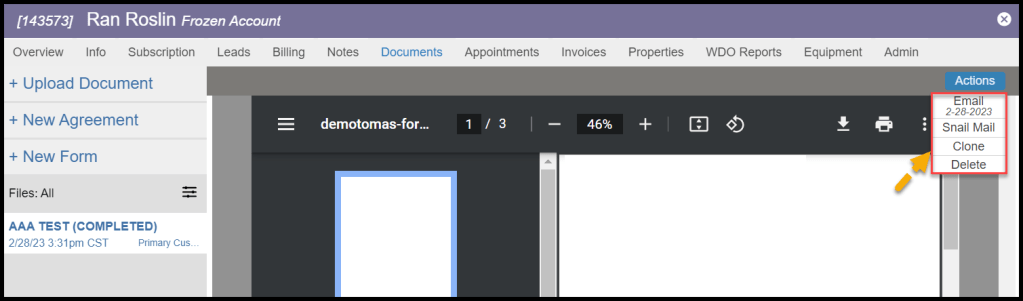
After approving the form, it can be emailed, snail mailed, cloned, or deleted.
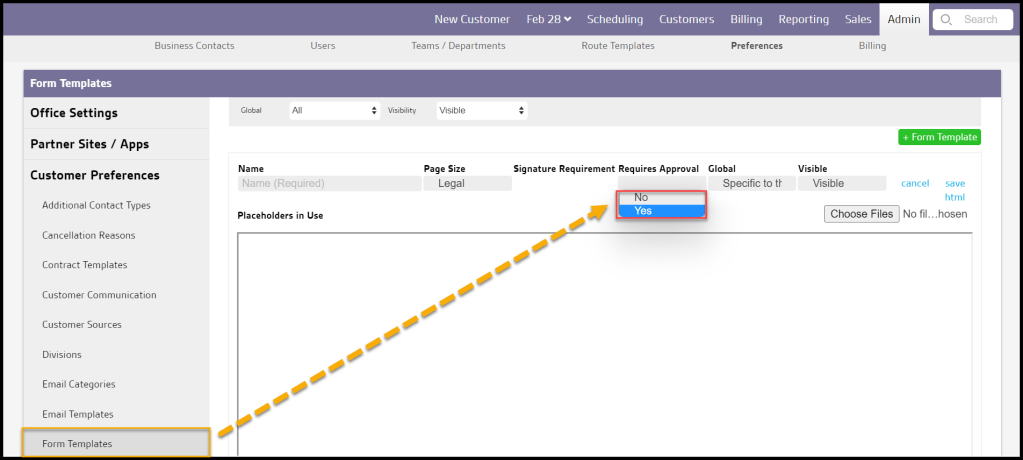
Editing Form Approval Requirements
To set if the form requires manager approval must be set up in Admin > Preferences > Customer Preferences > Form Templates. Select the desired form and toggle Requires Approval, then save.