Setting Up Sales Users for the Mobile Applications
Summary
Use this guide to set Sales users up. It includes the important configurations and preferences to consider once the Mobile Applications are activated.
- To download the Mobile Applications, open the app store on the Android or iOS device, and search for the mobile applications. They are free to download.
- To sign in to mobile applications, use the company domain in the “Company” field and log in with the username and password provided for the user in the user card.
Important Points:
- An Apple or Android phone is recommended for using the mobile applications.
- A small data plan (1 gig a month) is a good start to using the system, depending on the sizes of the uploaded images and documents.
Signing the contract
To use Sales Users in the mobile applications, sign the agreement by clicking on the Sales tab.
Click the red bar and sign the contract for that individual office.
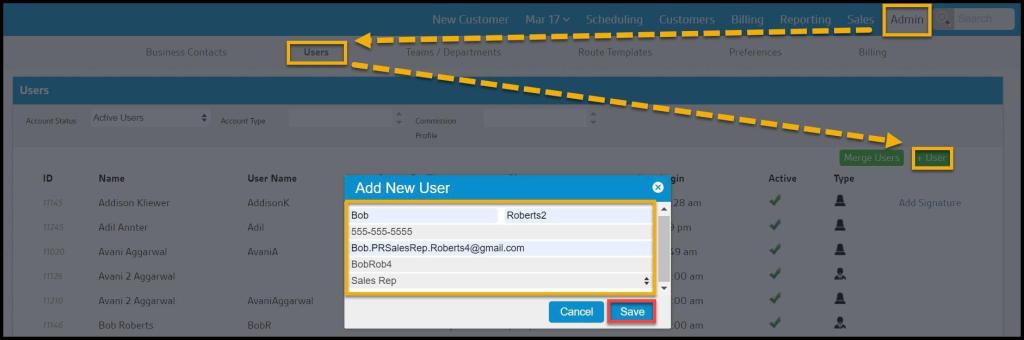
Creating a Sales User
Once the Sales Users in the mobile applications are activated, the next step is to create sales users that will use the mobile applications.
To add a new user, go to
Admin > Users > + User.
Fill in the user’s contact information and username, select Sales Rep, and select Save.
If a sales user sells in multiple branches, make them a roaming rep user. Please see the guide on Roaming Rep Users for more information.
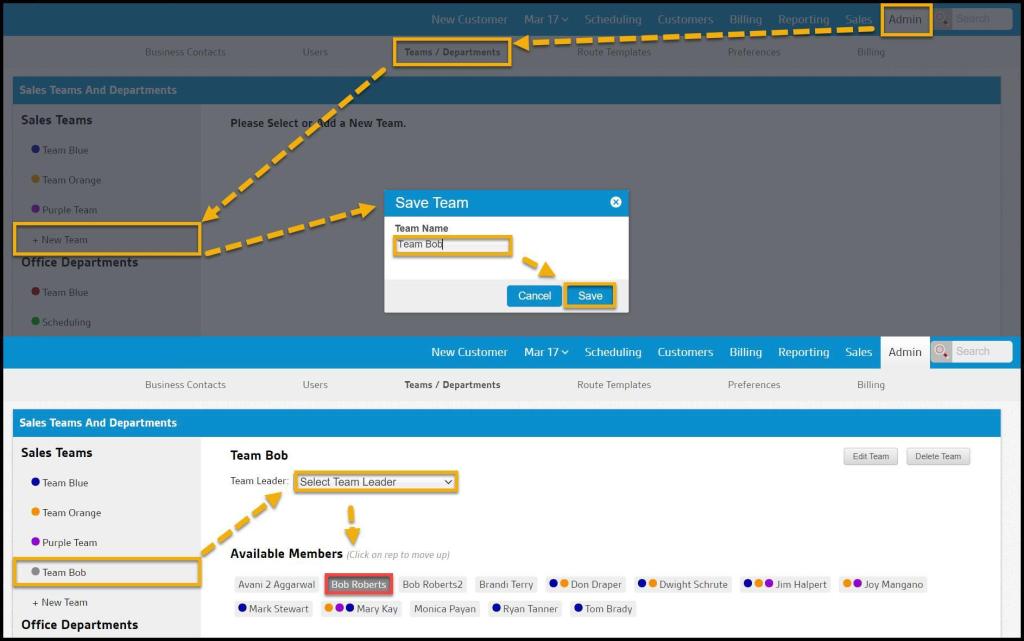
Creating a Sales Manager and Sales Teams
To choose a sales manager and their teams from the available Sales users, go to:
Admin > Teams/Departments.
Select + New Team to create a sales team and give the team its name.
After creating the team, select it and click on the sales reps for the team. To pick the sales manager or team leader, click on Select Team Leader on the drop-down menu and choose a Team Leader.
Creating Territory for Sales Users
Use the Area Management tool to assign specific areas for sales users to sell in.
Please see the guide on Area Management for more information.
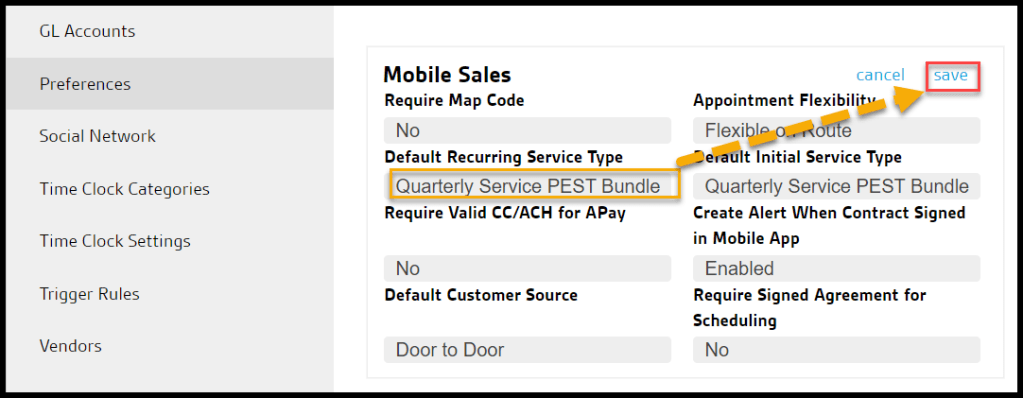
Making a Default Service Type for the mobile applications
To make a specific service type to be the default option in the mobile applications, go to:
Admin > Preferences > Office Settings > Preferences.
Set the default service type in the Recurring Default Service Type field.
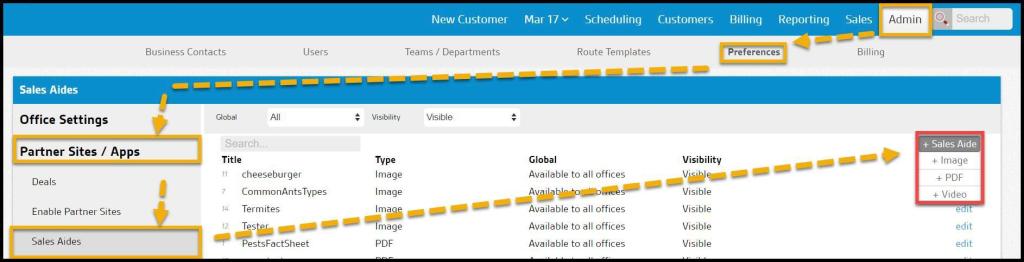
Adding Marketing Material for the mobile applications
To add marketing and sales tools, users can access in the mobile applications. Go to:
Admin > Preferences > Partner Sites /Apps > Sales Aides.
Upload relevant PDF files, images, or videos here.
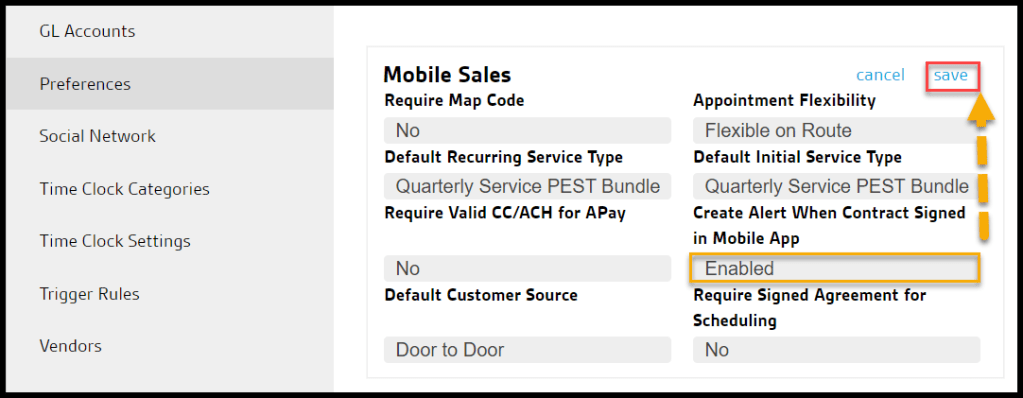
Notifying the Office When a Sales Rep Makes a Sale
To turn on notifications when sales reps make a sale in the mobile applications, go to:
Admin > Preferences > Office Settings > Preferences > Mobile Sales.
Enable the Create Alert When Contract Signed in Mobile App option.