Renewal Notices
Summary
Renewal Notices allow the user to designate specific timeframes and verbiage that will be included in the Renewal Notice.
When a Renewal Notice is sent via Trigger Rule or the Renewals Report, the logic built here will designate the version of the attached Renewal Notice.
Important Points:
- By creating Renewal Notice rules here, the user is able to specify verbiage that is included in Renewal Notices received by customers.
Accessing Renewal Notices
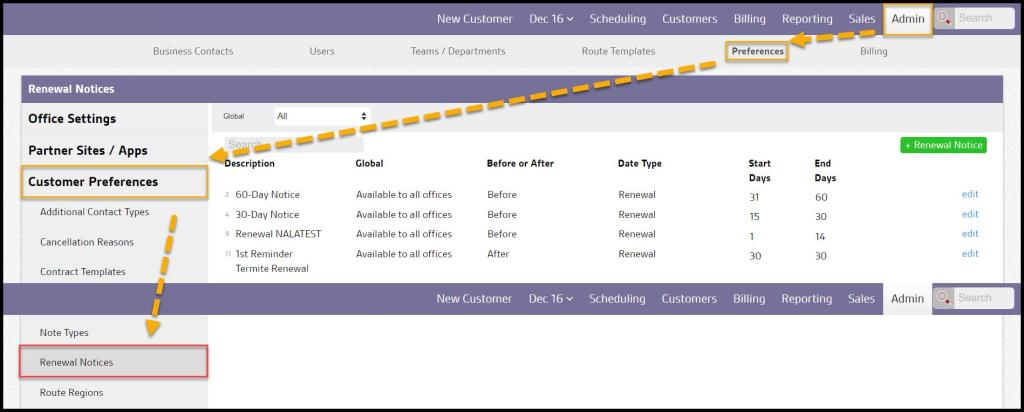
To access Renewal Notices, go to:
Admin > Preferences > Customer Preferences > Renewal Notices.
Filtering Renewal Notices
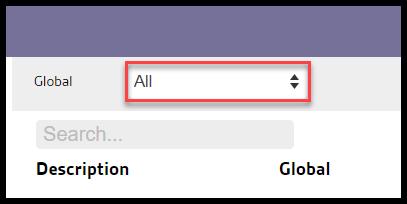
To filter the Renewal Notices, toggle the Global filter.
- Global: Shows all offices
- All: Display All Renewal Notices.
- Specific to Office: Display only Renewal Notices that are flagged to be specific to the user’s office.
- Available to all offices: Display only Renewal Notices flagged as available to all offices.
Selecting a new option will cause the results to refresh.
Creating or Editing Renewal Notices
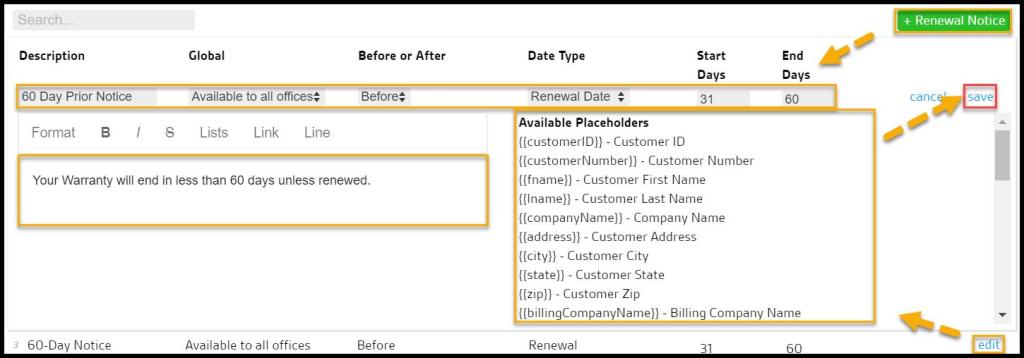
The following fields are available when creating or editing Renewal Notices:
- Description: A name for the Renewal Notice, such as “60-day Prior Notice“.
- Global: For companies with multiple offices, if a Renewal Notice is “specific to this office,” it will only be available to the office in which the Renewal Notice was created. If the Renewal Notice is “Available to All Offices,” then every branch can see the Renewal Notice.
- Before or After: Determines timing related to the Date Type (see below).
- Date Type: Indicates if the Renewal Date or Expiration Date is being evaluated for the Renewal Notice.
- Start Days: Enter the number of days Before or After the Date Type that the Renewal Notice will start.
- End Days: Enter the number of days Before or After the Date Type that the Renewal Notice will end.
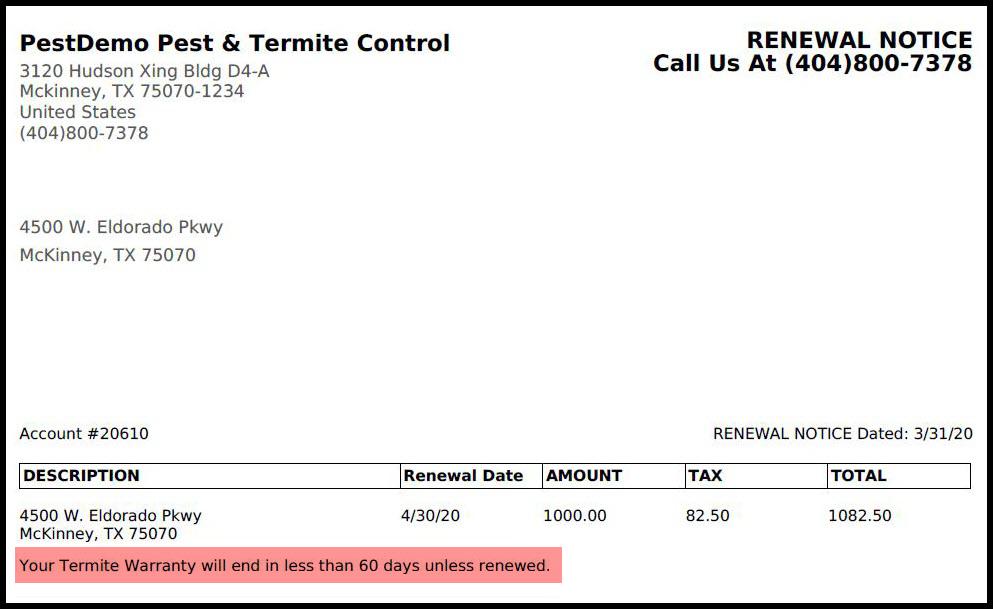
- Text Box: The verbiage and any placeholders entered here will appear on the Renewal Notice.
Select save when finished editing or creating the Renewal Notice, or cancel to remove the Renewal Notice.
Renewal Notice Text
The verbiage entered will appear here on the Renewal Notice.