
Products
Summary
The Products preferences allow users to add and edit chemicals and other products used for services.
Adding products will allow technicians to document their chemical usage in the mobile apps, and allow office staff to pull reports related to products, such as the inventory, chemical tracking, and state chemical reports.
Important Points:
- To access the chemical reports, go to the Reporting tab > Inventory.
- Ensure the Inventory unit is set up correctly before using the Manage Inventory report because it cannot be changed once in the inventory.
- Any merged chemicals specific to a user’s office will be removed permanently. This cannot be undone.
Accessing the Products in Preferences
To access the Products in Preferences, go to:
Admin > Preferences > Service Related > Products.
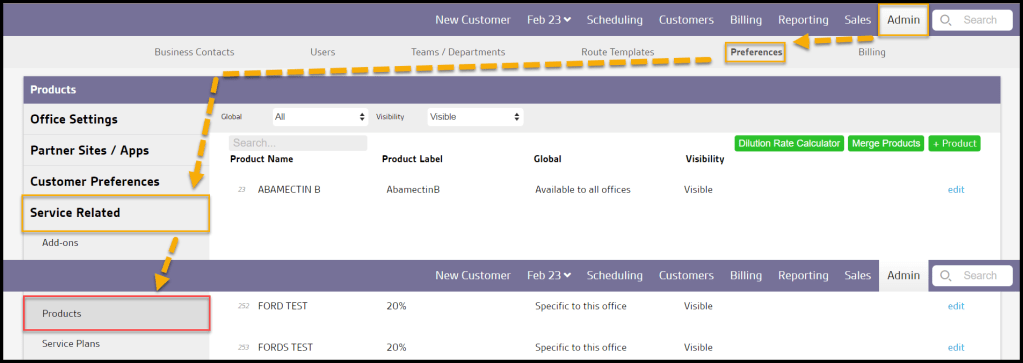
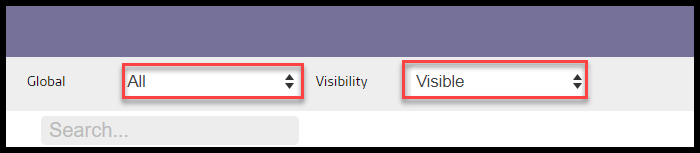
Filtering the Products in Preferences
To filter the Products, toggle these filters. If the desired result is not showing up, check the filters.
- Visibility
- All: Show all Products.
- Visible: Show only visible Products.
- Hidden: Show only hidden Products.
- Global
- All: Display all Products.
- Specific to Office: Display only Products flagged to be specific to the user’s office.
- Available to all offices: Display only Products flagged as open to all offices.
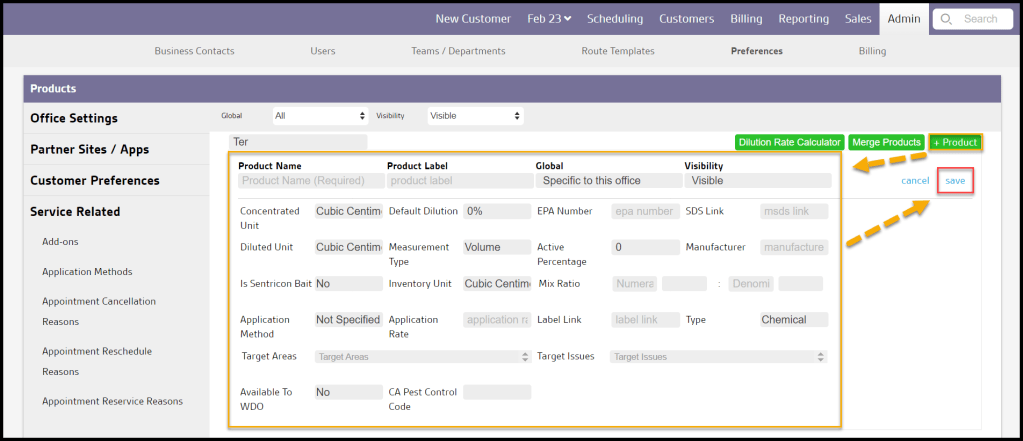
Adding or Editing a Product
To add a new Product, select + Product or select Edit to change an existing Product.
- Product Name: The Brand Name or common name of the product.
- Product Label: The name and percentage of the active ingredient in the product. This can be found on the product label.
- Global: Designate if this product is for this office or all the company offices.
- Visibility: Select this field to choose the visibility of the product. Products cannot be deleted, but they can be hidden. When a product is attached to past information, such as past appointments, deleting it will cause that information to disappear. Changing the Visibility to “Hidden” ensures historical information and reports remain intact, but the product will no longer be available to users.
- Concentrated Unit: The unit of measurement before diluting the product.
- Default Dilution: The default dilution rate that will be displayed for the product in TechRoutes and FieldRoutes. This is so the technician does not have to enter the dilution rate for every appointment. If needed, it can be adjusted in TechRoutes and FieldRoutes as well. See below for important information.
- EPA Number: This can be found on the product label of the product.
- SDS Link: This field is to link customers to more information about the product. This link will be displayed within the customer portal when viewing service history (under the “History” tab) next to the EPA #, the user will see a link that says “(Click for SDS Info)”.
- Diluted Unit: The unit of measurement for the product that is applied by technicians.
- Measurement Type: Indicates the type of measurement based on input from the Concentrated, Diluted, and Inventory Units.
- Active Percentage: Here is where the Active Percentage can be added. This can either be the percentage of active ingredient or the dilution of active ingredient.
- Manufacturer: The manufacturer of the product.
- Is Sentricon Bait: This is for Sentricon use only. Sentricon bait has a unique workflow in TechRoutes and FieldRoutes.
- Inventory Unit: This is the unit used to keep track of the product in the Manage Inventory report (can be found in Reporting > Inventory). Make sure the Inventory unit is set up correctly before using the Manage Inventory report because the unit cannot be changed once it’s in inventory.
- Mix Ratio: This will allow the user to set a mix ratio instead of a dilution.
- Application Method: The method of how the product is applied. New Application Methods can be created in Preferences > Service Related > Application Methods.
- Application Rate: This is a free text field whose purpose is to note the rate at which the product is applied (ex., 1 gallon per 100 square feet). This information will appear on the Service Notification but will not affect any Inventory Reports.
- Label Link: this will provide a link to the product label from the digital Service Notification.
- Type: This will allow the user to determine whether this product is a chemical. Many companies use the Products section to report non-chemical products like traps.
- Target Areas: The user can select a default Target Area(s) for the product. All Target Areas set up for the product will appear on FieldRoutes when the product is selected by the technician. By selecting default Target Areas, the technician can quickly remove those that do not apply versus selecting ones when none are defaulted.
- Target Issues: The user can select a default Target Issue(s) for the product. These can be pests, insects, and other issues that the product is used to prevent or cure. All Target Issues set up for the product will appear on FieldRoutes when the product is selected by the technician. By selecting default Target Issues, the technician can quickly remove those that do not apply versus selecting ones when none are defaulted.
- CA Pest Control Code: The user can select a default California Pest Control Code for the product. The state of California sets these pest control codes. When the default is selected, it will automatically populate in FieldRoutes when a technician adds the product. However, they have the ability to change it in FieldRoutes for that appointment. Note: CA Pest Control Code will not display for appointments outside of California.
NOTE:
Specific Product details are imported to the Appointment when it is created. If the Product Template content is later updated, the new details will NOT be included in existing Appointments in our desktop software or the mobile apps. To get the updated details, the Appointment must be Canceled, and then a new Appointment is created, adding the Product with its now updated details.
When a Manufacturer‘s name is present for a Product in the system, it is included on the customer Service Notification.
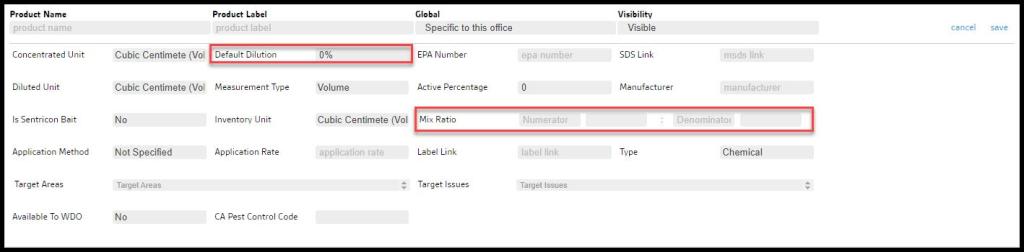
Mix Ratio or Default Dilution?
There is an option for the user to use either the Default Dilution or the Mix ratio.
- Default Dilution: If this feature is chosen, the Concentrated, Diluted, and Inventory Units must be of the same measurement type; all Volume, Weight, Units, or Length. The System will not allow a mix of measurement types. The Dilution will also need to be correctly calculated. See below.
This way is helpful for products that are not mixed with water.
- Mix Ratio: If this feature is chosen, the measurement types can be mixed. The first section is the concentrated amount of the product and the second section is the amount of water.
If the user has both a dilution and a mix ratio, the system will choose the mix ratio over the dilution.
The system will then proportionally calculate the concentrated amount for usage reports.
This way is helpful for anything mixed in water, especially wet-able solids.
Correct Default Dilution?
IMPORTANT!
Our dilution is different than the dilution found on the label for the product.
The label is only required to show the dilution of the active ingredient. Our Dilution is different as our dilution takes into account the whole of the product, not just the active ingredient.
The dilution of the whole product must be correct, so state usage reports display accurate usage. The Dilution Rate Calculator can assist in finding the correct dilution percentage.
Products not mixed with water will need to have a dilution of 100%
The math of how the different dilutions work is:
(Amount applied) X (Default Dilution) = (Concentrated amount used)

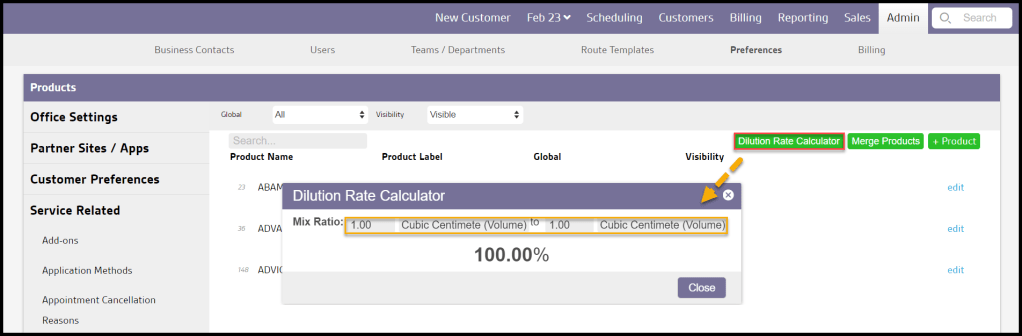
Dilution Rate Calculator
Our software offers a dilution rate calculator to assist in finding the correct dilution rate for chemicals. Select Dilution Rate Calculator at the top right.
The first number is for the concentrated amount and the second number is the final diluted solution.
The concentrated and diluted units must have the same measurement types.
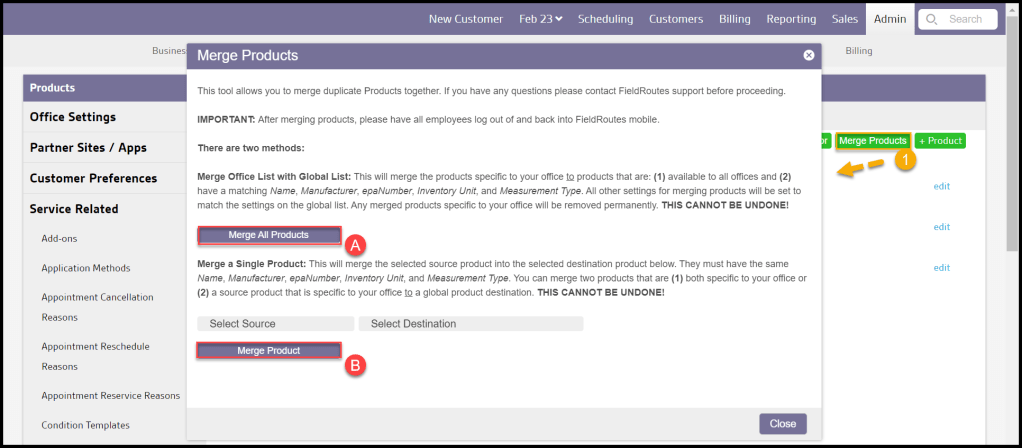
Merging Products
If duplicate entries of the same product exist, there is a tool to merge those products. Select Merge Products at the top right.
There are two ways to merge duplicate products:
- Merge All Products: This will merge any duplicate products that are already specific to the office with any office that has a matching Product Name, EPA number, inventory unit, measurement type, and manufacturer.
- Merge a Single Product: This will merge the selected source product into the selected destination product.
To Merge All Products, they must meet all of the following criteria:
- Be available in all offices. Make sure the Global field says “Available to all offices“.
- Have a matching Product Name, EPA number, inventory unit, measurement type, and manufacturer.
The user cannot merge products unless all required fields match. Any merged products specific to a user’s office will be removed permanently. This cannot be undone.
Can Different Measurement Types be Used for the Concentrated, Diluted, and Inventory Unit in the Products Preferences?
Our software does not allow mixed unit types in the Product preferences.
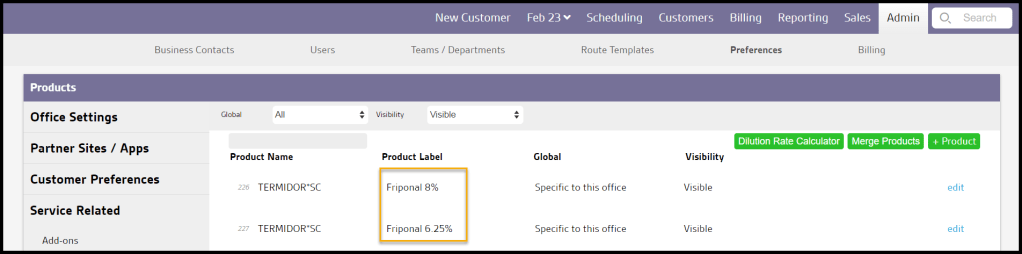
What do I do if a Product Has Multiple Dilution Rates?
If the user has one product with multiple dilution rates, we recommend adding a new entry for each dilution rate.
For example, Termidor SC has a dilution rate of 0.08% and 0.0625%: the user would have the product input twice in the product preferences, and one entry would have a dilution rate of 0.08%, and the other would have a dilution rate of 0.0625%.
See the image below for reference.
The Products that are selected automatically for a given Service Type can be configured by going to:
Admin > Preferences > Service-Related > Service Types.
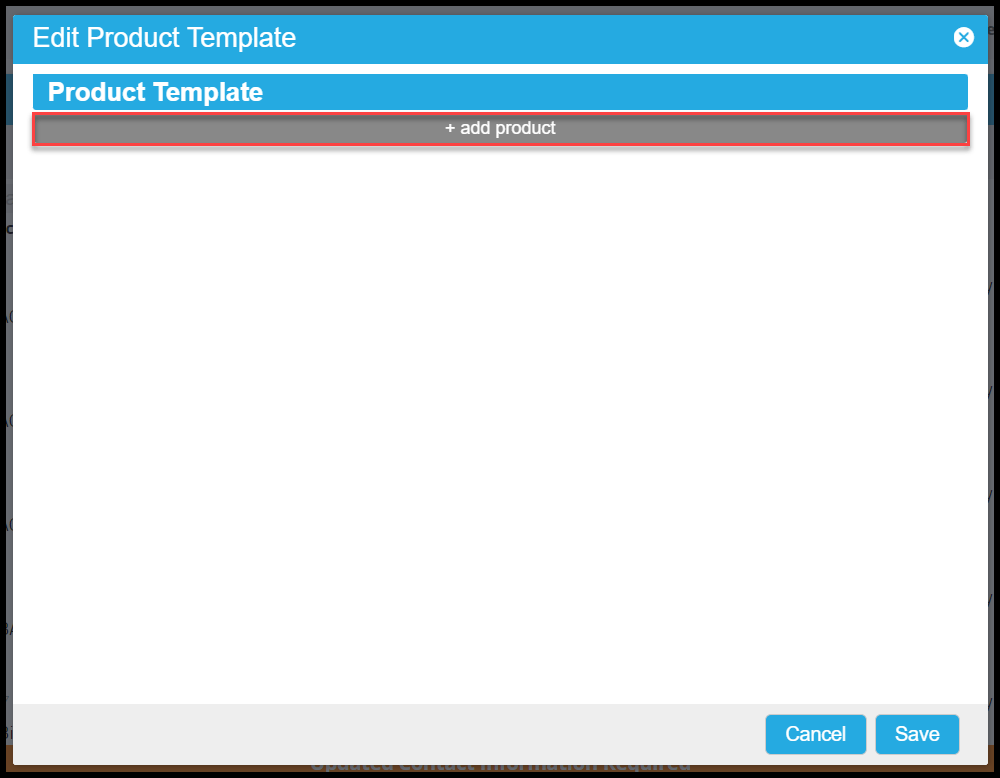
Select the desired Service Type for editing and click Edit Product Template.
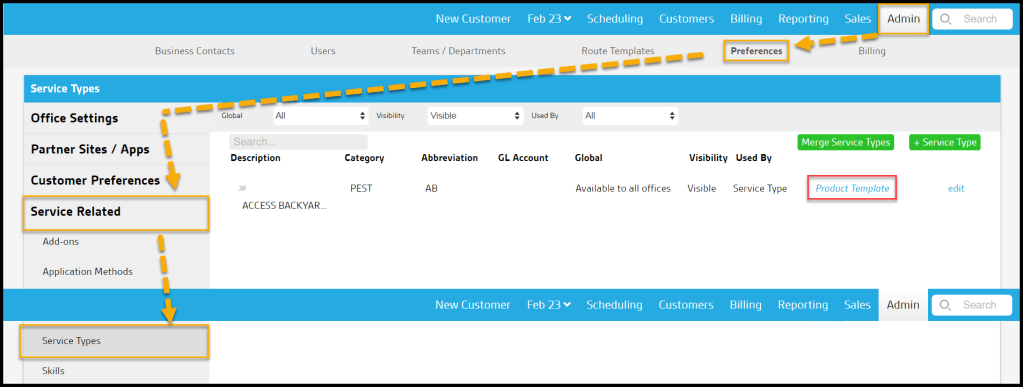
Products can be added by selecting + add product.
How do I Delete Products?
Products cannot be deleted, only hidden. However, when a product is attached to past information, such as past appointments, deleting it will cause that information to disappear.
Can I Specify Which Products are Allowed?
Users can specify allowed products for a service type, subscription, or customer stand-alone.
For appointments attached to a subscription, the allowed products are specified at the subscription level (Customer Card > Subscriptions > Actions > Allow Products).
If the allowed products are not explicitly set for the subscription, it uses the products allowed for the service type (Admin > Preferences > Service Types > Allowed Products Select).
For stand-alone appointments, it will look at the products set at the customer level (Customer Card > Admin > Products) and use the service type defaults if nothing is set.
