PestRoutes Tech: Overview
Summary
PestRoutes Tech is our mobile application that will allow technicians to more easily service scheduled appointments.
PestRoutes Tech provides many features, such as giving technicians the ability to see their daily route, check in and out of appointments, log the products used for the appointment, and even update and charge customers’ billing information. This is a vital application to use, as it will greatly help technicians be more productive and improves workflow.
PestRoutes Tech is available on iOS and Android devices.
Important Points:
- To refresh the data on the PestRoutes Tech screen, either choose a Date from the Calendar or pull down on the screen interface.
Logging in
To log into PestRoutes Mobile, fill in the three fields with the requested information and press the Login tab at the bottom.
- Company: Enter your company subdomain name for PestRoutes in this field. For example, if your PestRoutes URL is demopest.pestroutes.com, then you will enter “demopest” in this field. Do not use spaces in the company name.
- Username: The username to log in. You can find or change this information by going to Admin > Users in the desktop app, and choosing the desired user to view their user card.
- Password: The password to log in. You can set this by going to Admin > Users in the desktop app, and choosing the desired user to view their user card. Reset SMS messages and emails can also be sent to the phone number or email address on file for the user.
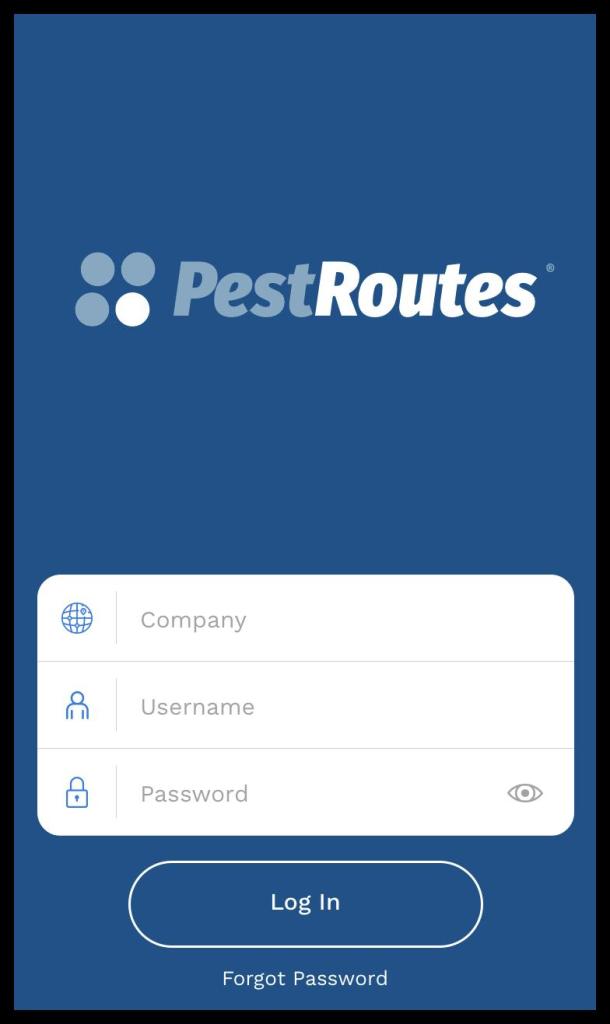
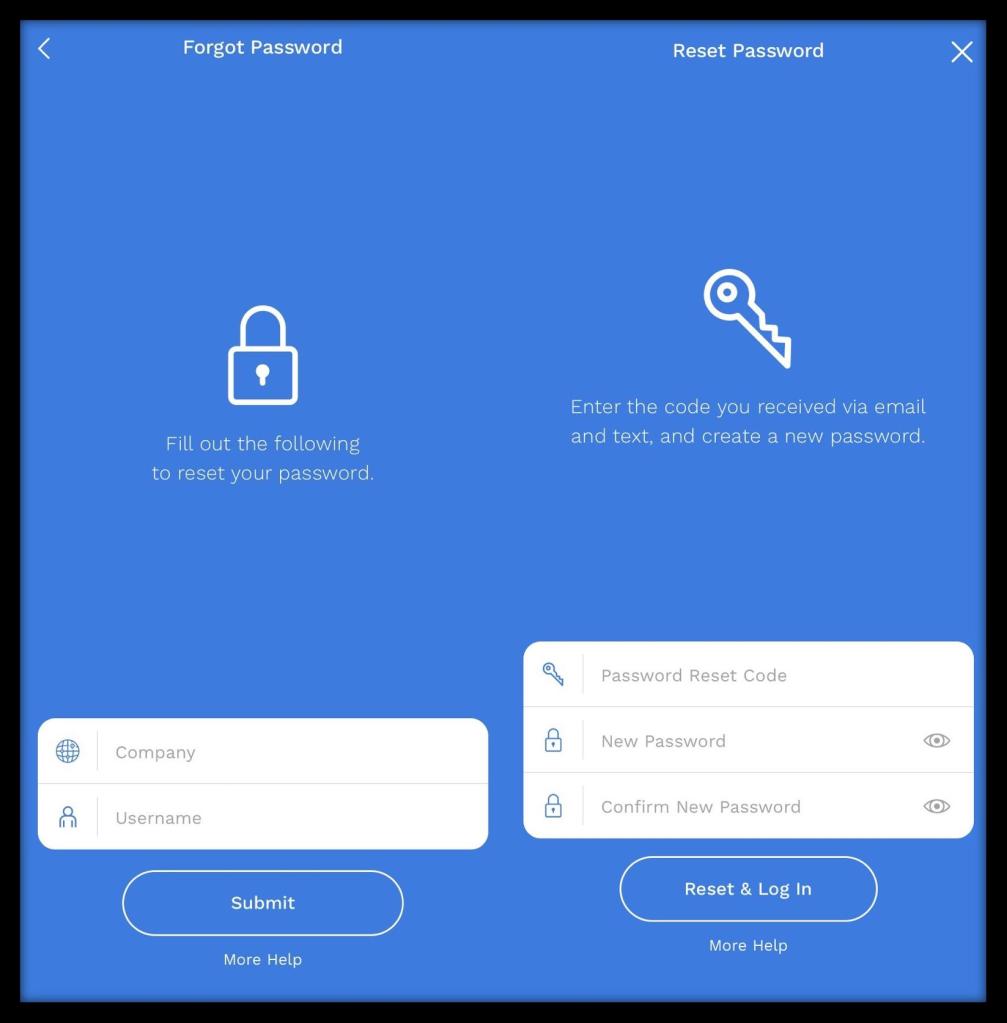
Forgot Password
Pressing Forgot Password on the login screen will lead to a page with a prompt for the company and username.
Once the company and username are submitted, the next page asks for the reset code, a new password, and confirmation of the new password. The reset code will be sent to the email address and/or phone number listed in the user card under Admin > Users.
The new password must contain 8 characters (at least 1 capital letter, 1 lower case letter, and 1 number).
My Routes Tab
When a Technician logs in, they will be directed to My Routes with a listing of the current Route’s Appointments.
This view shows basic information about the currently scheduled Appointments on this Route, along with some statistics for the Route listed above:
- Completed: The number of Completed stops over the number of scheduled stops.
- Spots Filled: The number of Filled Spots over the number of Available Stops.
- Timed Spots: The number of Spots that involved Timed Appointments.
- Product Value: The revenue value of the scheduled Stops for this Route.

Rescheduling Appointments on a Route
While the view defaults to only those Spots that are filled, pressing the Reschedule button reveals all open Spots on this Route as well. Indicate the desired Spot to move the Appointment.
The Calendar across the top will have a blue circle around the selected date. Sliding it right and left will move it to a different week. By default, Technicians can only see their routes from one day backward to three days ahead. You can edit the Tech Look Ahead Days and Tech Look Back Days under Admin > Preferences > Preferences.
In the upper right-hand corner, Map changes to show a spatial display of the day’s appointments.

Map View
The option to toggle to Map View is in the top right-hand corner. Once in Map View, that option will switch to say List.
Each appointment will have a numbered marker indicating its location. pressing the appointment changes the marker from blue to yellow and brings up the basic information from List View.
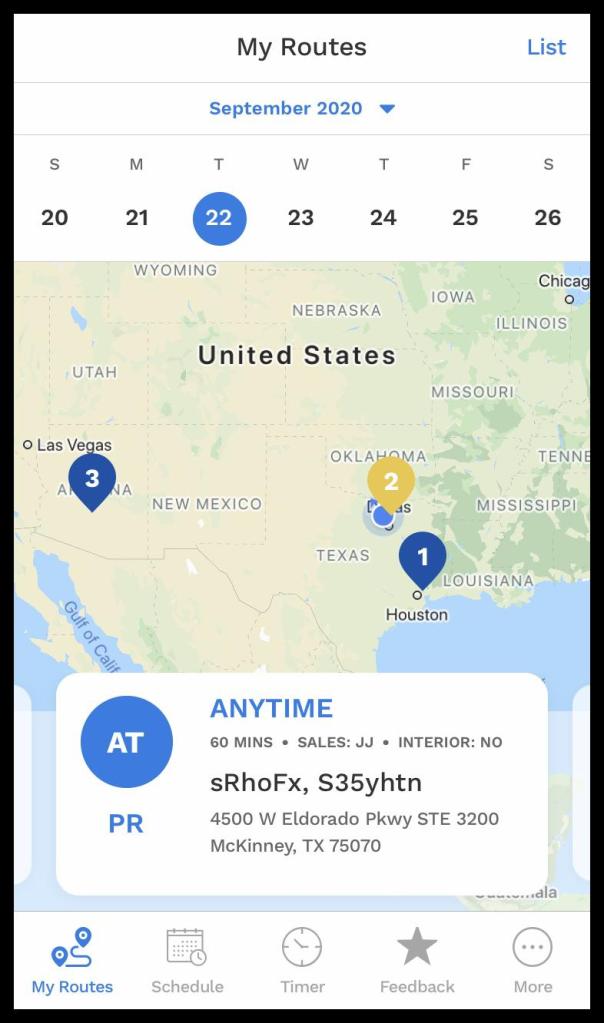
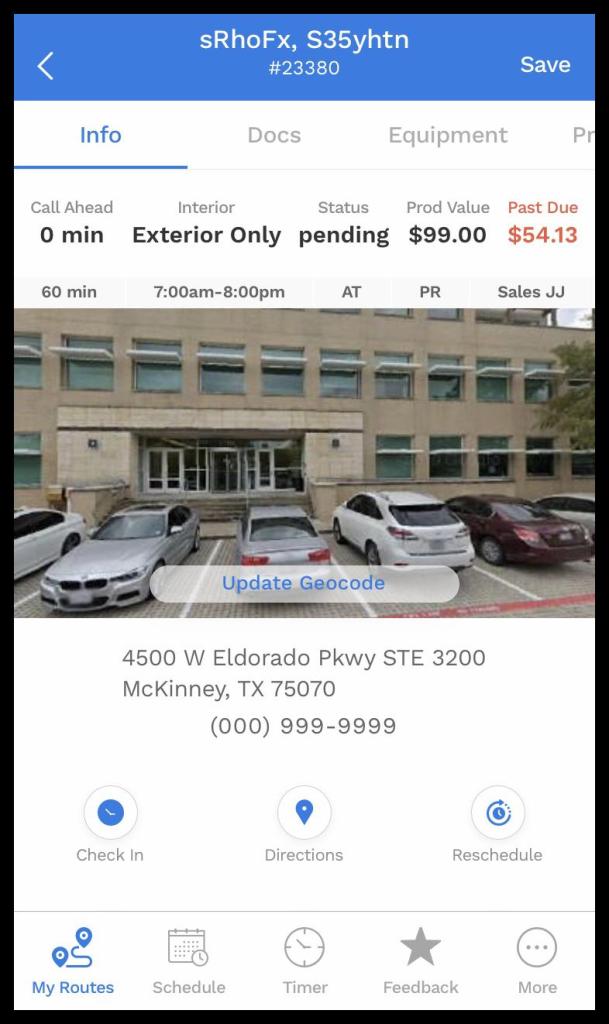
Appointment Details and Options
Each Appointment entry will give the following information:
- Customer Name: The first and last name entered as the main contact on the Customer Card.
- Customer Address: The service address from the Info tab of the Customer Card.
- Call Ahead: Requested time the Customer would like notification in advance of the Technician’s arrival:
- 0 Minutes
- 30 Minutes
- 60 Minutes
- Status: The current Appointment Status.
- Appointment Duration: Defaults to the Service Type preference setting. This can be edited under the Appointment Card.
- Appointment Time Frame: Anytime (AT), Morning (AM), Afternoon (PM), or a timed window.
- Service Type Abbreviation: Set up in Admin > Preferences > Service Related > Service Types
- Customer Name: The first and last name entered as the main contact on the Customer Card.
- Customer Address: The service address from the Info tab of the Customer Card.
- Salesperson Initials: Set up in Admin > Users > User Card.
- Check-in/Submitted: Indicates whether the Appointment has begun.
- Directions:A prompt pops up with the choice to base the directions on the customer’s address or the lat./long. of their geocode.
- Note: For more details on the default map app, see More section.
- Reschedule: pressing this will open the available Spots view. Press a new Spot to move the Appointment.
- Text: Send a text message to the customer using the phone number listed in the customer card under Phone 1.
- Call: Place a call to the customer using the phone number listed in the customer card under Phone 1.
- Email: Send an email to the Customer using their primary Email Address listed on the Customer Card Info tab.
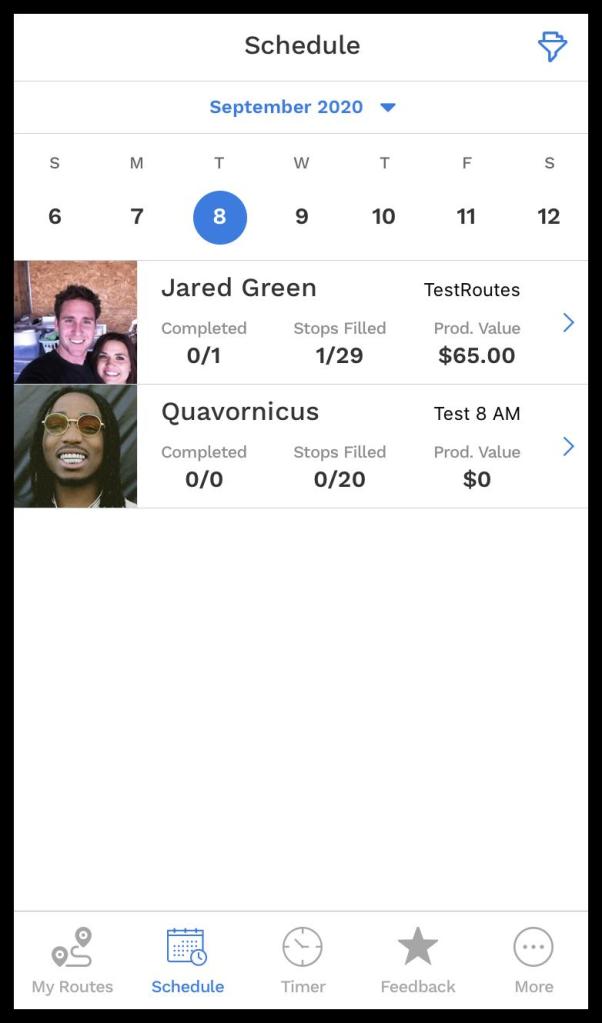
Schedule Tab Overview
The Schedule tab delivers a broad overview of all the Technicians with a route for the given day.
The filter icon in the top, right-hand corner allows the user to designate which technicians are shown.
To view a different day, simply click on the desired day or slide the calendar to change the week being displayed.
Regardless of Access Controls, technicians will see every route. However, to see the details of the other routes in terms of the overall number of stops and completed ones, a user must have the View Others Routes permission.
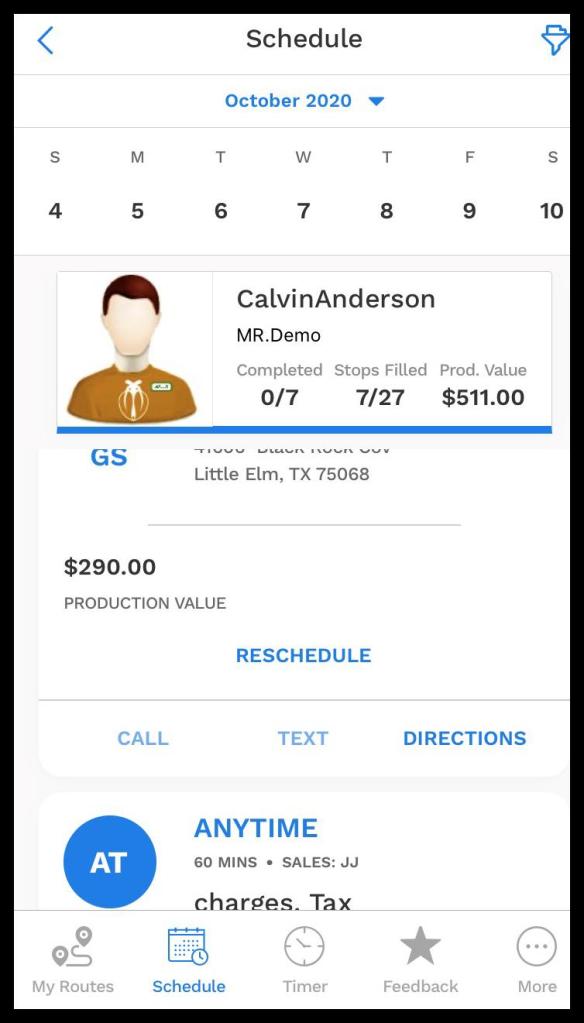
Schedule Tab – Technician View
Clicking on an individual technician lays out their schedule for the day. Much like the calendar, you can slide between technicians. If the user has the View Others Routes access control, they will easily be able to scroll through every technician’s schedule.
Appointment Notes are visible here if the office staff chooses to alert the technician about any details pertaining to this particular appointment.
To revert back to the overview, press the arrow in the top, left-hand corner.
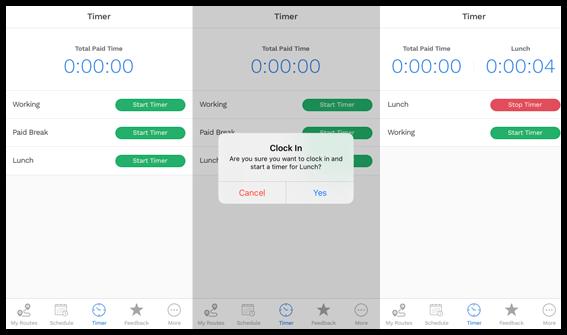
Timer
As a starting point, three categories are created by the system.
- Working
- Paid: Yes
- Allow clock in: Yes
- Next Category: Allow Paid Break, Lunch after 0 minutes
- Paid Break
- Paid: Yes
- Next Category: Allow Working after 0 minute
- Lunch
- Paid: No
- Next Category: Allow Working after 30 minutes
- Enforce Full Duration: Yes
These system reserved categories can be altered by clicking on the edit option to the right of the category. Additional categories are created by clicking on the + Clock Category button in the top-right corner.
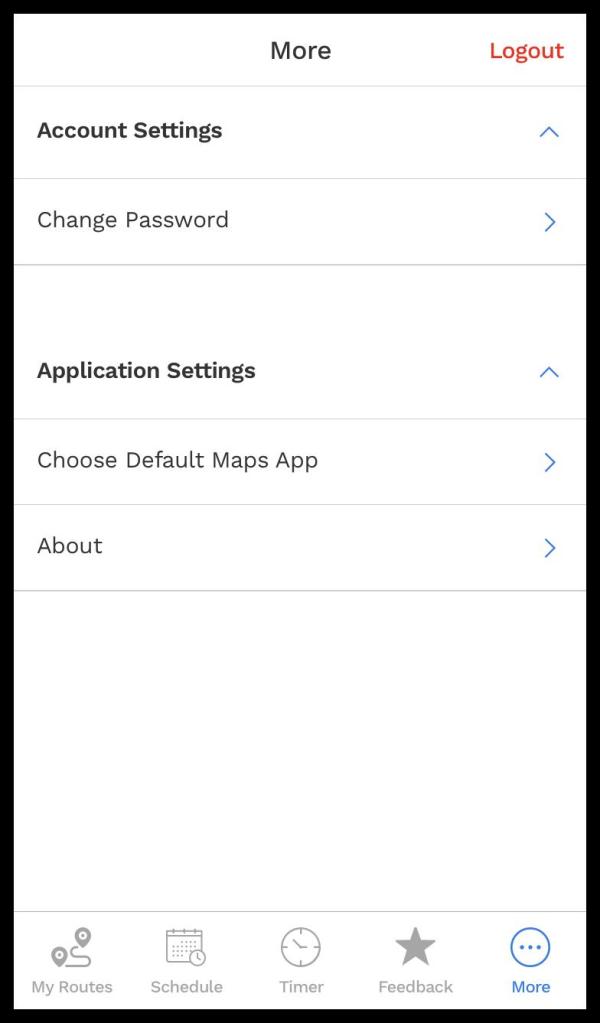
More Menu
pressing the More menu provides access to various system information, account settings, and application settings:
- Account Settings
- Change Password: Allows the technician to alter their password as long as the current password is known.
- Application Settings
- Choose Default Maps App: This controls what Map app, i.e. Apple Maps, Google Maps, Waze, etc., will open when requesting driving directions.
- About: Access system and version data.
- Logout: An account logout button is provided here.