PestRoutes Sales: Scheduling
Summary
PestRoutes Sales makes it easy for sales users to schedule the initial service for new customers, reschedule appointments, and even cancel appointments.
Accessing the Schedule Tab
To access the schedule in PestRoutes Sales, press the Schedule tab at the bottom of the page.

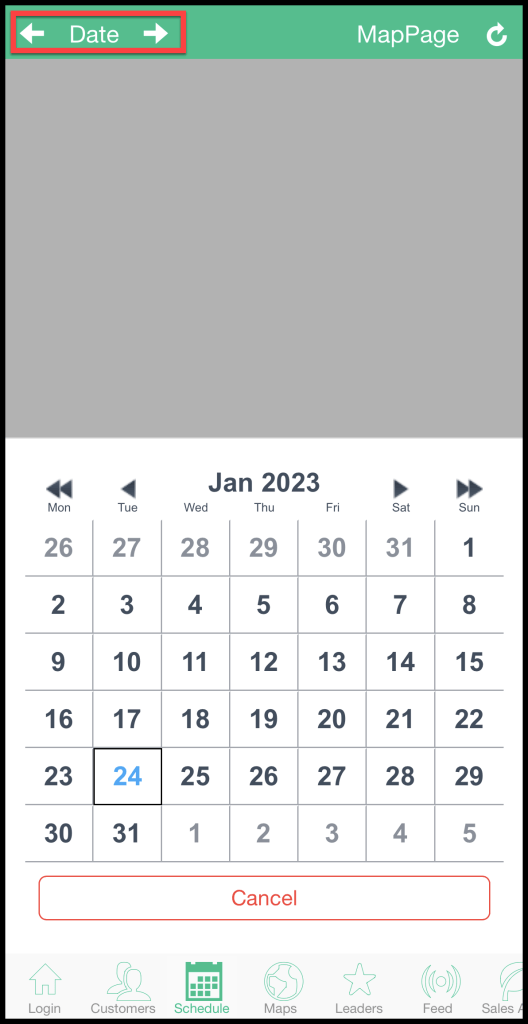
Choosing the Correct Route Date
Choose the date for the routes you would like to view. You can do this by either tapping the left and right arrows to move forward or back by one day or if you tap on the date, a calendar will appear, allowing you to choose the day as well.
Using the Schedule Tab
Once the day is chosen, a list of available routes will appear on the screen.
- The image to the left shows the user assigned to the route. You can upload a user’s image in the user card under Admin > Users.
- To the right of the image will be the user’s name assigned to the route.
- The number in the top right will display the number of spots scheduled on the route versus the number of available spots. For example, if two customers are scheduled on a route that has 17 spots available, the number will be displayed as “2/17”.
- In the lower right, the grey text will display the types of users that can schedule on the route and the route template assigned to the route.
It’s important to note that sales users in PestRoutes Sales will only have access to view and use schedule-able routes. Please see our guides on “Creating a Route Template” and “Add Routes to a Day and Route Actions Options” for more information.
To view the spots available on a route, press the route you would like to view.

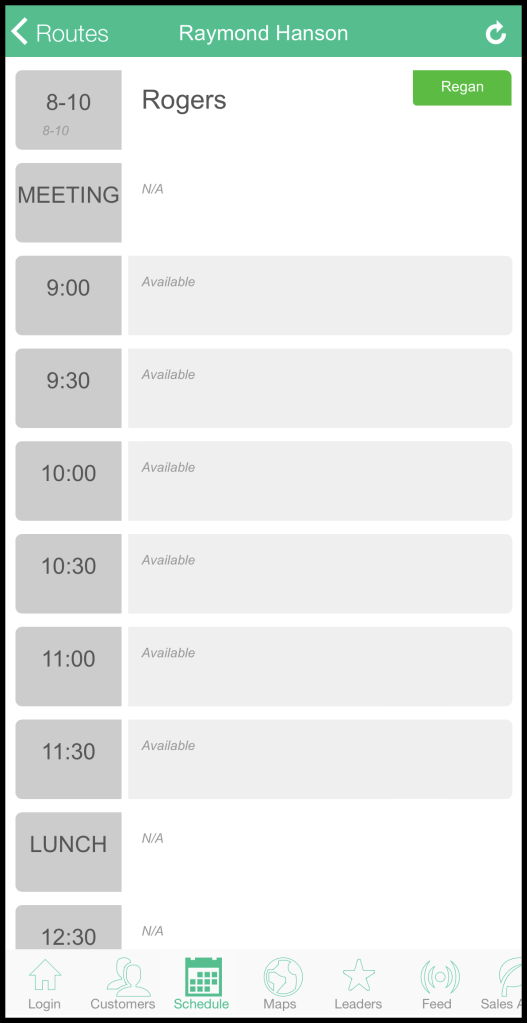
Using Routes
The route in PestRoutes Sales will mirror the time windows on the route in PestRoutes.
Blocked slots are represented with a white background, and open slots have a grey background.
If a customer is currently scheduled on the route, the sales user will see the time window the customer is scheduled for, the customer’s name, and to the right in the green box will have the user’s name that scheduled the customer.
If the appointment has been completed, a checkmark will appear to the left of the customer’s name.
Press an open slot to schedule a customer for that time.
Scheduling
Once you choose an open slot on the route, a new window will appear, allowing you to schedule a new or existing customer.
- New Customer: press this option if you are scheduling a customer not yet in the system.
- Existing Customer: press this option to schedule a customer already in the system. Once you press “Existing Customer,” a list will appear with all the customers the sales user has sold (they cannot schedule a customer if they have not sold the customer). Tap the desired customer from the list.
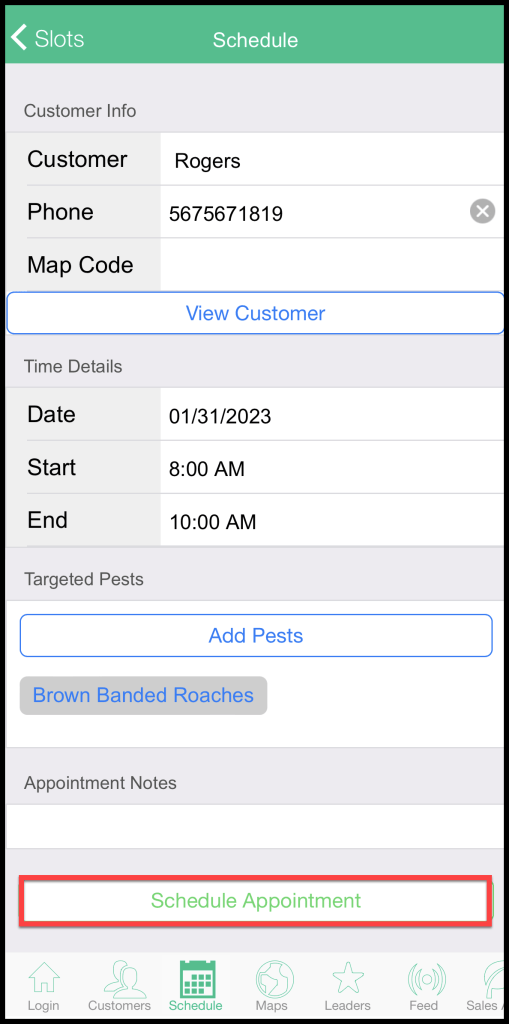
- Customer Info: This is where you can enter information about the customer you’re scheduling. If you’re scheduling a new customer, fill this information out. If you’re scheduling an existing customer, these fields may be auto-filled, but you may edit them if needed.
- Time Details: This is to enter the time details for the appointment. Verify the appointment date, and the “Start” and “End” fields will determine the time window for the appointment. It will default to a two-hour window starting at your chosen time slot.
- Targeted Insects: This is where sales users can specify target pests for the appointment. These pests will be visible to the technician in the technician’s mobile apps.
- Appointment Notes: You can also make appointment-specific notes in the Appointment Notes box. They will be visible to the technician in the technician’s mobile apps.
Press Schedule Appointment at the bottom of the page to schedule the customer on the route.
Confirming an Appointment
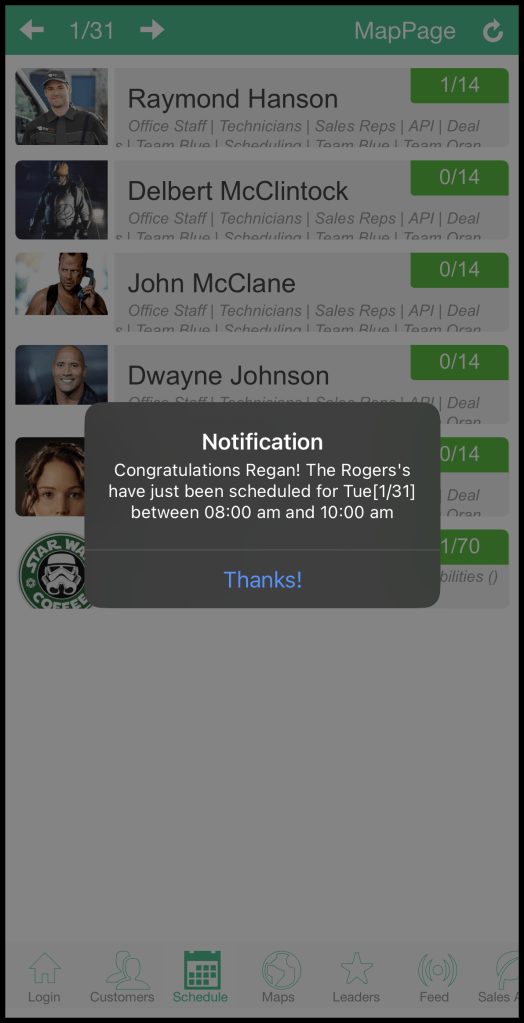
Once you press Schedule Appointment, a dialog box will appear confirming the appointment.
This appointment will also be visible on the route in PestRoutes.
Schedule Tab in PestRoutes Sales
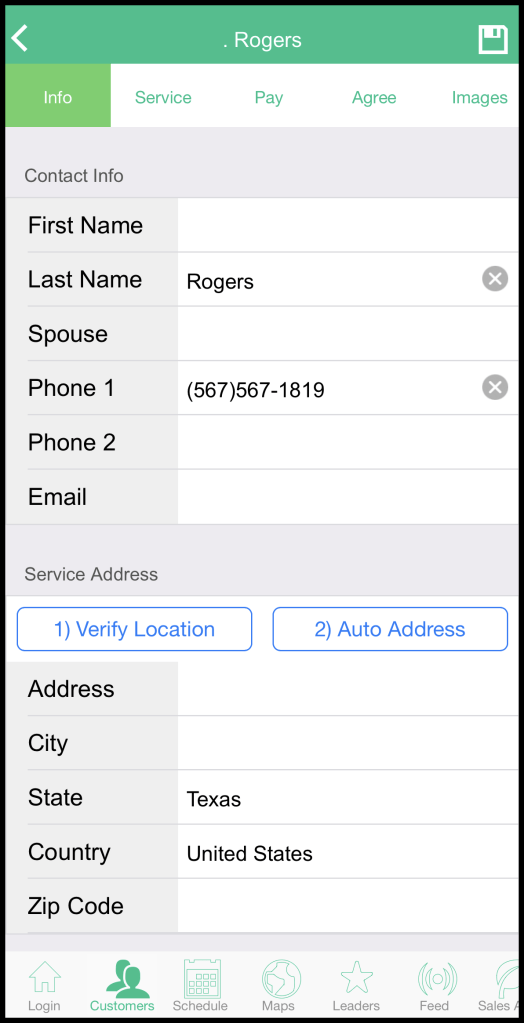
If a new customer was scheduled, ensure you fill out the remainder of the customer’s information and generate an agreement for the customer’s subscription.
Select the customer’s name on the route to fill out the customer card and generate an agreement. Then select View Customer.

Schedule Tab in PestRoutes Sales
This will bring up a window that will allow you to finish signing the customer up for service.
Please see our guide on Creating a New Customer in PestRoutes Sales for more information on this step.
Canceling Appointments
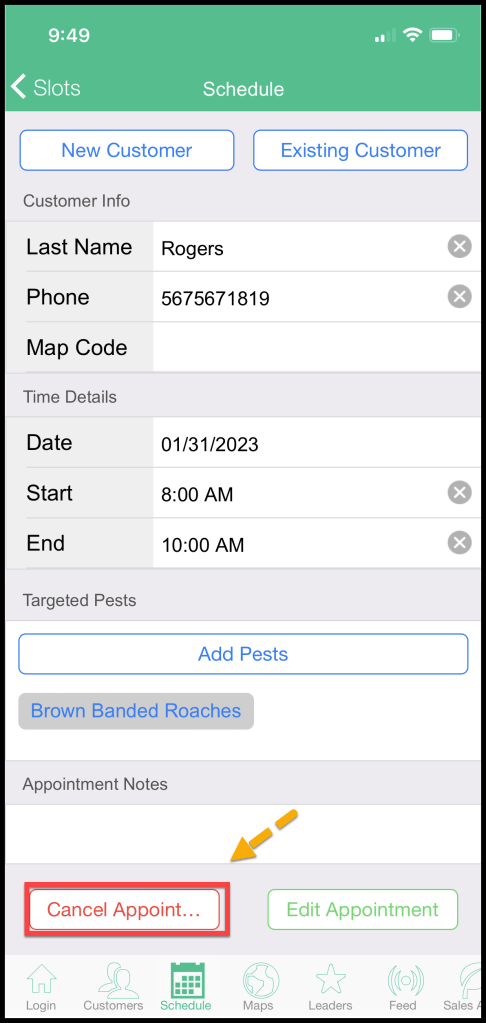
Sales users can cancel a customer’s pending appointment by pressing the customer on the route in PestRoutes Sales, and pressing Cancel Appointment at the bottom of the page. When you cancel an appointment, a dialog box will appear, prompting you to confirm the cancellation and provide a reason.
If the appointment has been completed, sales users will not have permission to edit it, so they can only cancel pending appointments.
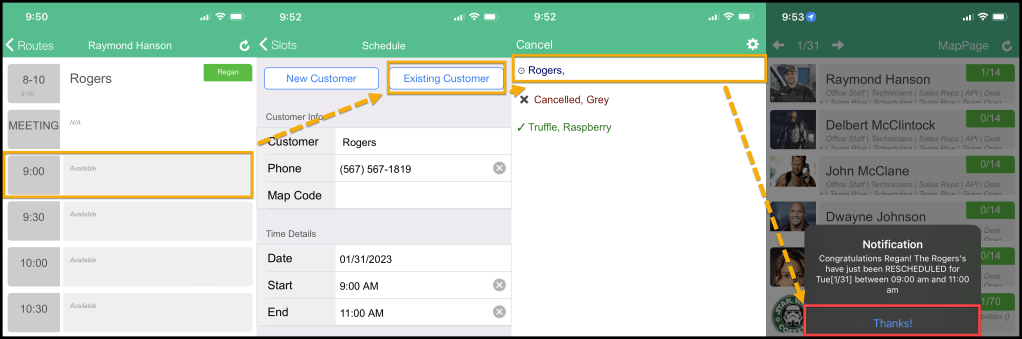
Rescheduling an Appointment
To reschedule a customer’s pending appointment, view the desired route you would like to reschedule the customer on, and choose an open time slot for the new appointment.
- View the desired route you would like to reschedule the customer on, and choose an open time slot for the new appointment.
- Press Existing Customer at the top of the appointment window
- Choose the desired customer from the list with all the customers the sales user has sold (they cannot reschedule a customer if they have not sold the customer).
- The customer’s information will auto-populate in the “Customer Info” section. Verify the date and time, then press “Schedule Appointment” at the bottom of the page.
When you press Schedule Appointment, a dialog box will appear confirming that the customer’s appointment has been rescheduled.
NOTE:
In PestRoutes Sales, you do not need to cancel the customer’s pending appointment to reschedule them. Once you press “Schedule Appointment” here, it will automatically reschedule your appointment.