
PestRoutes Sales: Customer Tab
Summary
The Customer tab in PestRoutes Sales is used to add details about customers.
Important Points:
- Quotes for a service are useful for larger companies that may have multiple levels of permissions before an agreement can be signed.
- Changes to the customer can be saved by pressing the save option in the top corner once a customer is opened.
Accessing the Customer tab in PestRoutes Sales
To access the customer tab in PestRoutes Sales, go to:
Open the PestRoutes Sales App > Customers.
Refreshing the Customer List
If no customers or specific customers are available, press the refresh button on the top of the screen. This is especially recommended for users who share a device. Refreshing should bring up a list of customers that this specific user has sold services to. The customer list should not show other users’ customers.

Searching the Customer List
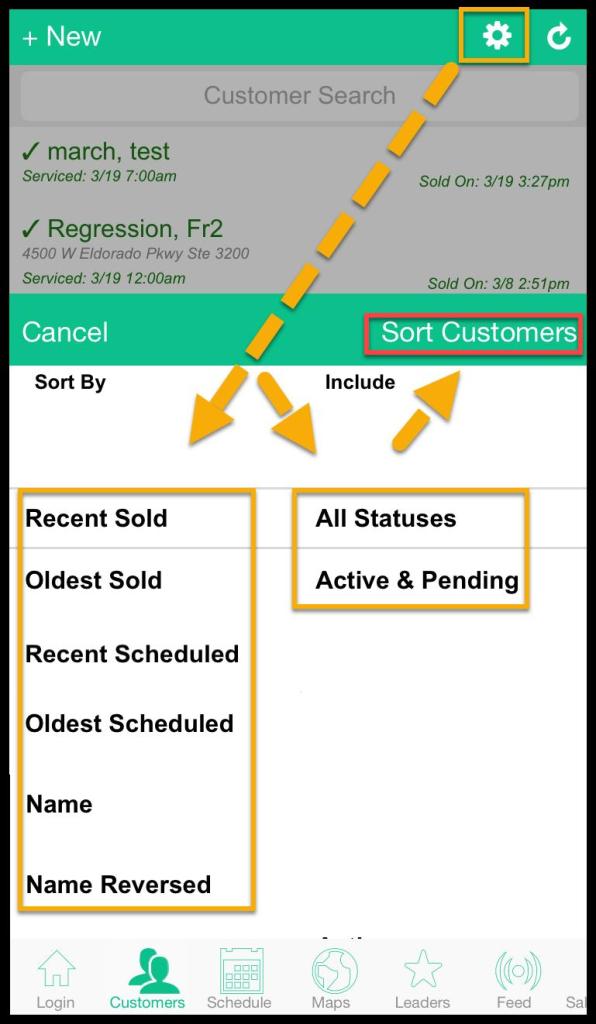
Press the gear icon in the top middle to filter customers.
- Sort by
- Recent Sold: Display customers by the most recent service sell date.
- Oldest Sold: Display customers by the oldest service sell date.
- Recent Scheduled: Display customers by the most recent service scheduled date.
- Oldest Scheduled: Display customers by the most recent service scheduled date.
- Name: Display customers by symbols, numbers, and alphabetically by last name (a to z).
- Name Reversed: Display customers in reverse by alphabetically by last name (z to a), then symbols and numbers.
- Include
- All Statuses: Display all customers regardless of status.
- Active & Pending: Display only customers with active or pending statuses.
Press Sort Customers to finish and refresh the list with new results.
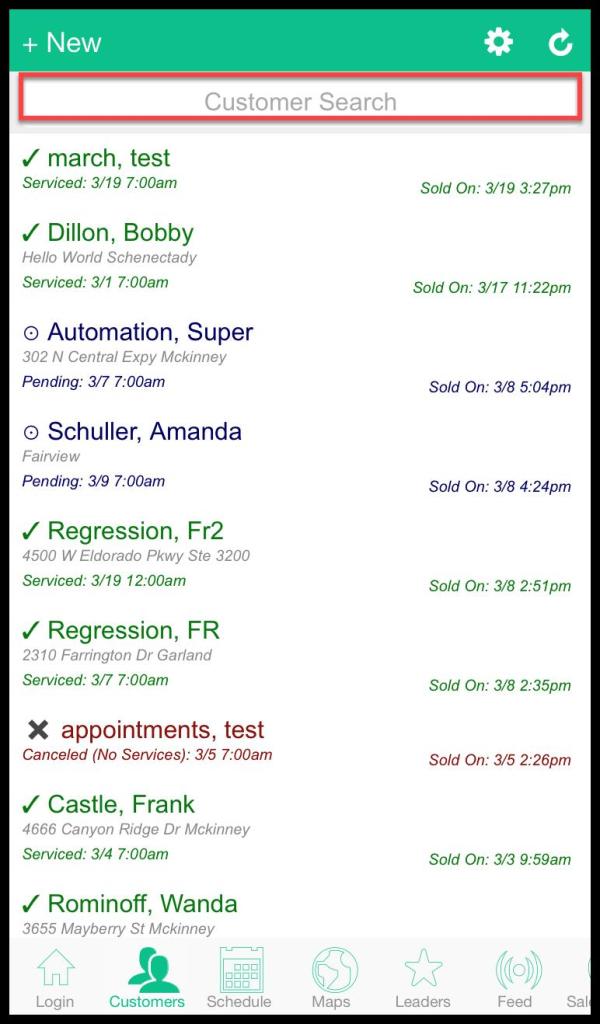
Using the Customer List Search Bar
Use the search bar to search for specific customers in the list.
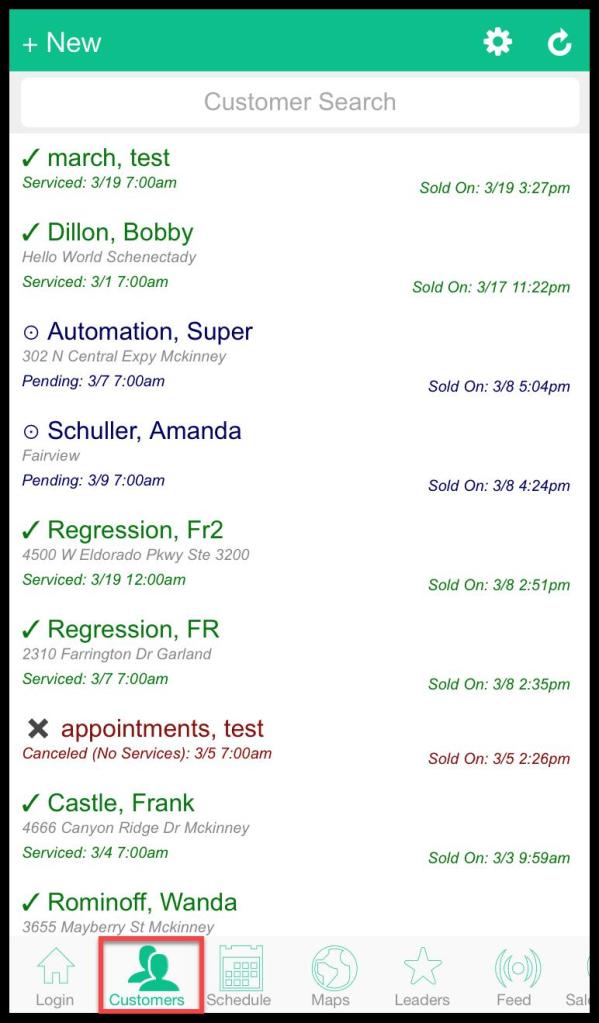
Viewing the Customer List
The customer list displays the customer information that this specific user has sold services to. On the right, the time is shown when the customer was serviced, canceled, or has a pending appointment. The customers have specific colors, which have the following meanings:
- Blue: Means the customer has a pending appointment
- Red: Means the customer has a canceled appointment.
- Green: Means the customer was serviced.
Pressing any of the customers will bring the customer card up.

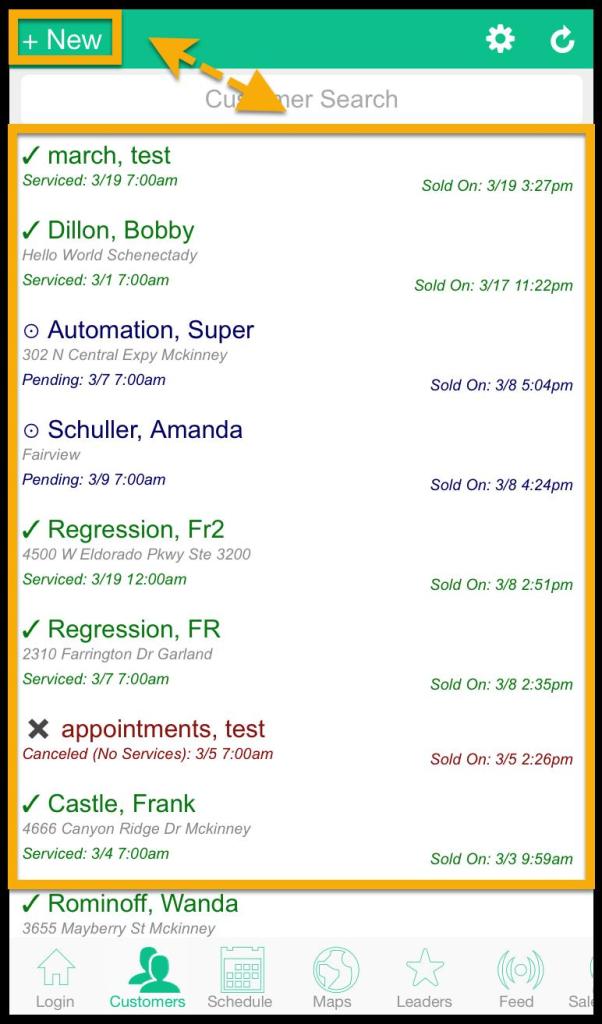
Adding or Editing Customers in PestRoutes Sales
To add or edit customers in PestRoutes Sales, press + new to create a new customer in PestRoutes Sales, or tap an existing customer to edit a customer from the user’s list.
- Note: At the bottom of every tab is a continue option, which will go to the next tab.
Info Tab: Contact Info
The customer’s contact info can be added under the Info tab.
- First Name: Enter the customer’s first name.
- Last Name: Enter the customer’s last name.
- Phone 1: Enter the customer’s primary phone number.
- Phone 2: Enter the customer’s secondary phone number.
- Email: Enter the customer’s primary email address.

Info Tab: Service Address
The address can be auto or manually entered. The auto address option prefills the address from the GPS so the Sales Rep can spend more time focusing on the other areas of the customer’s information, and will replace the auto address if there are any errors later.
- Address: Enter the street address for the customer’s service address.
- City: Enter the city for the customer’s service address.
- State: Enter the state for the customer’s service address.
- Country: Enter the country for the customer’s service address.
- Zip Code: Enter the zip code for the customer’s service address.
- Permanent Customer Notes: Write additional notes or document additional details about the customer’s service.
After the address is entered, the address will be shown with the maps tab in order to verify the address is correct. Tap the checkmark to return to the Info tab.

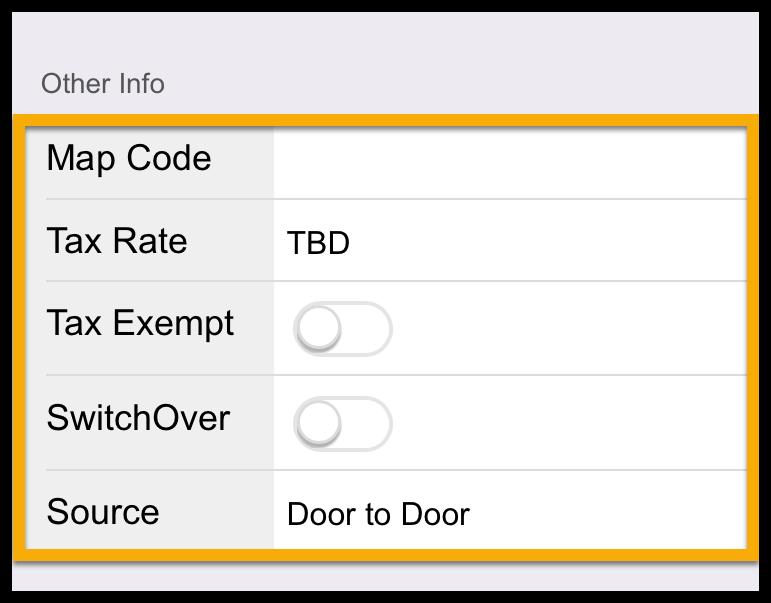
Info Tab: Other Info
- Map Code: Enter the map code, for users that use map codes
- Tax Rate: The tax rate is set by the zip code set in the admin tab in PestRoutes, but can be altered.
- Tax Exempt: Mark the customer as tax-exempt.
- Switch Over: If the customer was switched over from another company.
- Source: Identify the source where the customer was sold the service.
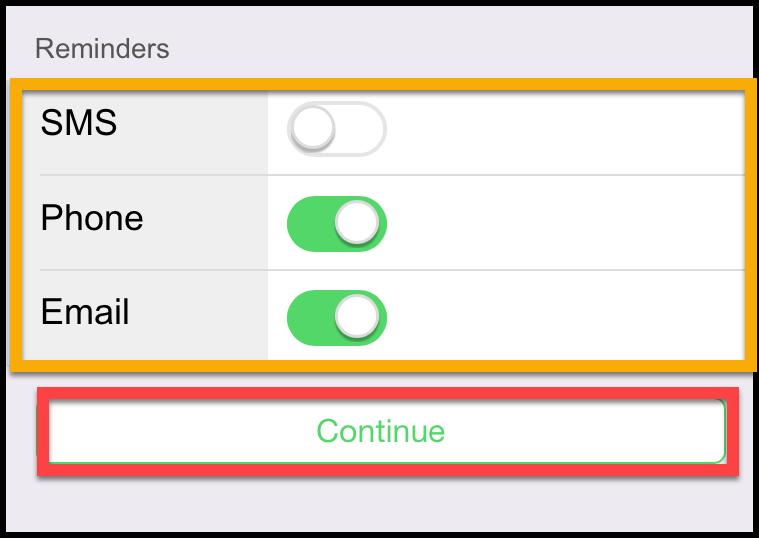
Info Tab: Reminders
- SMS: Identify if the customer will receive SMS reminders.
- Phone: Identify if the customer will receive phone call reminders.
- Email: Choose if the customer will receive email reminders.
Press Continue to go to the service tab. The information can also be saved before continuing by pressing the save option.
Service tab: Adding and Editing a subscription in PestRoutes Sales
To add a subscription in PestRoutes Sales, go to
Open the PestRoutes Sales App > Customers > choose the customer from the list > Service tab.

Service tab: Initial Service
Initial Service
- Start month: Enter the month when the customer wants to begin the service.
- Initial quote: Enter the amount quoted for the initial service.
- Discount: Enter the amount discounted for the initial service.
- Initial Charge: Shows the initial charge after the discount for the initial service.
Initial / One-time add-ons
- Edit Initial add-ons: Add any additional one-time services that customers might request in addition to the initial service.
Initial SubTotal
- Initial SubTotal: Enter the amount for the service subtotal.

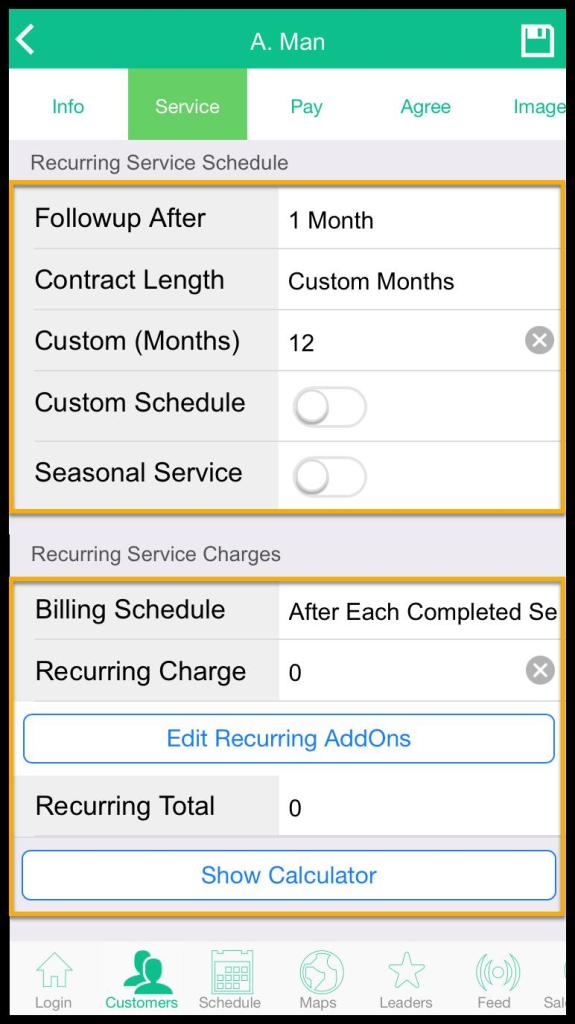
Service tab: Recurring Service Schedule
Recurring Service Schedule
- Follow up after: Enter the follow-up date for the recurring services.
- Contract Length: Enter the total contract length for the recurring services, which will depend on the contract type.
- Custom Schedule: Available to set up a custom schedule for the customer, but is usually rare.
- Seasonal Service: Used for services that are not needed outside of a range of months, and service times will not be recommended outside of a seasonal period.
Recurring Service Charges
- Billing Schedule: Determine when the customer will be billed for the service.
- After Each Completed Appointment (Normal)
- Weekly
- Every 2 Weeks
- Every 4 Weeks
- Monthly
- Alternate Monthly
- Quarterly
- Semi-Annually
- Annually
- Renewal
- Service Charge: Set the service charge for each billing cycle.
- Edit Recurring AddOns: Add any additional services that customers might request in addition to the recurring services.
- Recurring Total: Set the total for the recurring services for each billing cycle plus the charge for any additional Addons.
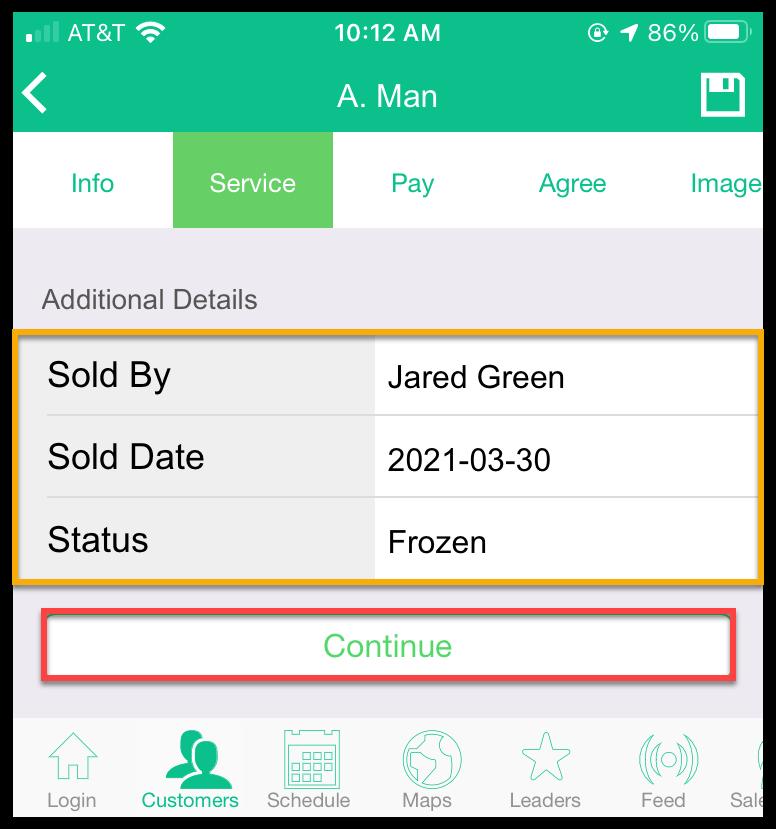
Service tab: Additional Details
- Sold by: Has the name of the PestRoutes Sales user that made the sale.
- Sold date: Has the date when the service was sold.
- Status: Shows the status of the subscription.
Press Continue to go on to the Pay tab.
NOTE:
It is recommended to save by pressing the save option on the top corner of the screen.
Pay tab: Initial Payment Information
The customer’s payment information for services is used here.
Initial Payment Information
- Method
- Credit Card
- ACH/ Echeck
- Check
- Cash
- Collect Payment
- Auto-pay: If the payment is a credit card, the customer is automatically charged each billing cycle.
- Paid in full: Determine if the service is going to be paid in full or in portions. If the initial payment is paid in full, it will be flagged in the office.
- Initial due: Shows the amount due for the initial service.
- Collected: Record the amount collected.

Pay tab: Billing Address
- Name: Enter the name of the billing recipient.
- Address: Enter the street address for the customer’s service address.
- City: Enter the city for the customer’s service address.
- State: Enter the state for the customer’s service address.
- Country: Enter the country for the customer’s service address.
- Zip: Enter the zip code for the customer’s billing address.
Press Continue to go to the agree tab.

Agree tab
The agreement will be generated by pressing Generate Agreement or Regenerate Agreement.
Once the agreement has been generated, have the customer initial and sign for a quote or for an agreement.
- Send As Quote: Used if the customer wants a quote, which is useful for larger companies who may have multiple levels of permissions before an agreement can be signed.
- Sign Agreement: Used if the customer wants to sign immediately after the agreement is sent, usually in person.
This step completes creating the agreement. To access the images and status pages, the top tabs have to be used.

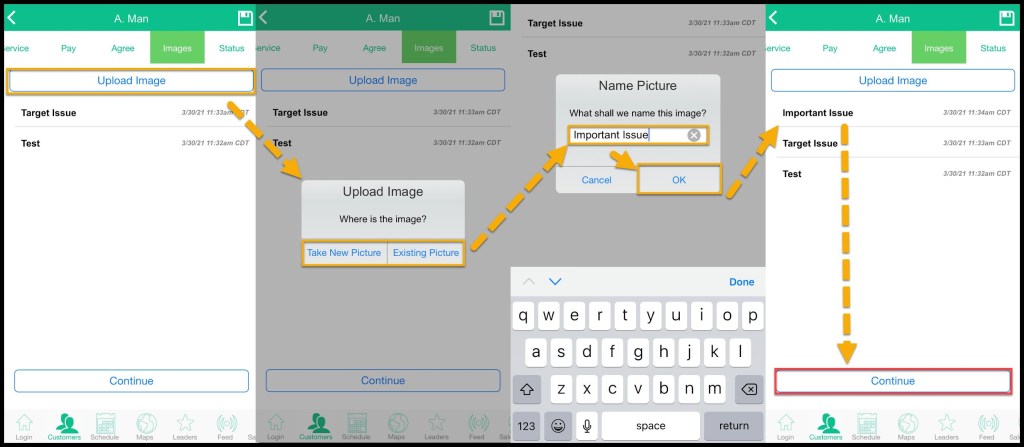
Images tab
If the agreement has been saved in the agree tab, it can be accessed in the images tab.
- Upload Image: Used to take a new image with the device’s camera or upload a saved image from the device. Add a name to the image and tap ok to save it.
Press Continue to move on to the status tab.
Status tab
- Schedule: Schedule or reschedule the appointment. See the Schedule tab guide for scheduling appointments in PestRoutes Sales.
- Status: Show the status of the appointment.
- Date: Show the date of the appointment.
- Time: Show the time of the appointment.
- Technician: Show the technician scheduled for the appointment.
- Notes (from Tech): Add notes from the technician.
- Notes (from Rep): Add notes from the sales rep.
Press Schedule to schedule the appointment. Note that this action moves the user to the schedule tab.

