
Marking a No Show
Summary
Marking an appointment as a “no show” is beneficial when the technician cannot complete the appointment for various reasons.
After an appointment is marked as “no show” in the desktop application, the customer will automatically be placed back in the Job Pool or Intelligent Routing to be scheduled again.
Important Points:
- Marking customers as a no show will automatically place them back into the Job Pool or Intelligent Routing, so they can be scheduled again.
Marking a No Show Appointment
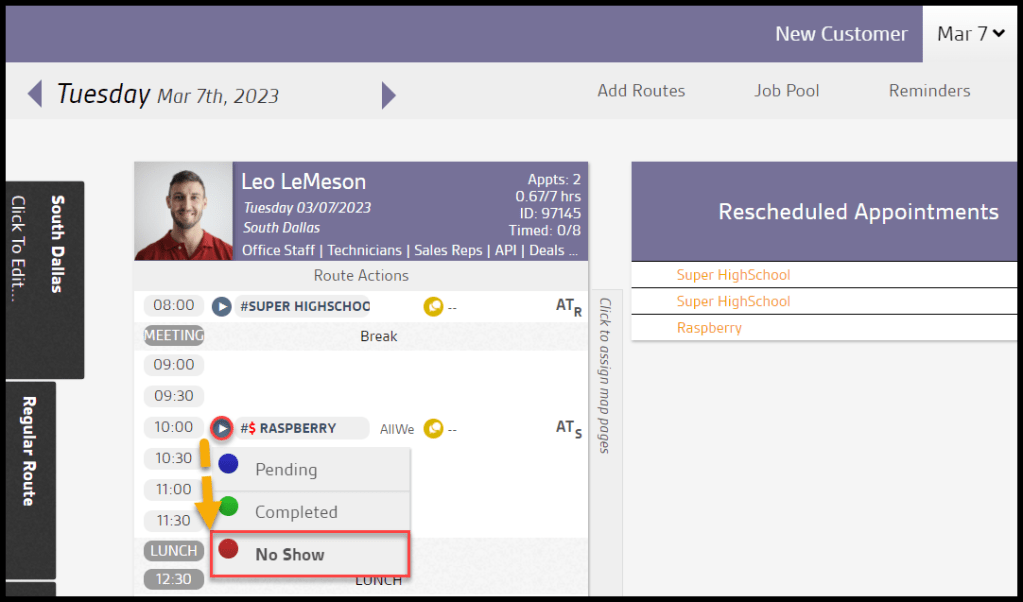
To mark a customer as a No Show for their appointment, go to:
Route view > The play button icon next to the appointment > No Show.
Entering the No Show Reason for the appointment
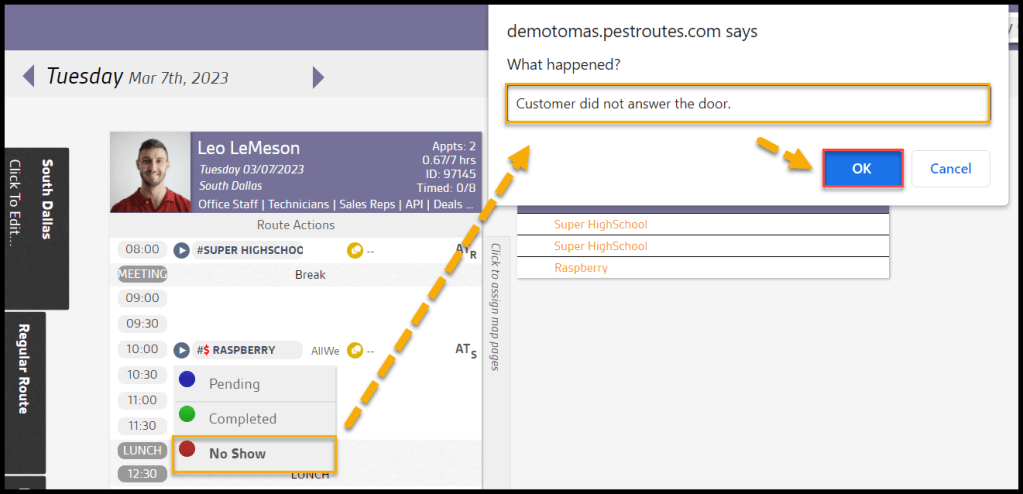
Once No Show is selected, a new dialog window will appear prompting the user to provide a reason for the No Show appointment. Enter the reason and press OK.
Viewing a No Show appointment
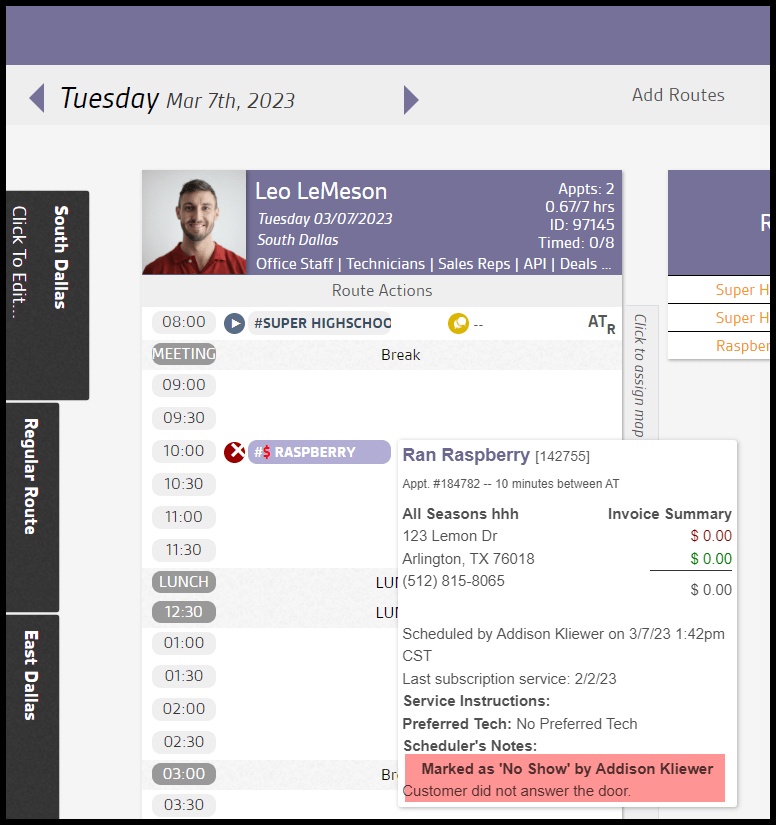
Once the appointment is marked as a No Show, the customer’s name will appear in red on the route for that day to indicate the appointment was a No Show.
What is the difference between marking an appointment as a no show versus canceling it?
Marking an appointment as a no show will leave the appointment on the route, but the customer’s name will turn red. Canceling an appointment will remove it from the route and put it in the Canceled Appointments column.
A no show appointment counts against a technician whereas a canceled appointment does not.

