
Intelligent Routing: Assign Planned Routes
Summary
Assign Planned Routes will allow the user to schedule the routes created in Intelligent Routing to your technicians.
Important Points:
- To prepare the routes in Assign Planned Routes, follow the steps in the Introduction to Intelligent Routing guide.
Preparing the routes in Assign Planned Routes
To access Intelligent Routing, go to:
Scheduling > Intelligent Routing.
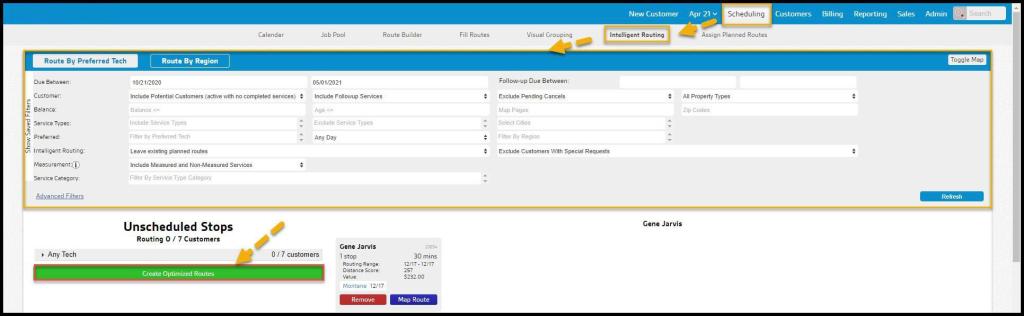
Follow the steps to filter the routes in the Introduction to Intelligent Routing guide, and select Create Optimized Routes when finished.
Accessing Assign Planned Routes
To access Assign Planned Routes, go to:
Scheduling > Assign Planned Routes.

Filtering the Assign Planned Routes
To filter the Planned Routes, toggle these filters.
- Start and End Dates: Limit results between certain dates in the Planned Routes.
- Technicians: Limit results to specific Technicians to be included in the Planned Routes.
Select Refresh to refresh the results.

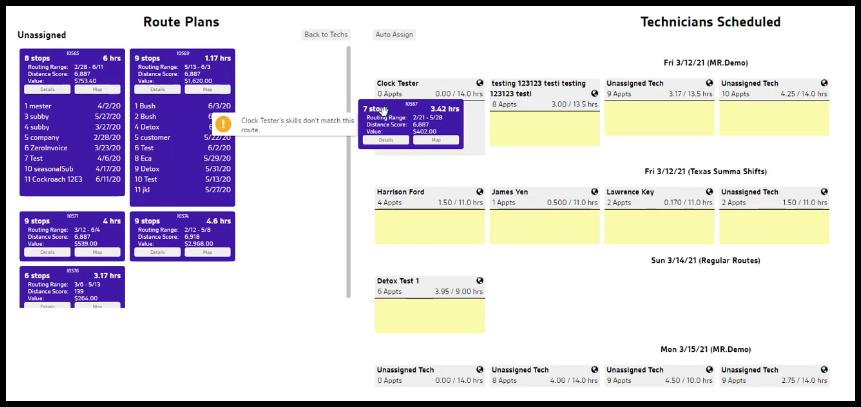
Viewing the Technicians Scheduled Section
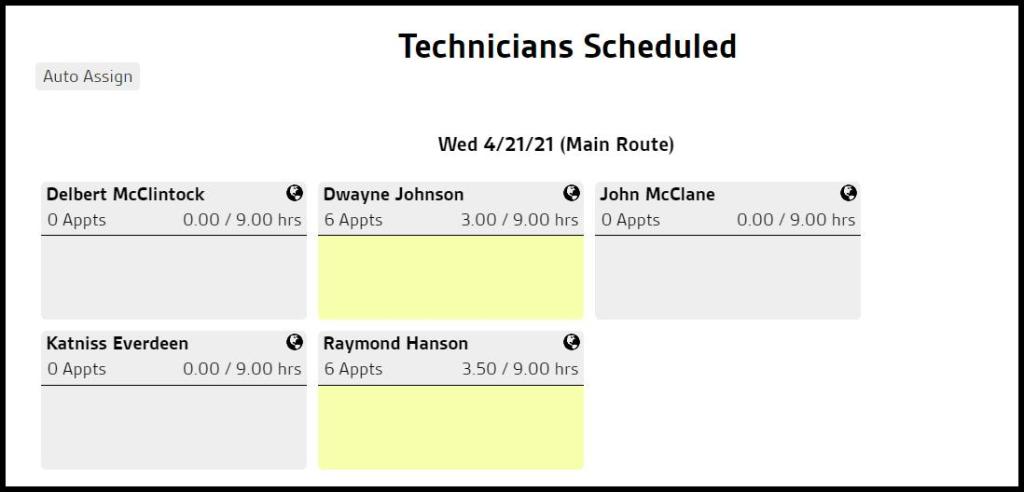
Under the “Technicians Scheduled” section, you’ll notice a block for each technician. A gray block means the technician has a completely empty route for that day. A yellow block indicates the technician has a previously scheduled appointment for that specific day.
You may want to view the maps on these routes to determine which route would best fit that day. See the Map It section below for further explanation. A green box means the technician has a completely full route for that day, so you will want to avoid scheduling a pre-built route on that day.
Using the Route Plans Section
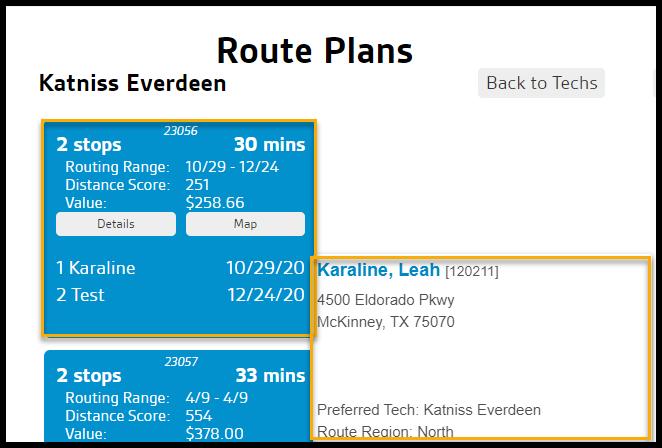
Under Route Plans are all of the optimized routes created in Intelligent Routing, sorted by preferred technician or region. Select the technician or region to view the routes made for that group.
- Routing Range: The range that the stops can be scheduled for.
- Distance Score: The Distance Score is based on the distance between the stops, and the starting and ending locations on the route. It does NOT represent actual mileage.
- Value: Displays the value of the customer’s contract.
Hovering over the customer will show the preferred technician, the route region, and any required skills for the appointment.
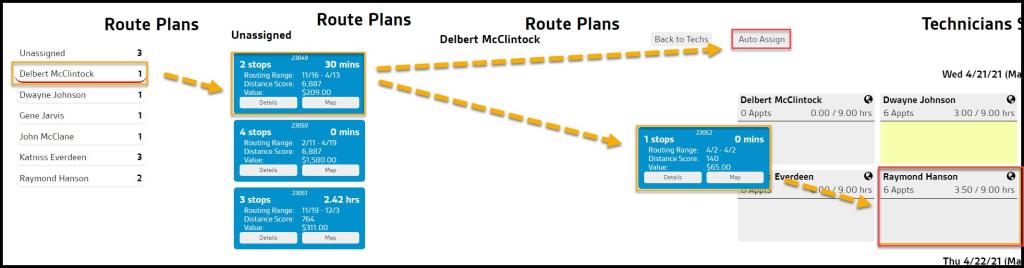
From there, drag and drop the routes onto the technician’s days or select “Auto Assign” to automatically assign the routes from that group to available technicians. If the technician’s skills do not match the appointment, a notification will warn the user of the skills mismatch. If a planned route is assigned to a skills mismatch, the software will warn the user that the technician does not have the skills required for the assigned route.
Skills Filter on Recommended Routes
- By default, Recommended Routes will display suggested routes that have matching skill sets
- There is a checkbox to control the matching by skillset. The user can uncheck the box and refresh to remove the skill set match requirement.
Saving Assign Planned Routes
Select Save Routes from the top menu when finished assigning the routes onto all of the technician’s days.

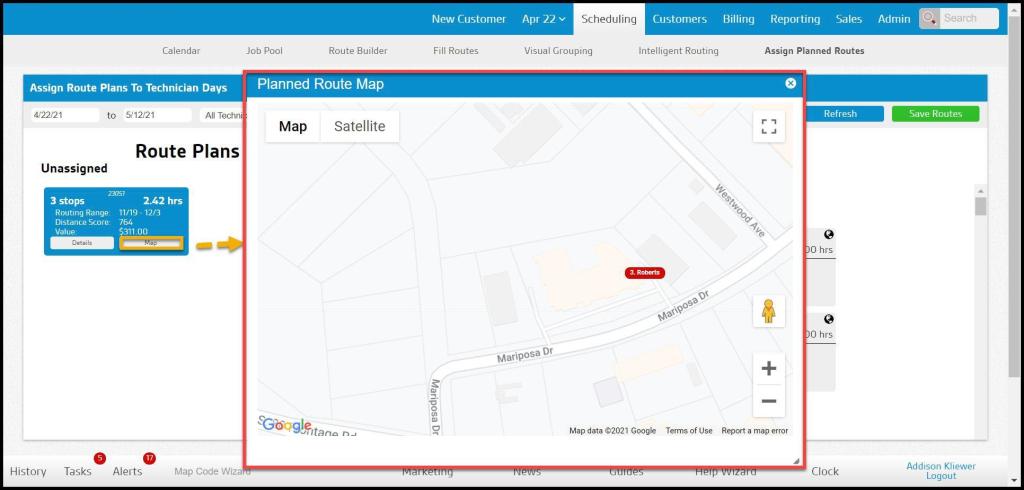
Mapping in Assign Planned Routes
To schedule a pre-built stop onto a technician’s route that already has scheduled appointments, you can easily view the maps for both routes and determine if that pre-built route fits the technician’s current route.
To see the map for the pre-built route, select the group the route is located in and then select Map in the lower right-hand corner of the route.
To view the map for a technician’s existing route, select the globe icon next to the technician’s name for the route.
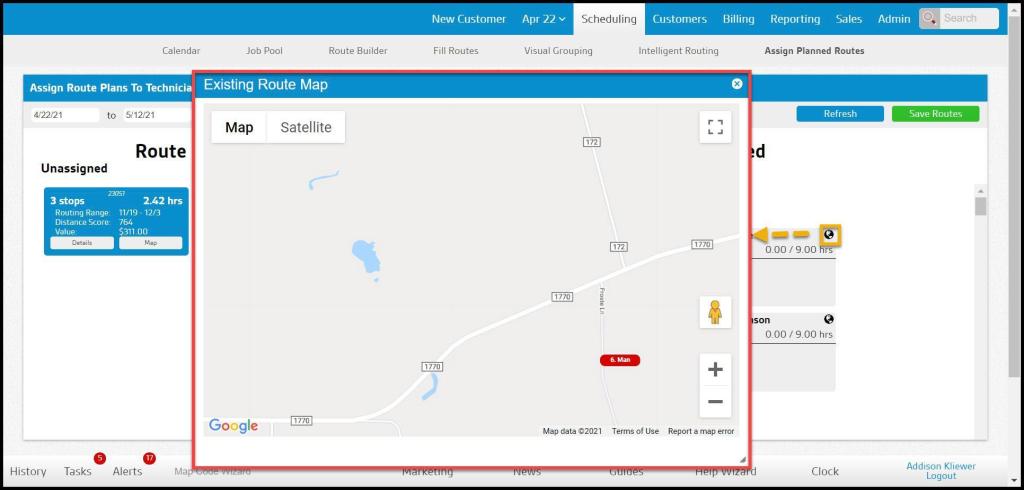
If satisfied with combining both routes, drag and drop the pre-built route on the technician’s route.

