How to Reschedule Appointments: Expand Reschedule Events
Summary
Rescheduling a customer at a high rate can give the customer many rescheduling notifications. This preference can help specify which actions are categorized as a reschedule event.
Changing the appointment day, the assigned technician, changing the time window, and adding a time window can be included or excluded as reschedule reasons.
Important Points:
- A Reschedule is taking a scheduled appointment, dragging it, and dropping it into a new appointment. Moving the appointment on the same day will only show the company, not the customer, a reschedule event. Tracking these events helps the office understand why customers are rescheduling appointments.
- This is helpful if a customer changes their appointment time multiple times.
- Dragging an appointment between routes with No Tech Assigned will not count as a reschedule because there was no change in a technician.
Accessing Expand Reschedule Events in Preferences
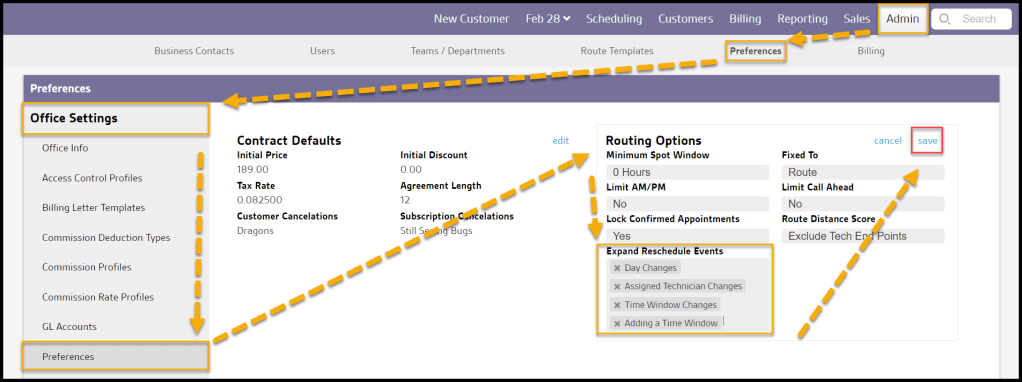
To access the Expand Reschedule Events in Preferences, go to:
Admin > Preferences > Office Settings > Preferences > Routing Options > Expand Reschedule Events.
Using the Expand Reschedule Events Options
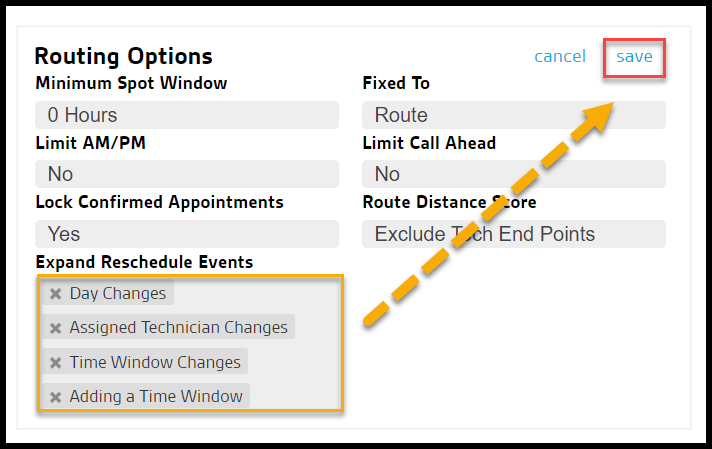
The Expand Reschedule Events has a few options:
- Day Changes: If an appointment is taken from one day and moved to another day, that action will be categorized as a reschedule event.
- Assigned Technician Changes: If the appointment was dragged and dropped from one technician’s route to another, that action will be categorized as a reschedule event.
- Time Window Changes: If the appointment’s time window is changed from AM to PM or any time window is changed, that action will be categorized as a reschedule event.
- Adding a Time Window: If a time window is added to an appointment, that will count as a reschedule event.
Select save when finished making changes to the expanded Reschedule Events options.
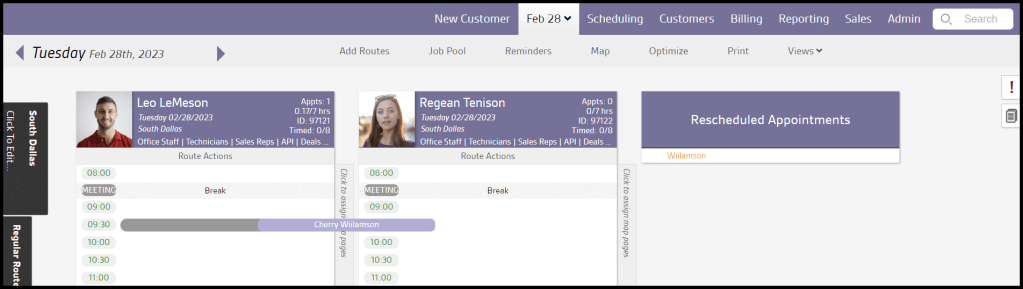
Seeing the Expand Reschedule Events in Action
Go to the desired Route, and when the selected customer is dragged and dropped to the newly rescheduled time or route, it will count as a reschedule, depending on which expand Reschedule Event options were chosen. It will appear on the customer card’s appointments tab as a reschedule event.
NOTE:
Dragging an appointment between routes with No Tech Assigned will not count as a reschedule because there was no change in a technician.
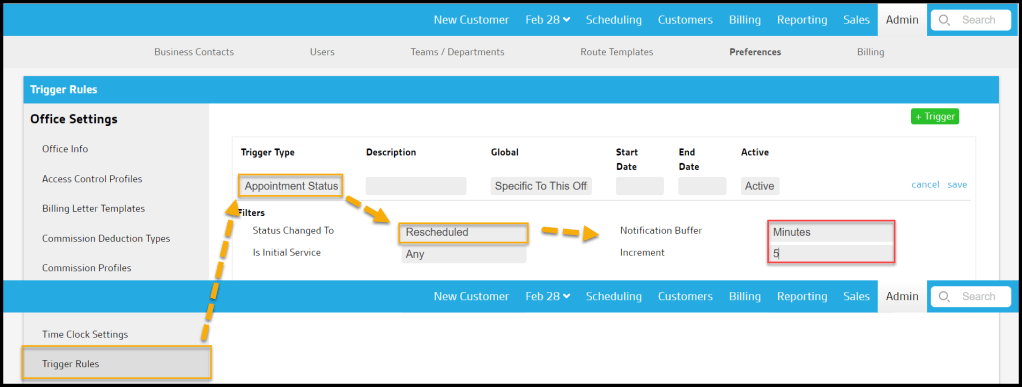
Using the Appointment Status Trigger Rule to control the reschedule notifications volume
To control the number of reschedule notifications sent to the customer, go to:
Admin > Preferences > Office > Trigger Rules > select the desired trigger rule. The Trigger Type should be Appointment Status, and the Status Changed To should be Rescheduled. The When to Trigger should be set to Trigger on Save.
These two options bypass the original real-time event from Trigger on Save and create a notification buffer that tweaks all of the Trigger on Save with Increments of time.
- Notification Buffer: Choose the unit of time that the time buffer uses: minutes, hours days.
- Increment: Choose the quantity of the unit of time chosen in the notification buffer field.