How to Manually Create Invoices
Summary
There are two ways invoices can be generated in the Operations Suite. When a customer’s scheduled appointment is completed, an invoice will automatically generate for that service in the customer card. Invoices can also be manually created.
Having the ability to create invoices manually is helpful when the user wants to create an invoice that is not connected to a service.
This guide will walk you through manually creating an invoice via the customer card.
Important Points:
- A manually-created invoice will not be attached to a service appointment.
Adding a New Invoice
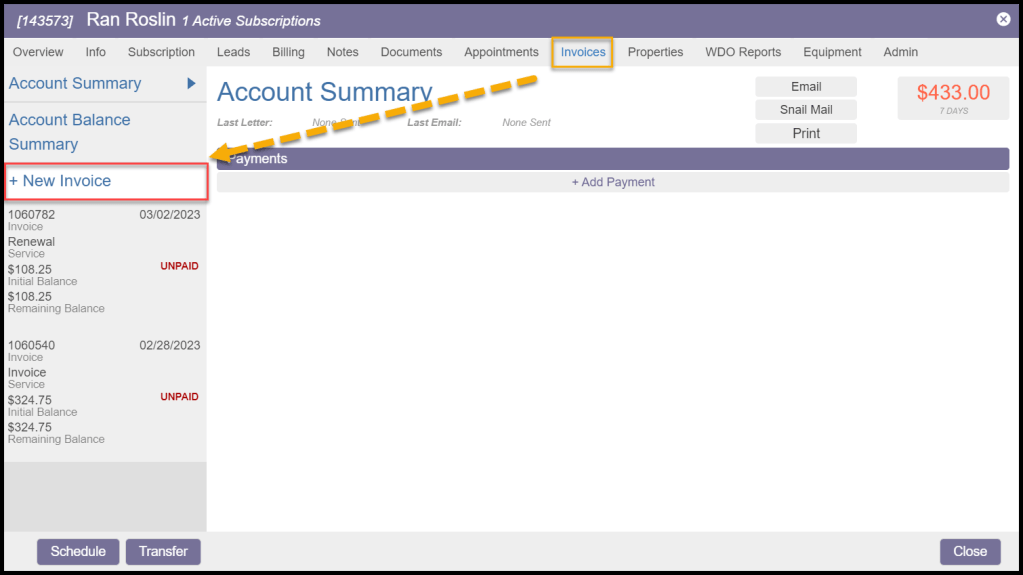
To manually add an invoice to a customer’s account, go to:
Customer Card > Invoices > + New Invoice.

Adding New Invoice Details
A new window will appear for entering the pertinent information to create the new invoice. Choose a date, enter the invoice amount, the type of service, and the billing account. Then select Create. Invoices can be backdated if necessary. Remember, this invoice is not attached to an appointment being performed.
New Invoice Defaults
Once the new invoice is created, it will appear in the invoice list on the left side of the Customer Card > Invoice tab.
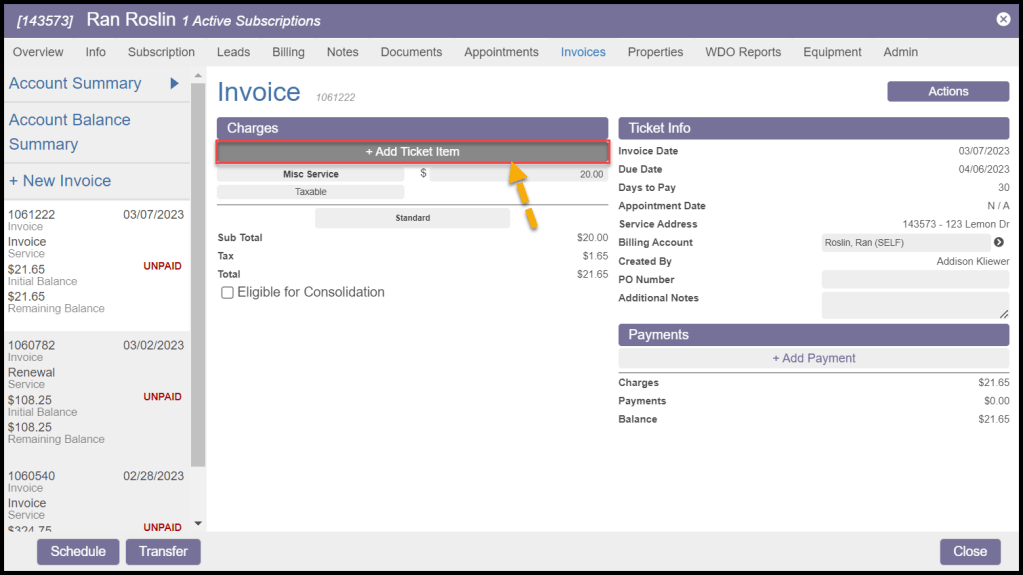
This invoice will be considered a Misc Service and will not be attached to any subscriptions or service types by default. However, to tie it to a service type, select Misc Service under the Charges section, and the service type for the invoice can be selected. This action is great when the user has a service type for late fees and wants to tie the invoice to the late fee service type to charge the customer a late fee.
Although this invoice can be connected to a service type, it cannot be connected to an appointment. Since it cannot be connected to an appointment, the Appointment Date will say N/A.

Adding a Ticket Item
Add-ons can be applied to the invoice as well. Select + Add Ticket Item under the Charges section, and a list of Add-ons will appear.
When adding ticket items to existing invoices, users can enter a quantity of up to 999. Selecting the trash can icon can be used to remove invoice Add-ons quickly.
Add-ons can be configured under Admin > Preferences > Service Related > Add-ons. See the user guide Preferences > Add-ons for more information.
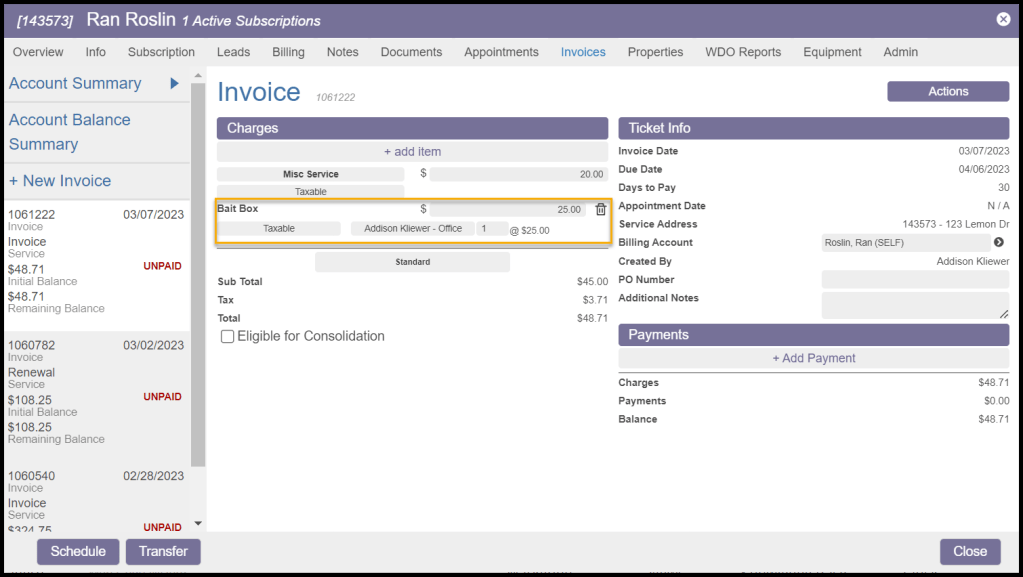
Viewing the Ticket Item on the Invoice
When the Add-ons are applied to the invoice, they will appear under the Charges section.
The quantity box can be selected to adjust the number of Add-ons being charged for, if it is taxable or not, and edit the price of the Add-ons It can also be used to verify which user applied the Add-on.
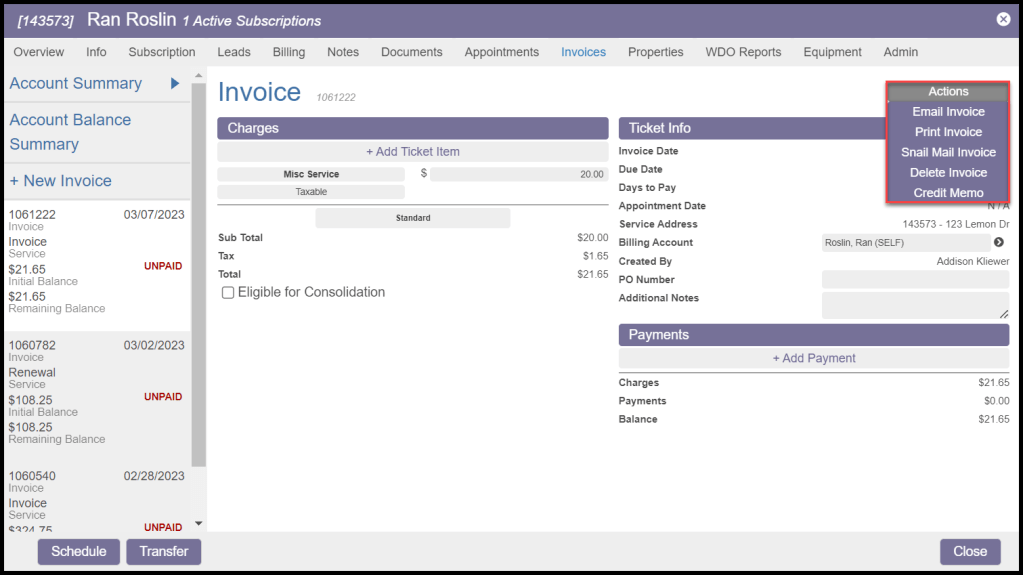
Using Invoice Actions
The invoice can be used in a few different ways. Select the Actions button to select an option.
- Email Invoice: Email an individual invoice to the customer. The Billing tab email address will be used to email the invoice.
- Print Invoice: Print this invoice.
- Snail Mail Invoice: Send this Invoice via the ordinary postal system instead of email.
- Delete Invoice: Manually created invoices can be deleted. Invoices attached to a specific appointment cannot be deleted because they will be the only documentation for invoicing the customer for an appointment.
- Credit Memo: Create a Credit Memo for this invoice. See the related guides below for more information on Credit Memos.
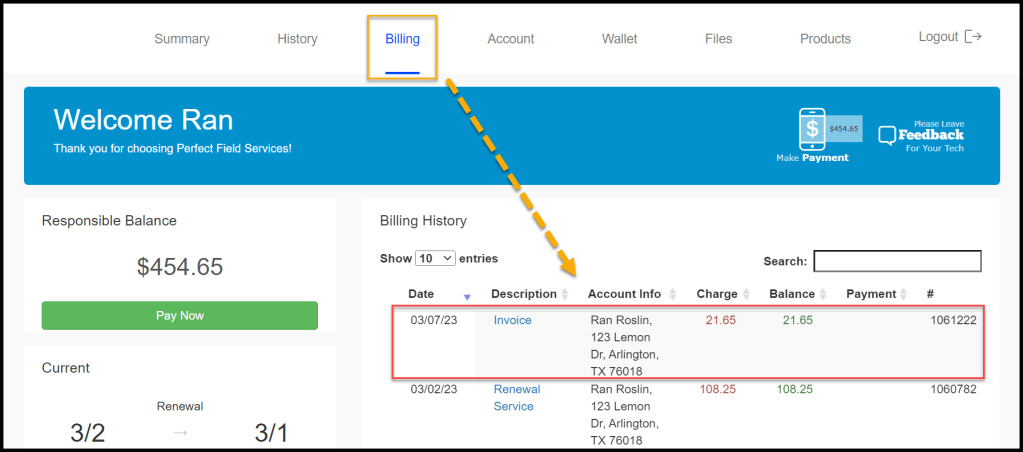
Invoice in Customer Portal
The newly created invoice is also visible in the customer portal under the Billing tab.
To go to the customer portal quickly, go to Customer Card > Admin > Portal Login.

If a payment is applied directly via the customer card, that applied payment will be visible in the portal. The customer also has the option to apply for the payment themselves via the customer portal.