Editing an Invoice Prior to Completing an Appointment
Summary
A user can edit an invoice for a pending appointment.
This feature can edit products, targeted issues, targeted areas, technicians and add invoice items. When the technician services the appointment, the updated invoice will reflect in the mobile applications.
Important Points:
- Be sure to select “Save without Completing” or else changes to the invoice will not be save. Clicking “Save and Complete” will show that the customer has been serviced.
Editing an Invoice Before Completing an Appointment
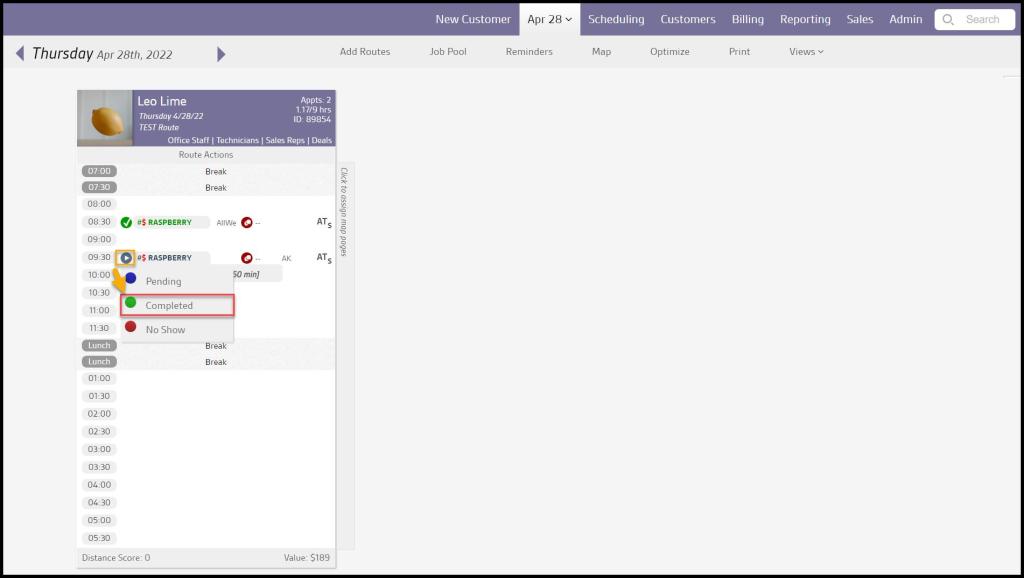
Go to the route view for the day the customer is scheduled on, and select the blue play button to the left of the customer’s name.
In the drop-down that appears, the user will notice options that will allow the user to mark the customer’s appointment as “Pending”, “Completed”, and “No Show”. This method is also an easy way to change the appointment status.
To edit an invoice before the service is complete, select Completed. Note: Selecting this option does not immediately complete the appointment.
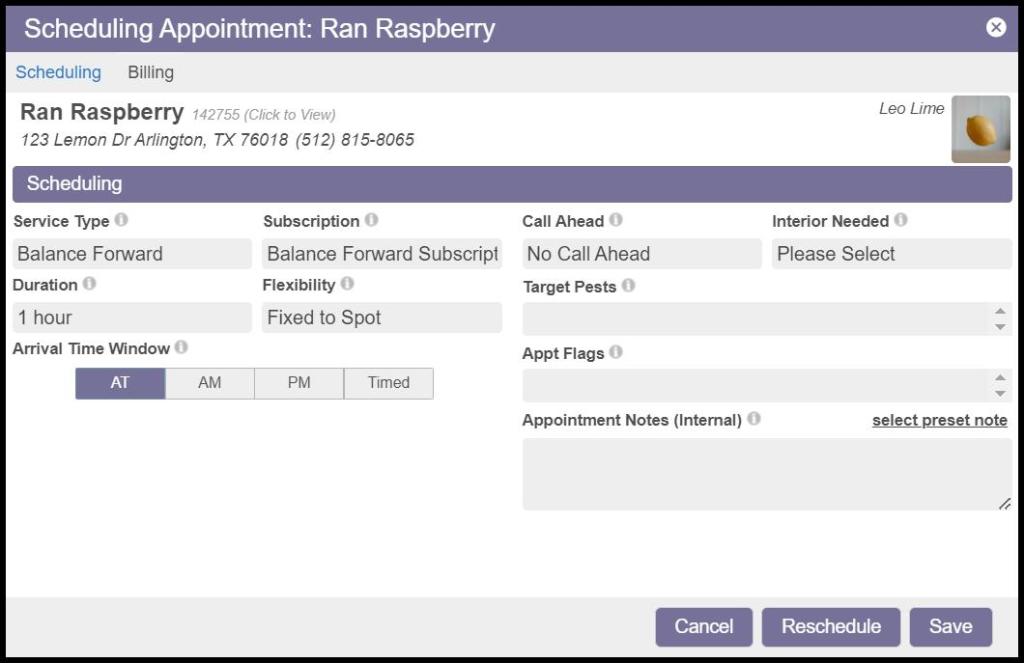
Using the Scheduling Appointment Window
Once the user selects “Completed,” a new window will appear, giving the user the ability to completely edit the invoice template.
- Technician: To assign the appointment to a new technician, select the tech’s image, and select a new technician from the list.
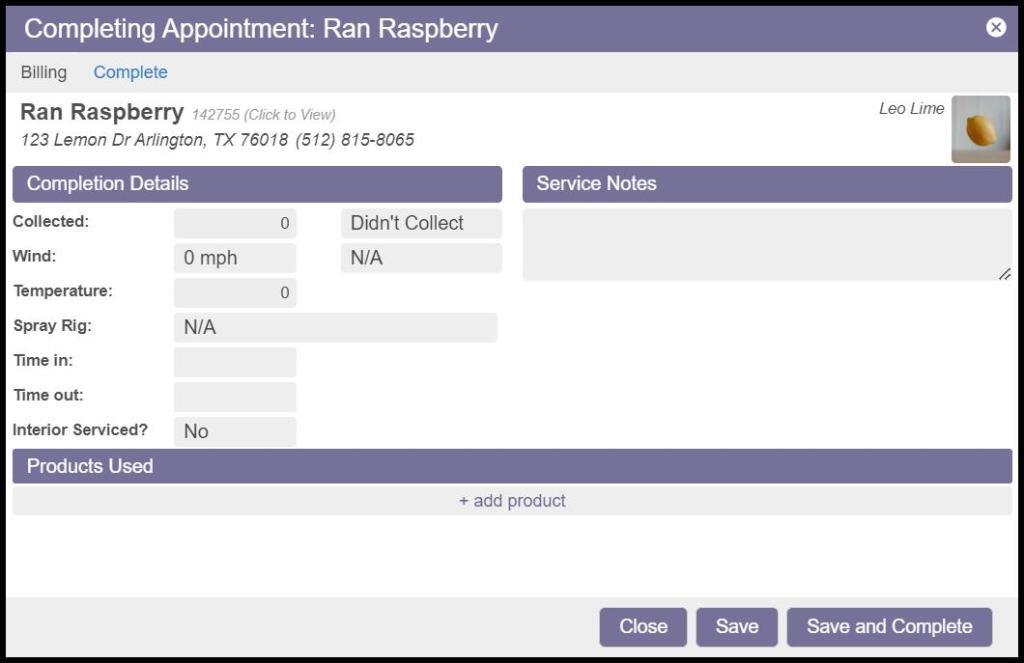
- Completion Details: This section will allow users to edit the Completion Details of the appointment. Normally the technician will fill this information out once they complete the appointment in the mobile application.
- Service Notes: The service notes will appear on the customer’s completed service notification under the “Technician Comments” section. Normally the technician will fill this information out once they complete the appointment in the mobile application.
- Products Used: This section is used to input the products used for the appointment. Again, the technician normally fills out this in the mobile application.
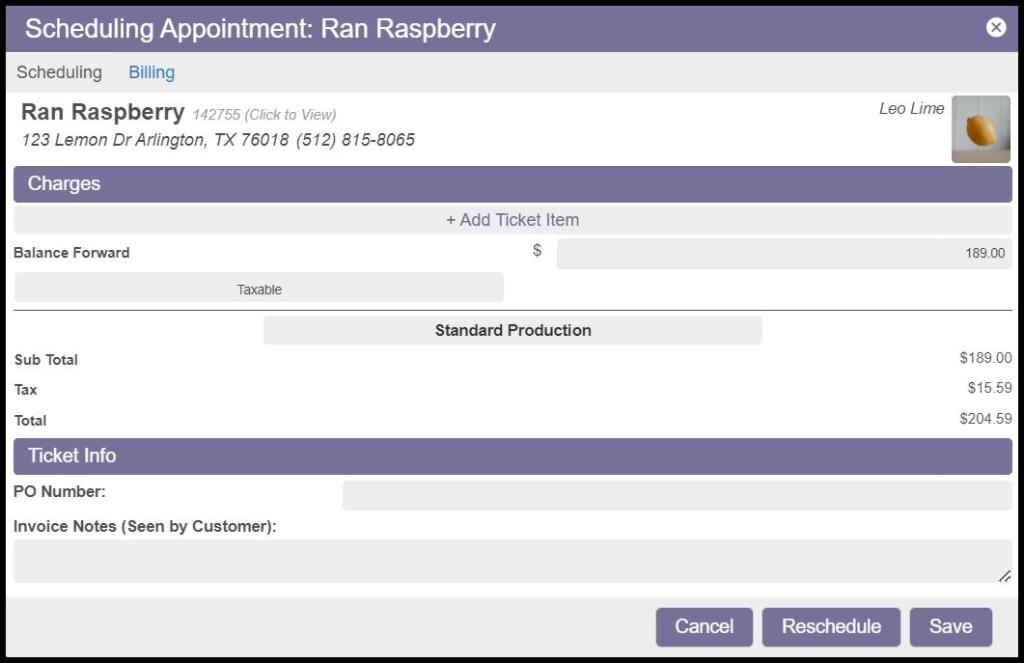
- Charges: This is where the user can edit the charges for the appointment and add ticket items.
Saving with Completing the Appointment
To save the desired changes to the complete dialogue box, select “Save. ” This option will save all changes made but does not complete the appointment. This will allow the technician to complete the appointment as normal on the mobile application and see the new changes made.
If Save and Complete is selected, the changes will be saved, and the appointment will be completed. This will automatically generate an invoice for the customer that will reflect the changes made here.

Editing the Invoice Via the Customer Card
Alternatively, the user can access this full dialogue from the customer card.
Open the customer card and select the “Appointments” tab. Select the pending appointment to the left of the screen.

Once the user selects the appointment, it will bring up all the appointment details.
In the upper right-hand corner, select Edit.
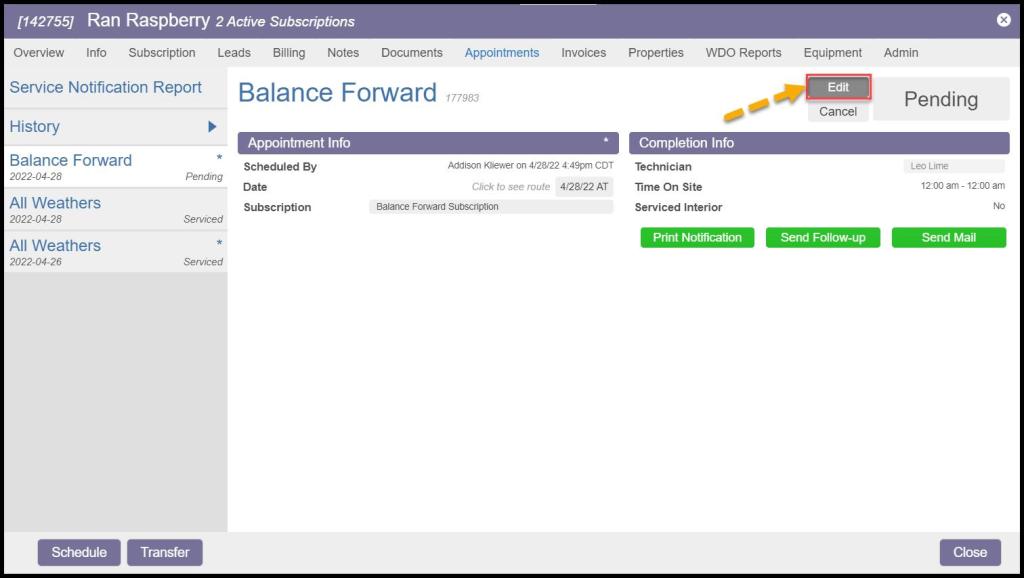
Once this option is selected, it will bring up the Scheduling Appointment dialogue box allowing the user to edit Scheduling, Billing, and Units before completing the appointment.