Creating a Customer Card
Summary
This guide describes the process by which a new Customer is added to the system.
Important Points:
- Customer locations are Geolocated with Google Maps.
- The Customer’s new card will come up automatically after you select Save.
Creating a New Customer
To add a new Customer, click on the New Customer tab at the top of the main system screen.

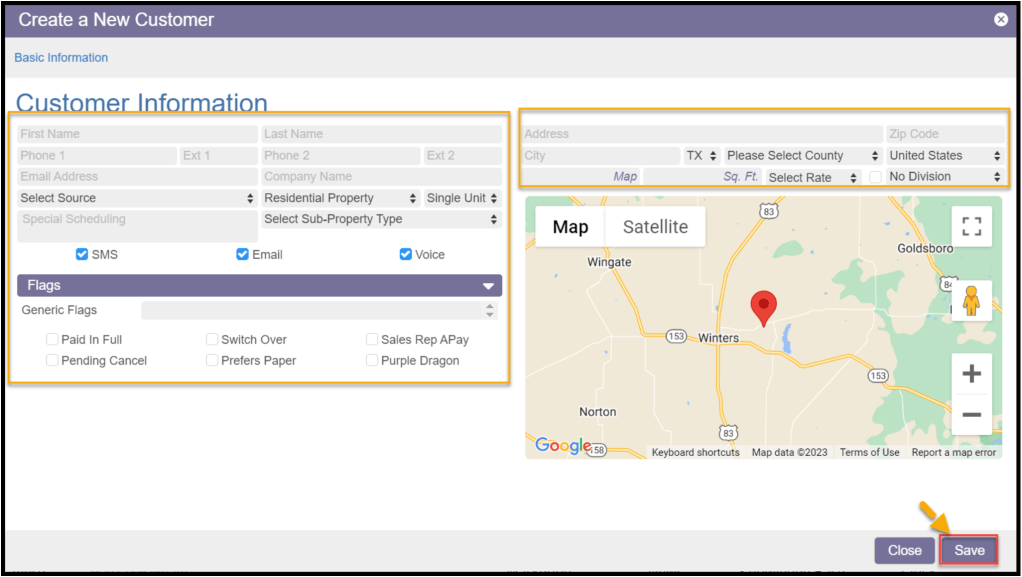
Adding New Customer Information
A blank Customer Card will appear. Enter basic information about the new Customer and then Save to add them to the Customer list.
- First and Last Name: The customer’s first and last name
- Phone 1 / Phone 2: Two phone numbers may be stored, but only the number in the Phone 1 field will receive the SMS and voice messages
- Email Address: The email address used for appointment reminders and completed service notificaitons
- Company Name: The company name for commercial properties
- Selected Source: How the new customer was contacted for service.
- Create and edit Source options in Admin > Preferences > Customer Preferences > Customer Sources
- Property Type: Default = Residential Property; toggles to Commercial Property
- Note: Always include the Company Name for commercial property
- Unit Type: Indicates whether the property requires single access or is an apartment, office, or other larger structure requiring alternative access and record-keeping
- Single Unit = default
- Multi Unit – used for a property with multiple residents and access points
- Structures – large structures such as apartment or office buildings
- Select Sub-Property Type: Special property types may be indicated here
- Day Care
- Hospital
- School
- Special Scheduling: This field is for customers that have special scheduling requirements and will require manual scheduling
- NOTE: Entering notes here pulls the customer out of Intelligent Routing and Fill Routes
- Reminders: Indicate specific preferred appointment reminder methods for the customer
- SMS – short message service/text communication
- Email – email communication
- Voice – voice calls and voicemails
- Flags: Toggle specific flags or list Generic Flags
- Create and edit Generic Flags in Admin > Preferences > Customer Preferences > Generic Flags
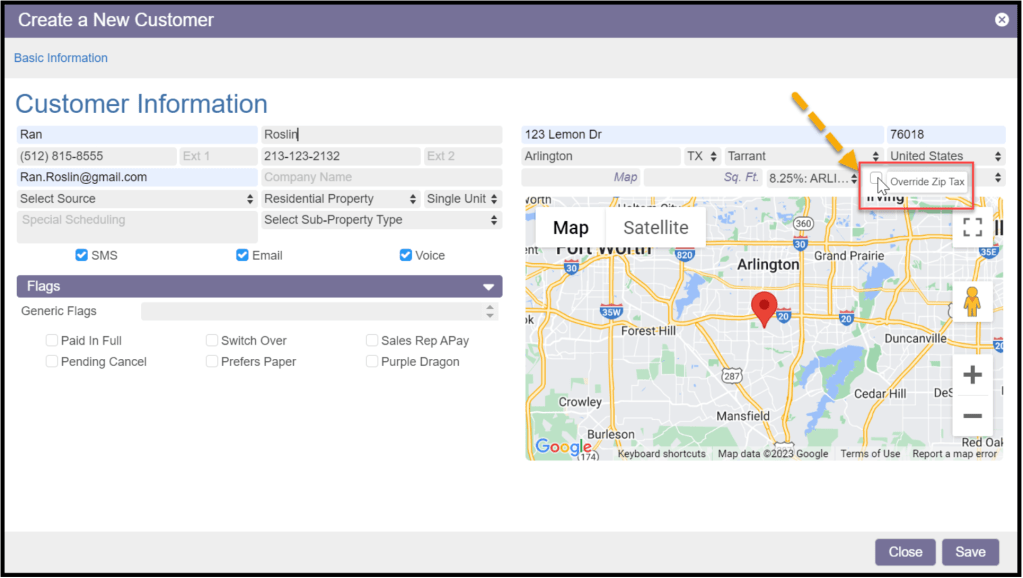
Geolocation
The new Customer’s service address and zip code are automatically geolocated via Google Maps, providing access to the street view.
Note:
The pin can be dragged to the correct spot if Google Maps indicates the wrong location.

Additional Property Settings
Several additional fields appear at the bottom of the service address to help manager the Customer.
- Map Code: For companies that use them, map codes may be entered to help locate the Customer address
- Property Size: This field allows a property size to be given in square feet to alert to any special considerations, material, needs, etc required for servicing the location
- Division Type: This is a customizable field to indicate sub-division names, apartment complexes, etc. No Division = default, but custom choices may be created in:
- Admin > Preferences > Customer Preferences > Divisions
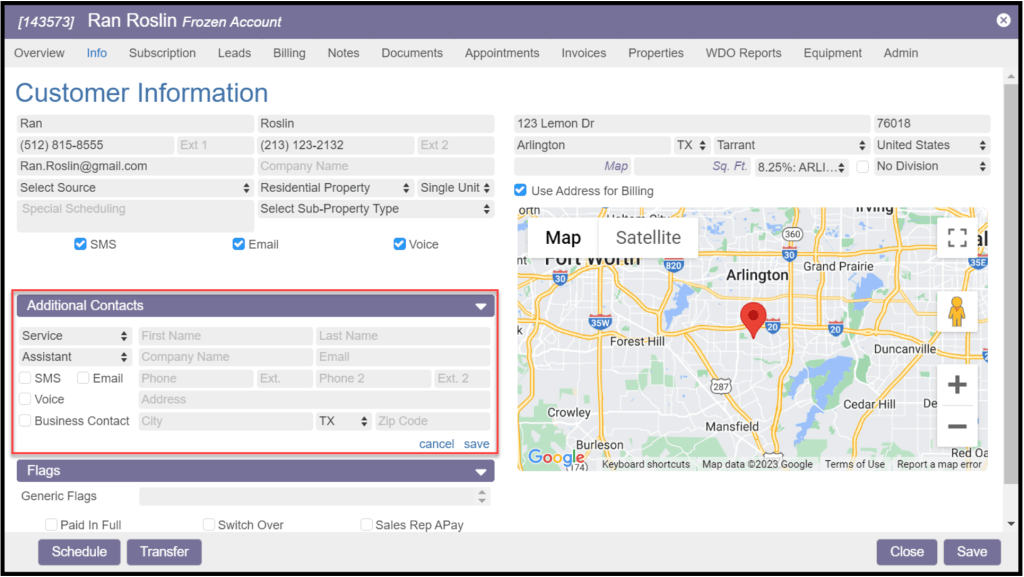
- Use Address for Billing: Checkbox automatically uses the Service Address as the Billing Address
Additional Contacts
Once the Customer info has been saved and the card created, the Info tab will have a new section for Additional Contacts. There are two options for adding an Additional Contact:
- + Add Contact: Aside from the basic information, there are fields unique to additional contacts.
- Contact Type: Contact descriptors that are customizable and created and edited in Admin > Preferences > Customer Preferences > Additional Contact Types
- Communication Preference: Indicates which communication types to use for the Additional Contact
- Business Contact: Checking this box adds the Contact to the Business Contact list located in the Admin tab
- + Add From Business Contacts: The field allows you to search for already existing Business Contacts
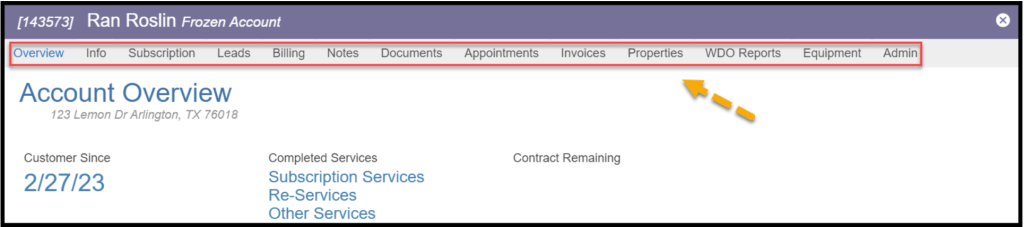
Customer Card Tabs
Once saved, the Customer Card has several tabs across the top:
- Overview
- Info
- Subscription
- Leads
- Billing
- Notes
- Documents
- Appointments
- Invoices
- Properties
- Structures (optional if Structures Property Type is selected)
- WDO Reports
- Equipment
- Admin
These tabs are used to manage the Customer account. See additional Customer user guides for details.
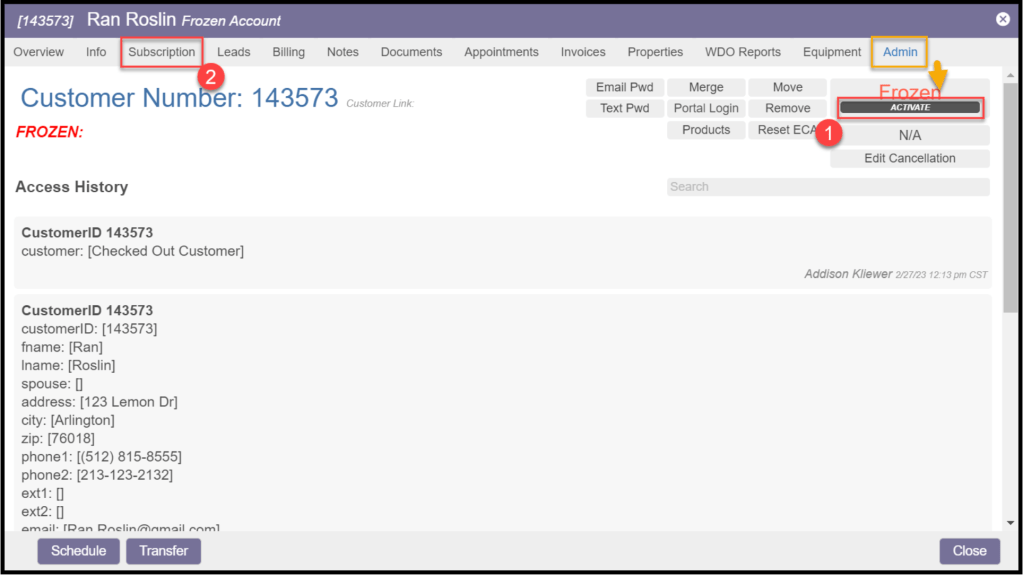
Activating a New Customer
A new Customer account remains in Frozen status and is then Activated in one of two ways:
- In the Admin tab, the upper right corner has the option to Activate the customerr
- Alternatively, adding a new Subscription in the Subscription tab will also automatically Activate the Customer