
AutoPay Trigger Rule
Summary
While AutoPay is an option for all customer subscriptions, this is primarily about the customer providing permission to automatically charge their chosen payment source once a service is provided and an invoice generated. The manual step of generating a list of AutoPay invoices and submitting them for batch payment using the Billing > AutoPay Balances tool is regularly required to actually receive their payments.
Now the Auto Payment Trigger Rule type offers true, hand-free automation of AutoPay invoices to customers utilizing the FieldRoutes Payments service. This guide covers adding a rule, customizing, and enabling it. Once done, the rule will automatically process AutoPay payments without requiring manual review or intervention.
Important Points:
- This Trigger Rule type is available exclusively for FieldRoutes Payments customers.
- AutoPay rules require 1) the AutoPay setting on the subscription and 2) a valid payment source designated as either the account AutoPay source or a subscription-specific payment source.
- All customer subscriptions can be marked as AutoPay which provides payer permission to charge their designated payment source for completed service invoices. Customers can use the AutoPay Balances tool to batch charge these invoices regularly.
- The AutoPay trigger rule offers true hands-free AutoPay capability, submitting the designated invoices for payment automatically with no review or manual interaction required.
- The payment will typically process within 60 seconds of Appointment completion but may take longer at times of high system payment traffic.
Open the Trigger Rules Preference
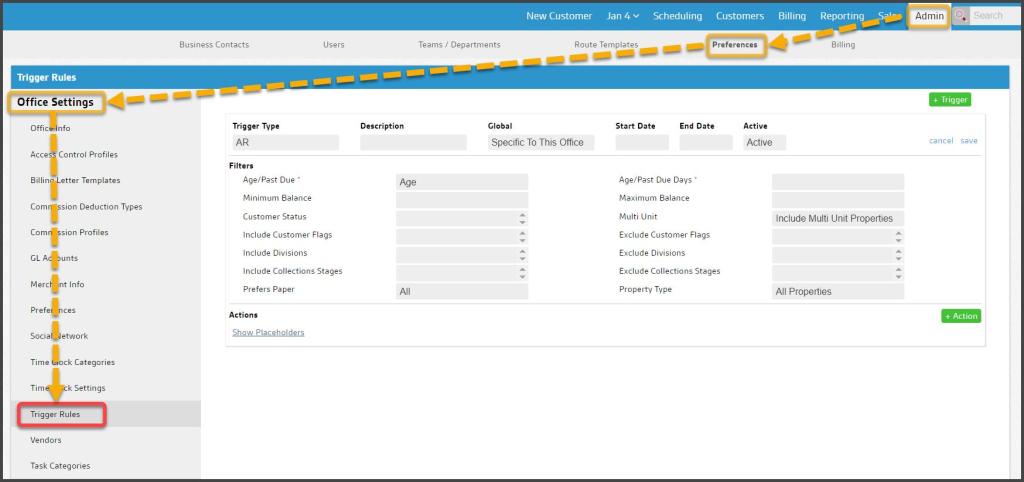
First, navigate to the Trigger Rules preference at:
Admin > Preferences > Office Settings > Trigger Rules
Add a New Auto Payment Trigger Rule
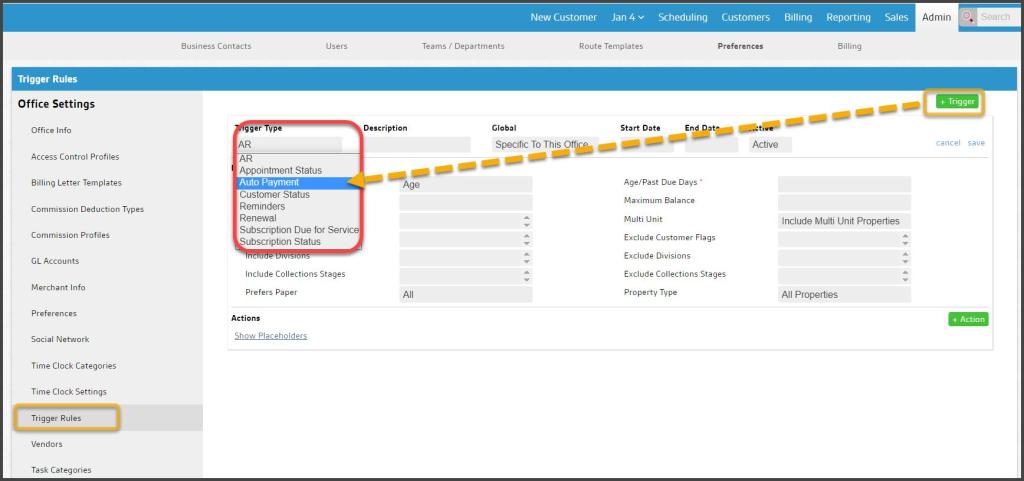
| Select the green + Trigger button from the Trigger Rules preference to add a new rule.From the Trigger Type drop-down menu, select the Auto Payment option. |
|---|
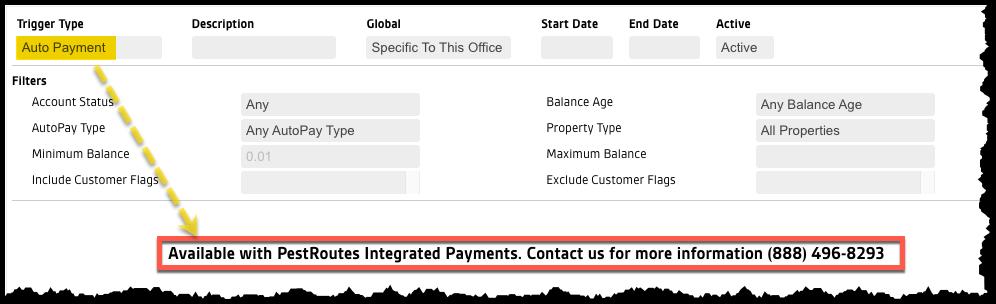
NOTE:
This Trigger Rule type is exclusively available to customers using FieldRoutes Payments, due to additional functionality enabled by this integration. Customers subscribed to 3rd-party payment processors will see a reminder that switching will also allow them to use this rule.
Customize the Rule Settings
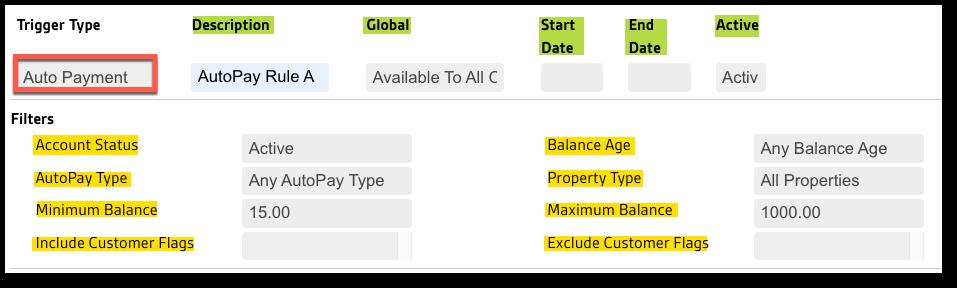
The Auto Payment rule’s success depends upon a) the customer providing permission, b) having the subscription AutoPay setting to Yes, and c) a valid Default AutoPay payment method. If these are in place, invoices that meet the rule conditions below will automatically be submitted for payment without manual review or intervention. The following settings designate which invoices are processed and when:
- Trigger Type: Select Auto Payment from the menu
- Description: Provide a name/short description for this specific rule (e.g., AutoPay Rule A)
- Global: Designate whether this rule is:
- Available to All Offices
- Specific to This Office
- Start Date: (optional) Provide a future date when this rule will take effect
- End Date: (optional) Provide a future date when this rule will be disabled
- Active: This setting determines whether the rule is:
- Active
- Not Active
- Account Status: Choose which account statuses to attempt AutoPay:
- Any
- Active
- Frozen
- Balance Age: Set AutoPay for Any Balance Age, or limit to a specific number of days past due
- AutoPay Type: Any AutoPay type or limit to the card or ACH payments
- Any AutoPay Type
- ACH AutoPay
- CC AutoPay
- Property Type: Choose to AutoPay all properties, or limit to Commercial or Residential
- All Properties
- Commercial Only
- Residential Only
- Minimum Balance: (optional) Set a minimum invoice amount to trigger AutoPay to avoid excess fees.
- Maximum Balance: (optional) Set a maximum invoice amount limit the rule attempts to AutoPay
- Include Customer Flags: Limit to customers with specific Flags (NULL includes all flags/no flags)
- Exclude Customer Flags: Exclude customers with specific Flags (NULL will not exclude any flags)
Add the Process Auto Payment Action
Finally, select the green + Action button to add the action the rule initiates.
Select the single menu option available here: Process Auto Payment.
Once saved as Active, the rule will monitor all invoices and automatically initiate payment.

