Adding Routes and Route Action Options
Summary
Our software makes it easy to add routes, edit routes, assign technicians, and utilize different route actions.
Routes serve a vital function between our desktop software and mobile apps.
Important Points:
- A user’s settings may not allow technicians to see other technicians’ routes, so be sure to assign the technicians correctly.
- Routes can be dragged and dropped into any order the user wants.
Add Routes to a Day
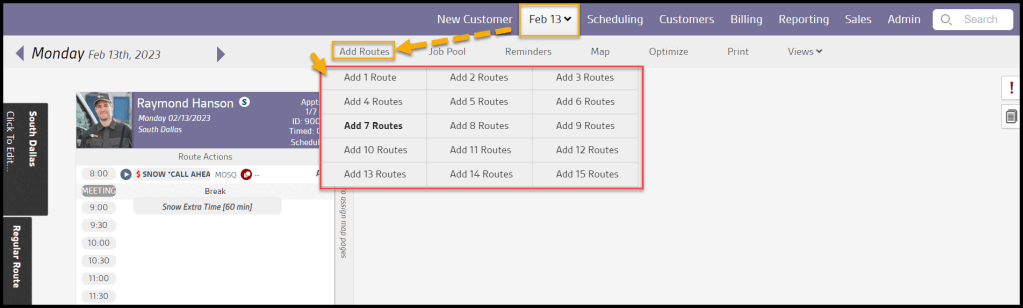
To add a new route, click on the calendar at the top of the page to go to the route view for the desired day and select Add Routes at the top.
Once Add Routes is selected, the user can choose how many routes they would like to add for that day.
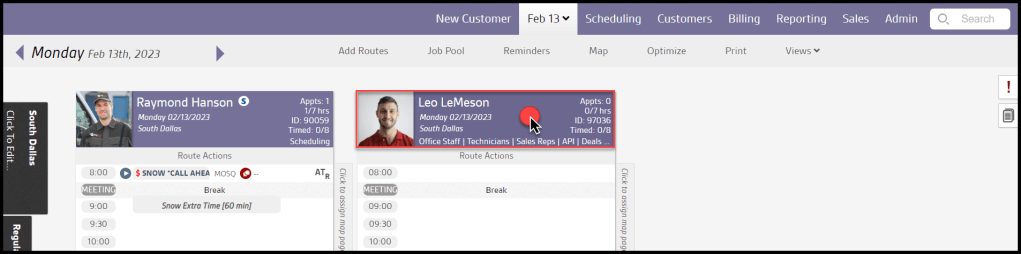
Viewing the Route Header
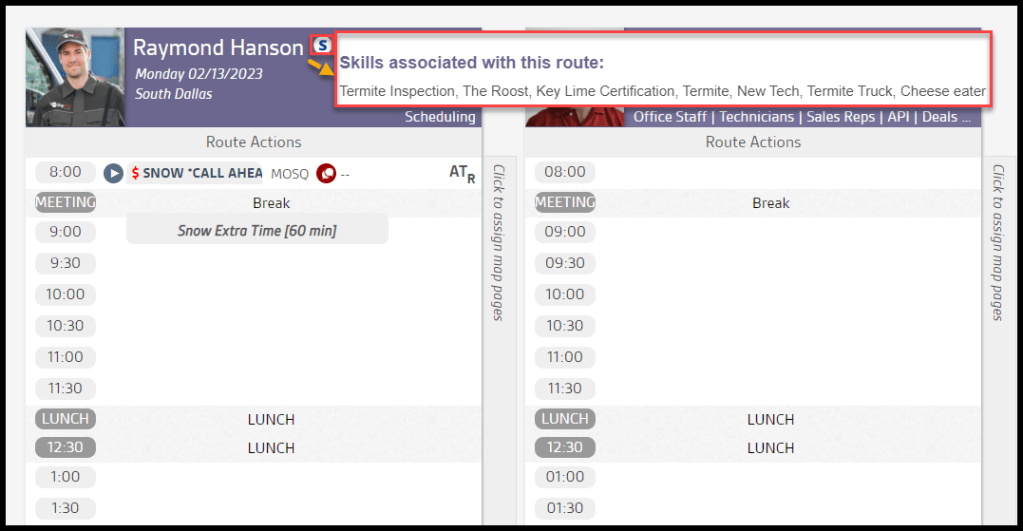
The Route Header will show the following options.
If the technician has been assigned skills, hovering over the S icon will show which skills the technician has been assigned in the user card.
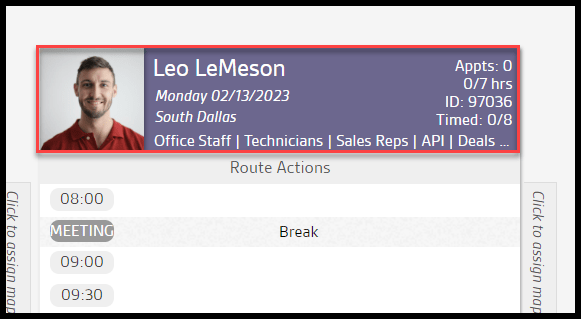
Adding a New Route
Once the route has been added, the user will notice that it is not assigned to a technician. Hovering over the S icon will show which skills the technician has been assigned in the user card. To assign the route to a technician, select the route header, which will bring up an Edit Route Information box.
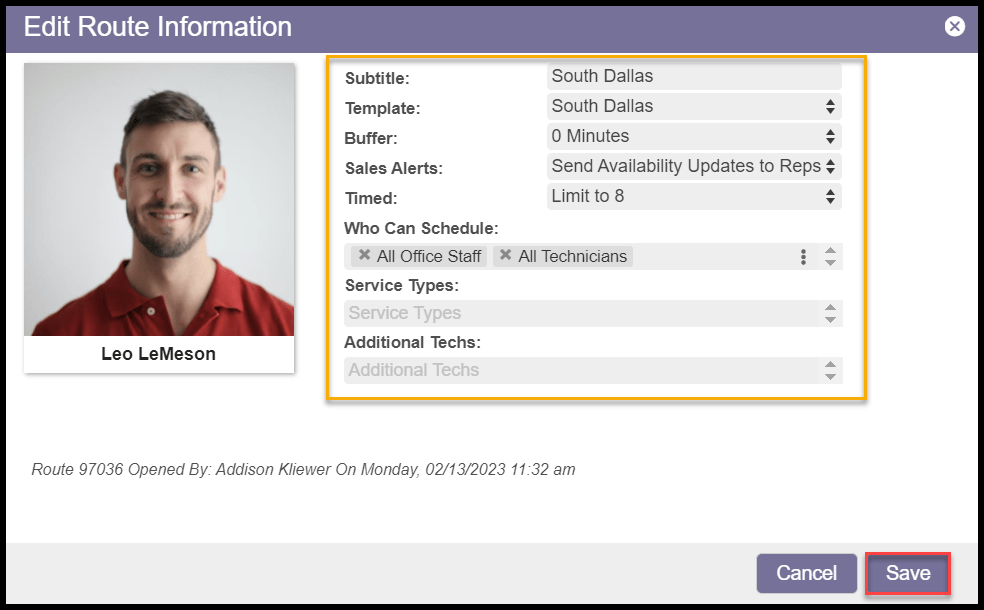
Using the Route Information Box
Use the Edit Route Information box to assign a technician to the route and edit other information regarding this specific route.
- Click to Assign Tech: Clicking this box will allow the user to assign a technician to the route. This is important to grant technicians access to the route in the mobile apps.
- Subtitle: The route subtitle normally defaults to say whatever the route template is titled. It can be edited here. This subtitle will appear on the Route Header below the date.
- Template: This is the route template the route is using. The user can change it to another template here. Please see our guide on route templates for more information.
- Buffer: We designed Buffers to give technicians free time between appointments within a time window. It will consider the length of the time window and appointment duration. Please see our guide on Route Templates for more information on the buffer. Default settings should work in most cases.
- Sales Alerts: Sends out notifications to sales users every time a spot fills up on the route (generally only used for start routes).
- Timed: This will allow the user to determine the number of timed appointments allowed on the route. Any timed appointments over the limited amount will be overbooked if a limit is selected.
- Who Can Schedule: Determines which user type can schedule appointments on the route. The user can also select specific sales teams and office departments to schedule.
- Additional Techs: This is where specific technicians who will also have access to the route can be selected. It is also useful when two technicians work on the same appointment.
- Tech Skills: This is where any skills added to the user card can be shown.
To save any changes made, select Save.
NOTE:
Additional Techs can view those routes on the Schedule screen in FieldRoutes Mobile without needing “view other’s routes” to see the Schedule screen.
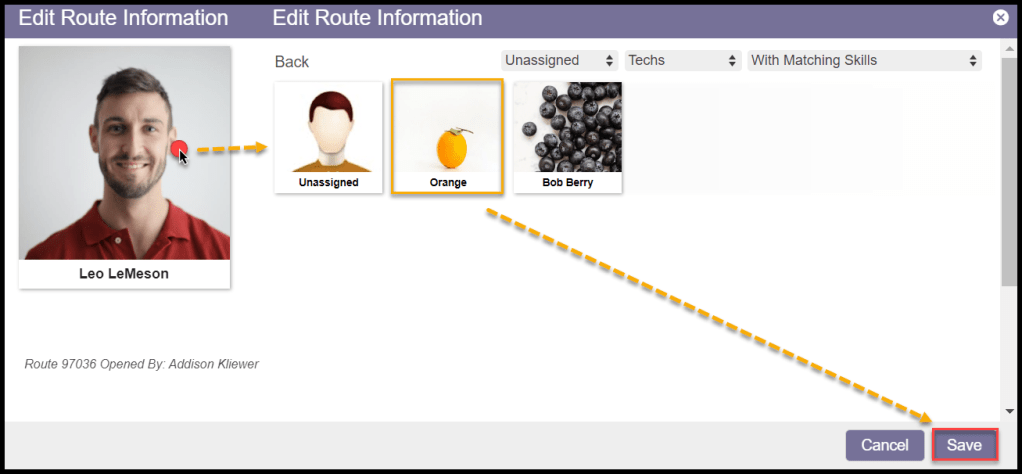
Edit Route Information: Technician Modal Window
The user can filter out results that appear. This is especially useful for staff with or without matching skills. Select the image for the technician in the Edit Route Information window to access the modal window. The technicians can be filtered.
- Assigned: Shows unassigned and assigned technicians and office staff.
- Staff: Show technicians or office staff.
- Matching Skills: Shows staff with or without matching skills.

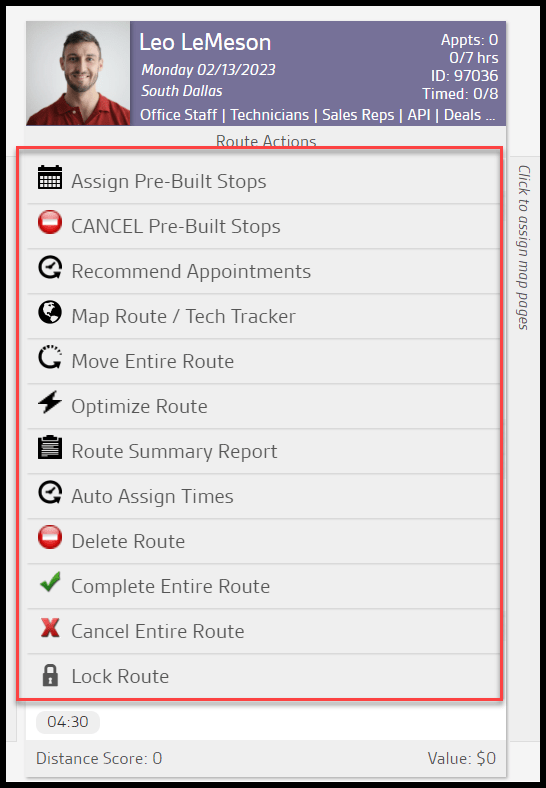
Route Actions
The user can perform many other actions on a route by selecting Route Actions below the Route Header.
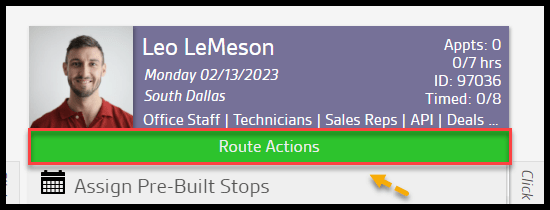
Route Actions Menu
When the user selects Route Actions, a menu will appear with several available actions. The header will include any Tech Skills assigned to them in the user card. Please see the guide on assigning tech skills to a user.
- Assign Pre-Built Stops: If the user has created pre-built stops in Intelligent Routing but has not assigned them to a route yet, the user can assign the routes through Route Actions. Please see below for more details.
- Cancel Pre-Built Stops: This will cancel any appointments scheduled via Intelligent Routing or FillRoutes. This action will not cancel any appointments that have been manually scheduled.
- Recommend Appointments: This option will open the Job Pool and pulls all the customers who are due for service that is closest to the customers currently scheduled on the route. This action makes it super easy to drag and drop appointments onto the route and schedule them.
- Map Route / Tech Tracker: This option will bring up a map that allows the user to see where all the customers scheduled on the route are located. The mobile apps will periodically ping the technician’s location, and the user will see the data here. Please see below for more details.
- Move Entire Route: If users need to move an entire route due to a technician being sick or in severe weather, they can select this option. Please see below for more details.
- Optimize Route: This action will use an optimization algorithm to rearrange all the appointments within their time window to result in the smallest or the shortest distance using the shortest amount of fuel.
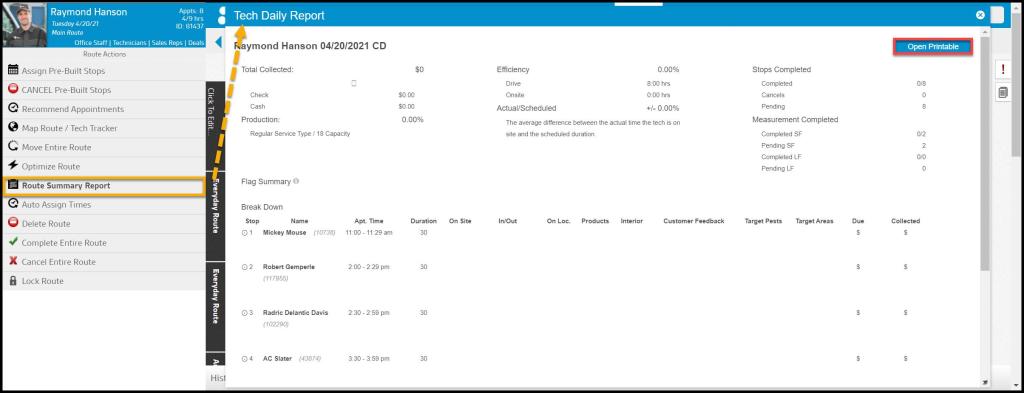
- Route Summary Report: Please see our guide on the Route Summary report for more information.
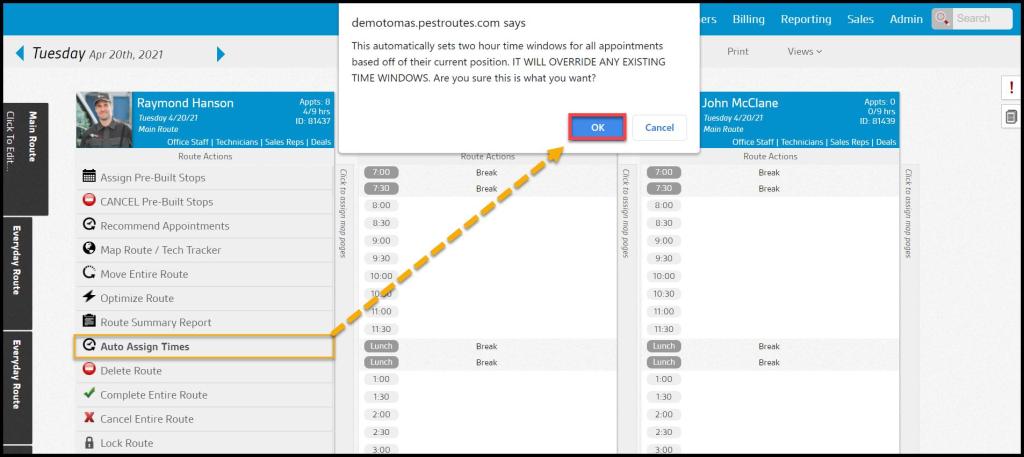
- Auto Assign Times: This will automatically assign two-hour time windows to appointments based on the spot times the appointments are located. This action will override any existing time windows.
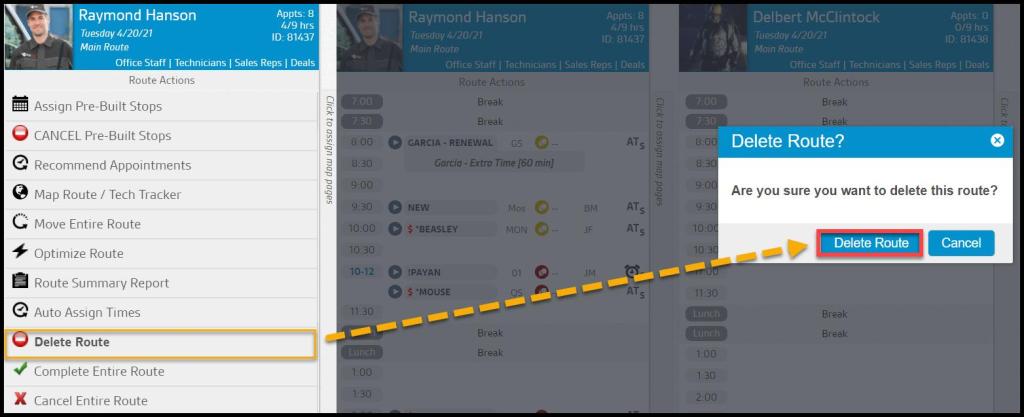
- Delete Route: This will delete the entire route. Any appointments that are scheduled on the route will be overbooked. When a new route is added to the schedule, the appointments will automatically appear on that new route.
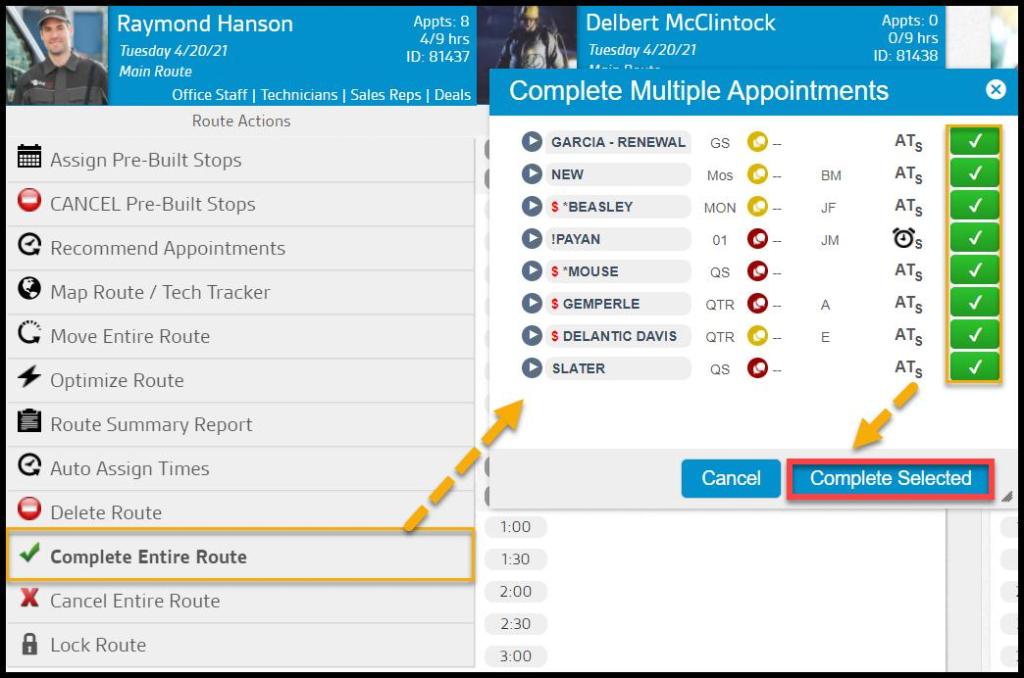
- Complete Entire Route: This will allow the user to complete every appointment on the route at once.
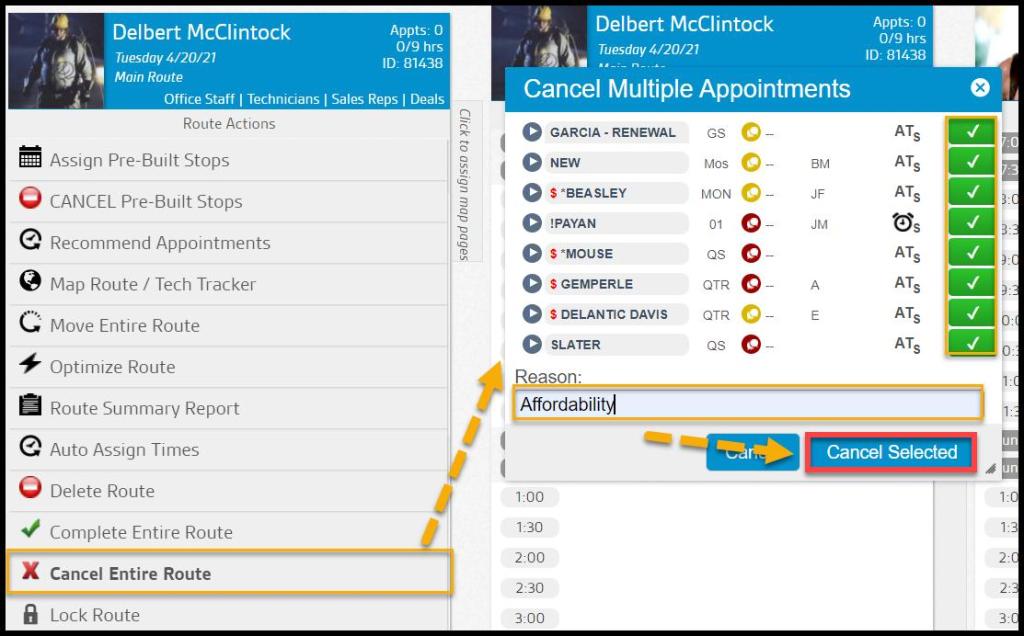
- Cancel Entire Route: This will allow the user to cancel every appointment on the route at once.
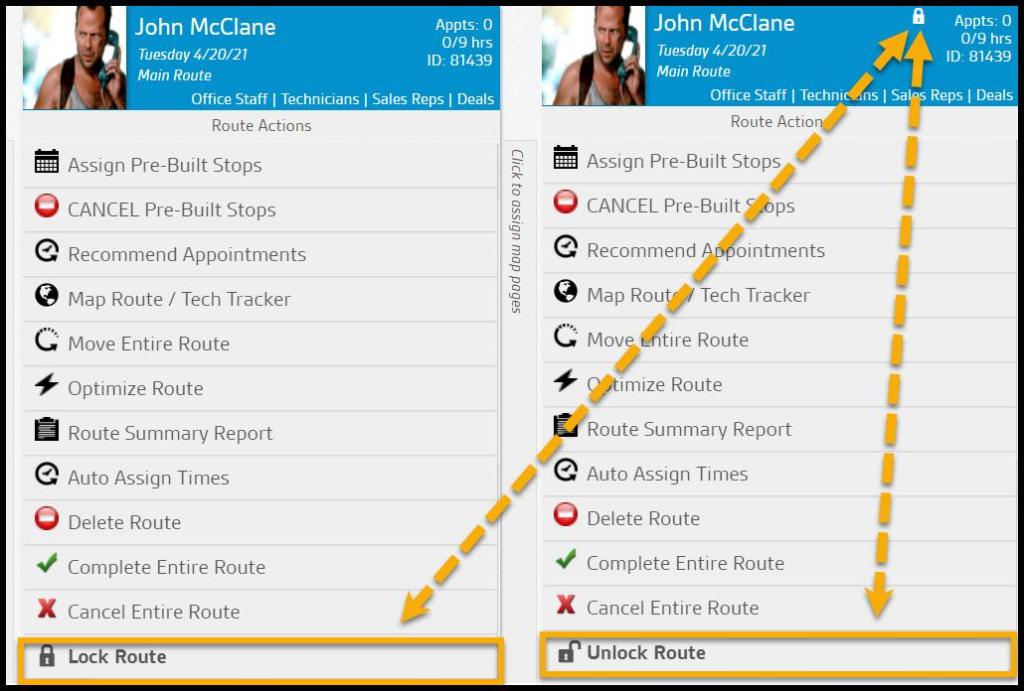
- Lock Route: This prevents users from scheduling, rescheduling, canceling, or modifying any appointments on the route. Users must have the access control Lock/Unlock Routes to perform this action.
Assign Pre-Built Stops
When the user selects Assign Pre-Built Stops, it will allow them to assign pre-built stops created with Intelligent Routing.
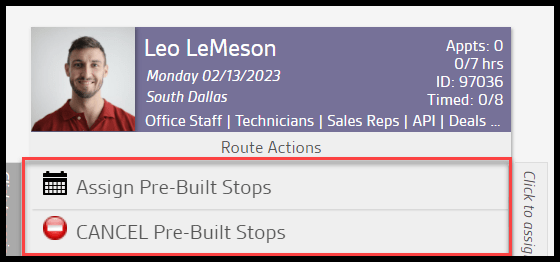
- Select the desired pre-built route the user would like placed on the route. Once selected, the software will highlight it in green. Select Assign to Route to place the pre-built stops on the route. The user can also filter by the preferred technician.
- To see what the pre-built route looks like spatially, select Map Route, and it will bring up a planned route map. If the user would like to remove a pre-built route, select Remove, and all the customers on that route will go back to Intelligent Routing to be optimized again.

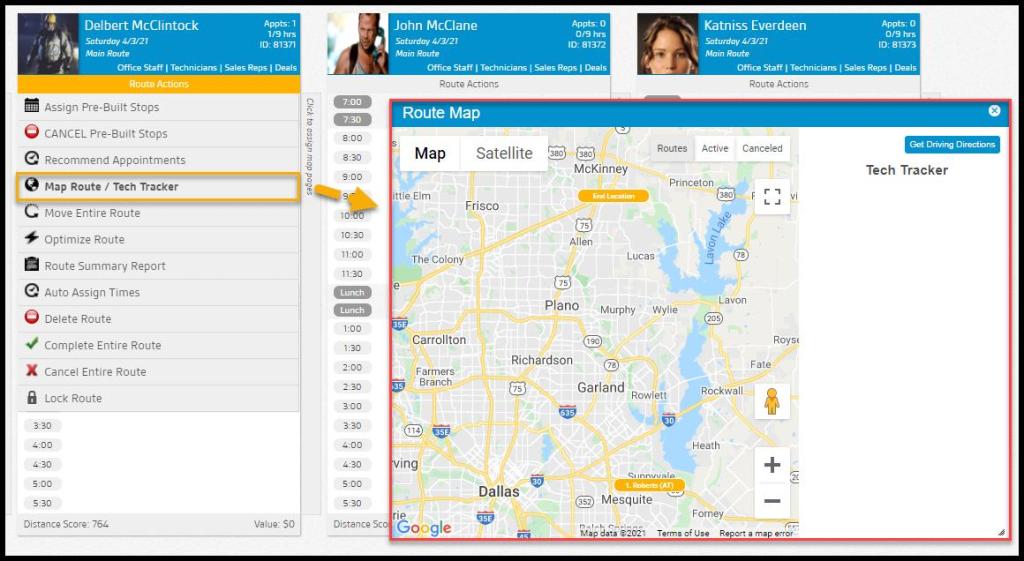
Map Route / Tech Tracker
The Map Route / Tech Tracker serves two functions.
- Provides a map allowing the user to see where all the customers on a route are located. The tracker is a great tool to ensure the routes are efficiently optimized.
- This map will track the technician’s location. As long as the GPS is turned on for the device the technician is using; then it will ping their location throughout the day. The user can see the logs here, under the Tech Tracker section. It will display the time the technician was tracked, and if the user hovers over the time, it will display the tech’s location at that time on the map.
Select Get Driving Directions to open a new tab with Google Maps that will display the drive time.
Move Entire Route
If the user needs to move an entire route to another day or another group, select Move Entire Route. This action is especially helpful if a technician calls in sick or the user needs to reschedule an entire route due to severe weather conditions.
Once the Move Entire Route is selected, a new window will appear, allowing the user to choose which date to which they would like to move the route. In the Date field, select the desired date.
In the Group field, the user can select the route to reschedule the route in. It will default to the group to which the route is already assigned to. This is also helpful if the user needs to move a route to another group on the same day.
Once the desired information has been entered, select Move Route to move the route. This will move the route and the scheduled customers to the new date.

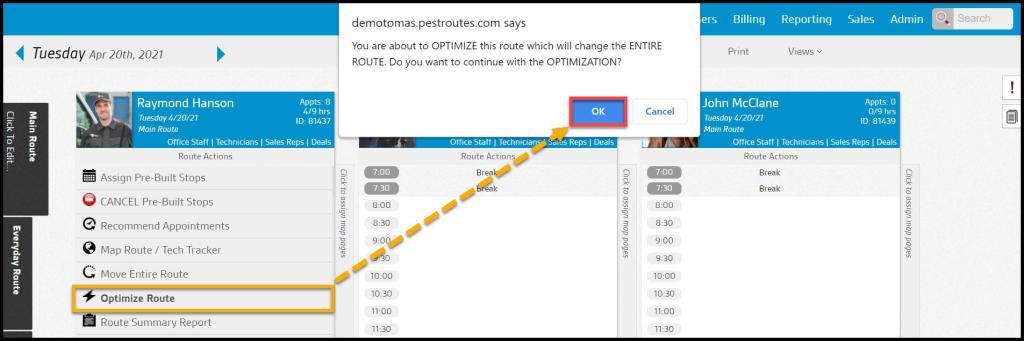
Optimize Route
Select Optimize Route to arrange all the stops on the route in a highly efficient manner. Our software uses a proprietary combination of several leading 3rd party routing technologies and blends their strengths to provide a best-in-class solution.
Once the user selects Optimize Routes, a prompt will appear asking for confirmation before continuing. After approval, a green bar will display.
NOTE:
Optimizing costs 20¢ per route.
Route Summary Report
Once the user selects Route Summary Report, a report that details a report’s summary will pop up.
Auto-Assign Times
For appointments to have precise and standardized time, Auto Assign Times is an action that will set every appointment with a two-hour time window. Any existing time windows will be disregarded.
Delete Route
Delete Route completely gets rid of the route. If the route contains appointments, then one of two things will occur. In instances where other routes exist, the appointments will be moved to another route. When no other routes exist, the appointments are placed into Overbooked.
Complete Entire Route
Complete Entire Route grants the option to complete appointments in bulk. Each appointment will have either a red X or green check mark indicating whether it will be left alone or completed.
Cancel Entire Route
Cancel Entire Route gives the ability to cancel appointments in bulk. Each appointment will have either a red x or green check mark indicating whether it will be left alone or canceled. The option to type in a reason will also be available.
Lock Route
Users can lock a route to ensure that it cannot have any appointments scheduled, rescheduled, canceled, or modified by others without the proper access control.
A lock icon will appear in the route information box to show that the route is locked.