
Adding and Editing Users
Summary
Manage all office, technician, and sales users via the Users Tab. Add new users, edit existing ones, and even deactivate former ones here.
Important Points:
- Office staff typically use the Desktop app, technicians use PestRoutes Tech, and Sales Reps use PestRoutes Sales.
- After creating the user, click their name to view their employee card
- Users can set permissions on the website with the Access Control options (see the help section for details).
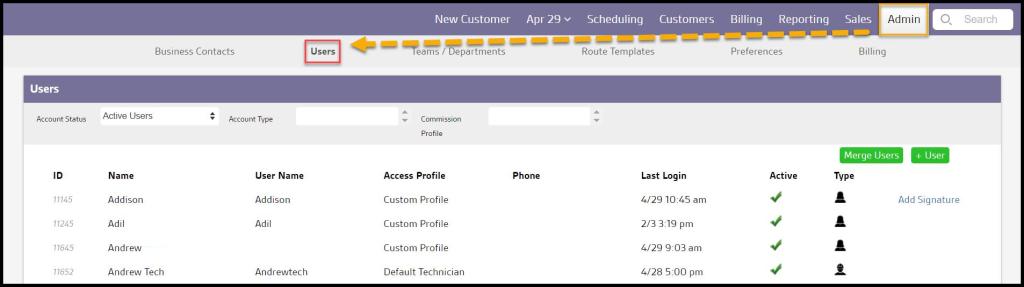
Navigating to the Users Screen
To access the Users, go to:
Admin > Users
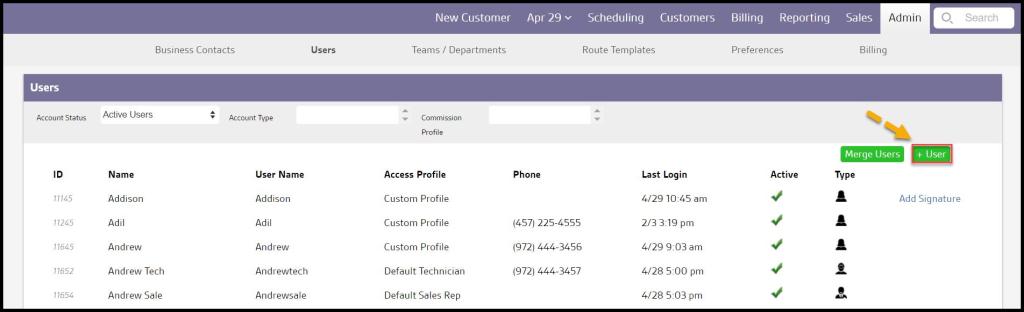
Adding a New User
To add a new user, click Add User.
Adding the New User Details
The Add New User screen allows the user to add information regarding the new user.
- First Name: Add the user’s first name.
- Last Name: Enter the user’s last name.
- Phone Number: Put the user’s phone number.
- User name: Add the user’s username.
- Email Address: Add the user’s email address.
- User Type: Choose the user type, such as office user, sales representative, or technician.
Select Save when finished.

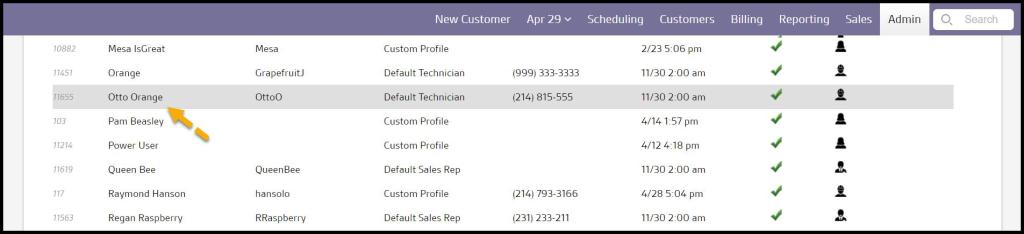
Selecting the New User from the user list
Click on the user from the list to open the Edit User window.
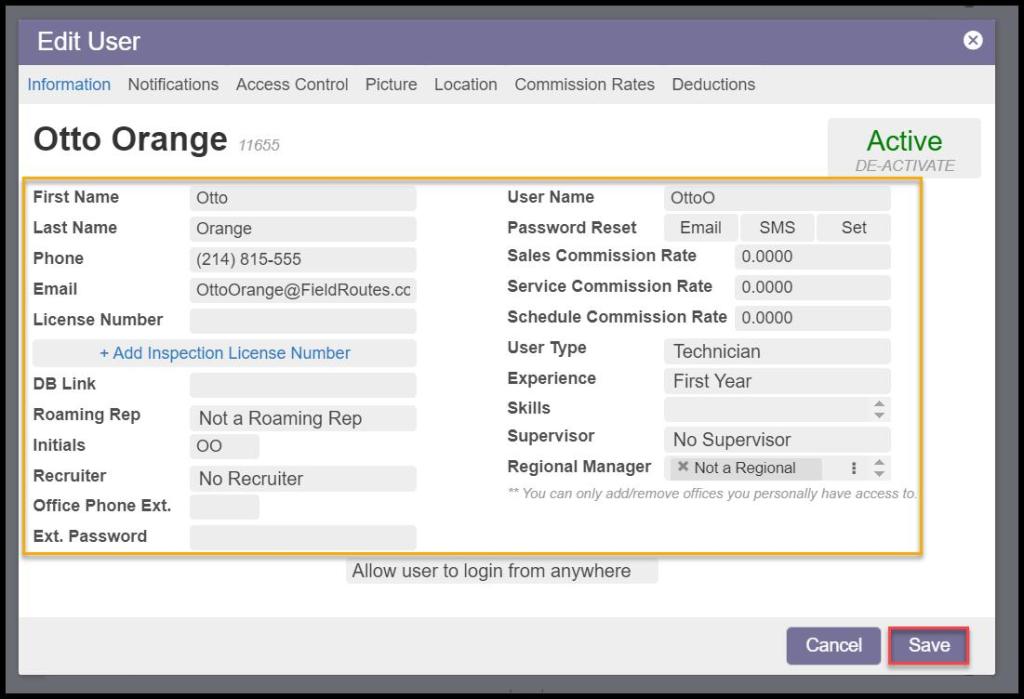
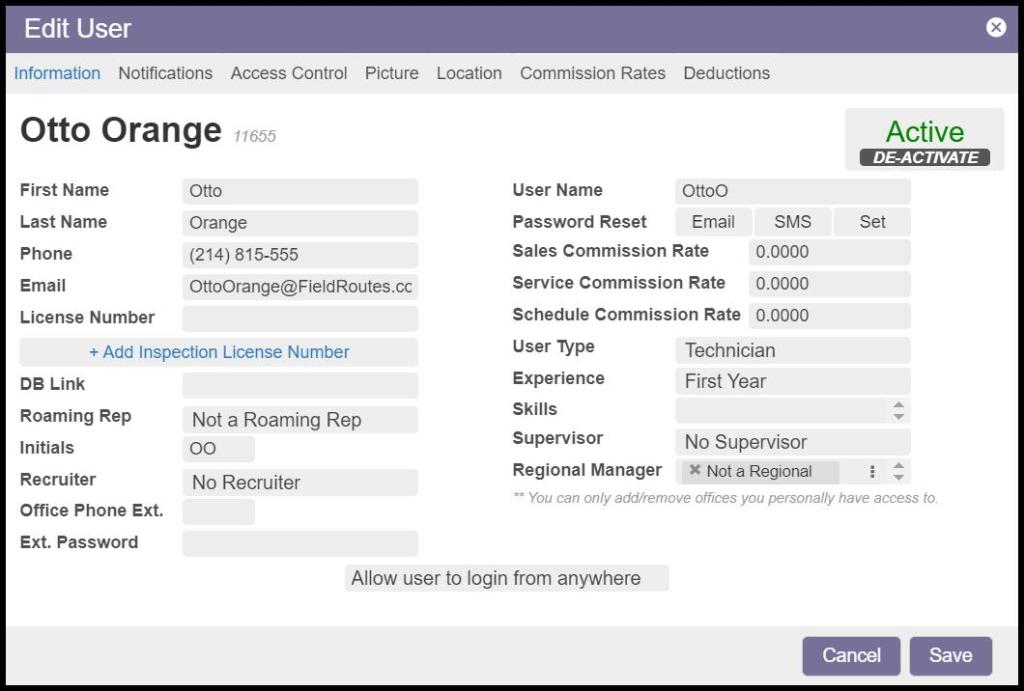
Adding and Editing User Information (Info Tab)
Use the Info Tab to add or edit information about the user.
- First Name: The user’s first name.
- Last Name: The user’s last name.
- Phone: The user’s phone number.
- Email: The user’s email address.
- License Number: If the user is a technician, enter the license number here. The license number for the technician will appear on the completed service notification.
- DB Link: A database link is placed here when users are first imported.
- Roaming Rep: Roaming rep users can toggle between multiple offices. Please see our guide on Roaming Rep Users for more information.
- Initials: Displays the user’s initials.
- Recruiter: If an existing office user recruited the employee, specify the user here.
- Office Phone Ext: The user’s office phone extension.
- User Name: The username the user will log in with. If a phone number is added for the user, it will appear here by default. This can be changed to something else.
- Password Reset: The user’s password for logging in can be set, or a link can be sent to set or reset it.
- Sales Commission Rate: The user’s commission rate when they make a sale.
- Service Commission Rate: The user’s commission rate when they complete an appointment.
- Schedule Commission Rate: The user’s commission rate when they schedule a customer in PestRoutes.
- User Type: The user type, such as office user, sales representative, or technician.
- Experience: The number of years of experience the user has in the field.
- Skills: Add skills that the user is proficient in. A desktop user can manage these skills in Preferences.
- Supervisor: Shows the user’s supervisor. An existing user can be selected here. Note: changing the supervisor will not change completed service notifications, the supervisor will stay the same when the service is completed. If the supervisor does need to be updated for a completed appointment, it can be updated in the customer card > Appointments tab > selecting the correct service > completion info > supervisor. Please see the appointments tab guide for more information.
- Regional Manager: These are the offices the user will have access to. Please see our guide on Roaming Rep Users for more information.
- Allow User to Login From Anywhere: Please see our “Prevent Users From Logging Into PestRoutes From Outside the Office” guide for more information.
Primary Team Assignment
If a User has been assigned to multiple Teams or Departments in the Admin > Teams/Departments section, a new field will appear on the User Information tab called Primary Team.
This setting then offers a drop-down menu containing a list of all the Teams and Departments the User belongs to. Selecting an option from this menu designates that selection as the User‘s main team or department that is most significant to their role.

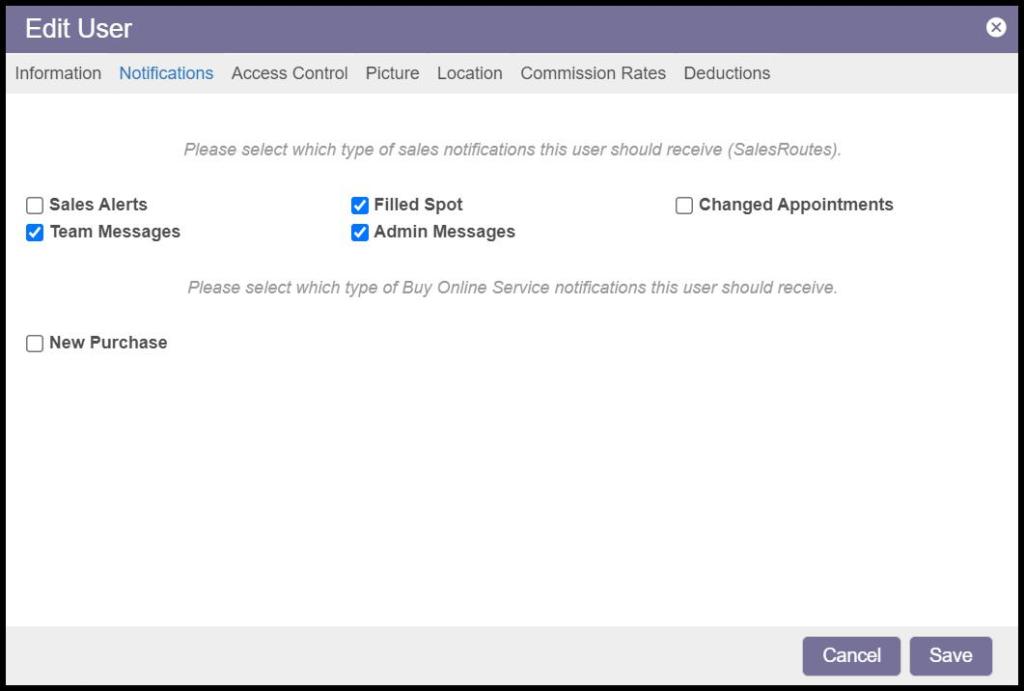
Enabling Notifications (Notifications Tab)
For sales users, set up Sales Alert notifications so they can be notified when appointments have changed, or an appointment slot has been filled. They can receive notifications from other sales users or office admin users.
- Sales Alerts: A user will receive alerts in the Mobile Applications when another sale has been made in the sales mobile apps. If the sales representative is on a team, they will only receive alerts from that team. If the sales representative is not on a team, they will receive alerts from all the sales mobile app users.
- Team Messages: These are messages sent in Mobile Applications under Feed > New message icon (box with pen) > Send to: My Team. They can only be sent and received via the sales mobile apps.
- Admin Messages: These are messages created by an admin user when they select “My Company (Admin Only)” for the Send to option when creating a message.
- Filled Spot: This determines whether the user will receive alerts in the sales mobile apps with updates regarding the filled spots in the routes.
- Changed Appointments: Enabling this will send sales mobile alerts to the user when an appointment is changed.
- New Purchase: Determine if the user will receive New Purchase Buy Online Service notification.
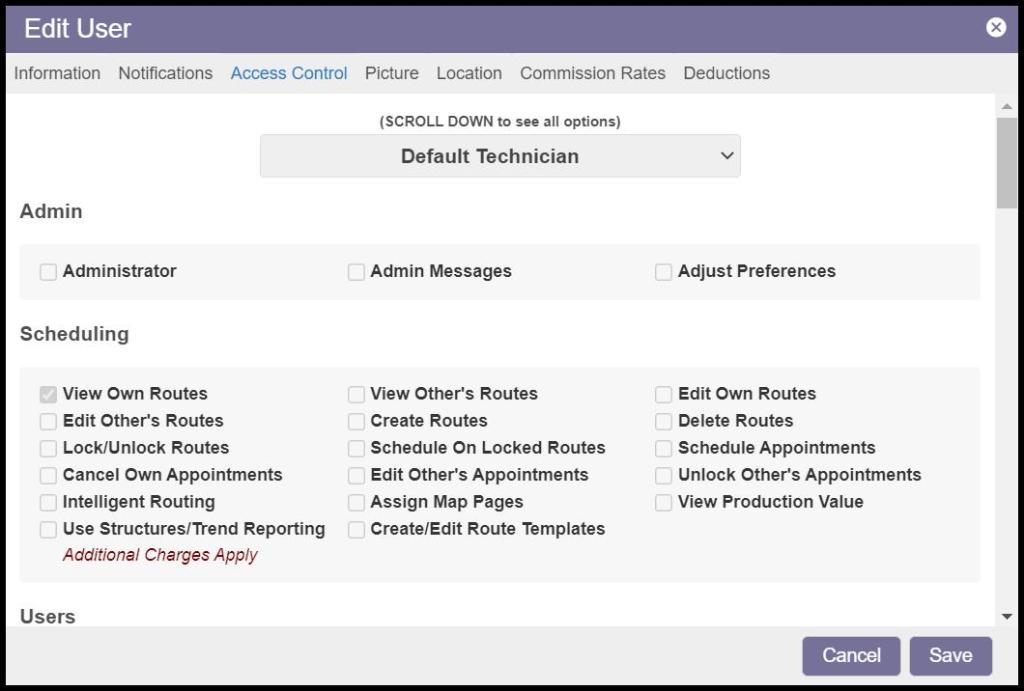
Adding Access Controls (Access Controls Tab)
The Access Control tab sets an Access Control Profile for the user.
Please see the guide on Access Control Profiles for more information, and see the guide on Access Controls for full details on what the permissions allow users to do.
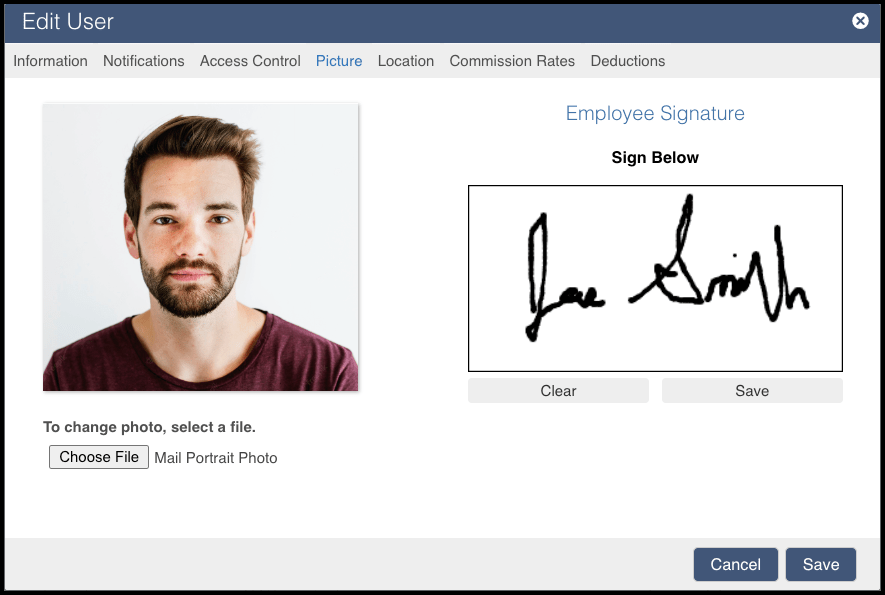
Adding a Picture and Signature (Picture Tab)
Use the Picture tab to upload an employee photo for the user and store a default signature for the employee. The technician photos will appear on the routes and the completed service notifications. Only an office user can upload pictures. The signature can be pulled into the California WDO report when California WDO is enabled.
Setting a Technicians Start and End location (Location Tab)
The Location tab defines the starting and ending location for technicians who may not start their day at the office.
This is helpful with Intelligent Routing as it will ensure the routes start and end in the respective location.

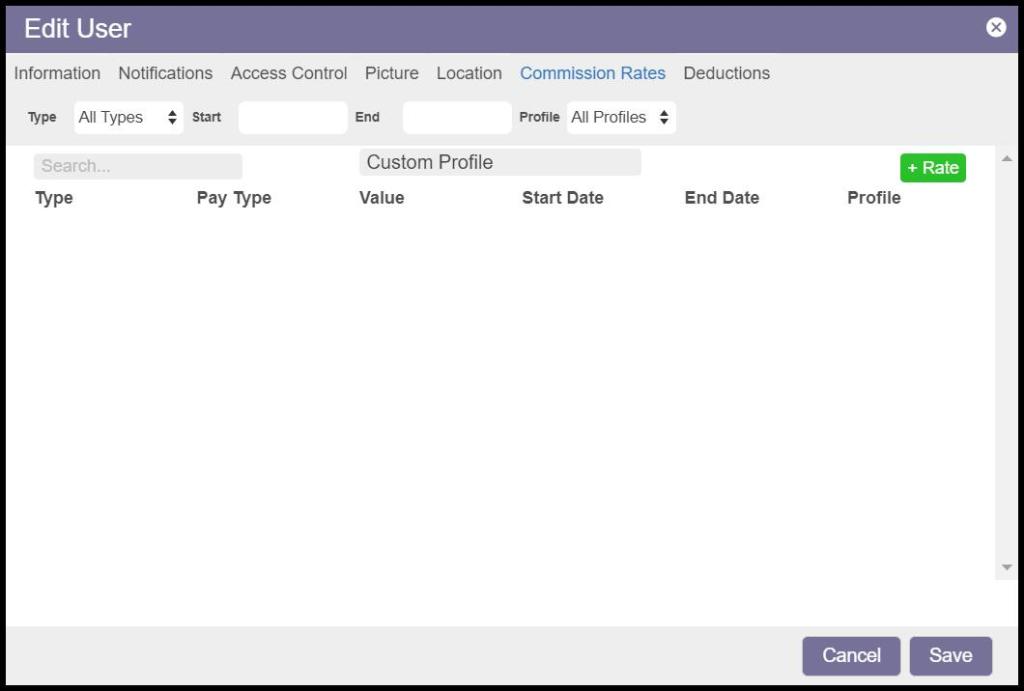
Setting Custom Commission Rates (Commission Rates Tab)
The Commission Rates Tab in the User Card is used to set custom commission rates. See the Commission Rates guide for more information.
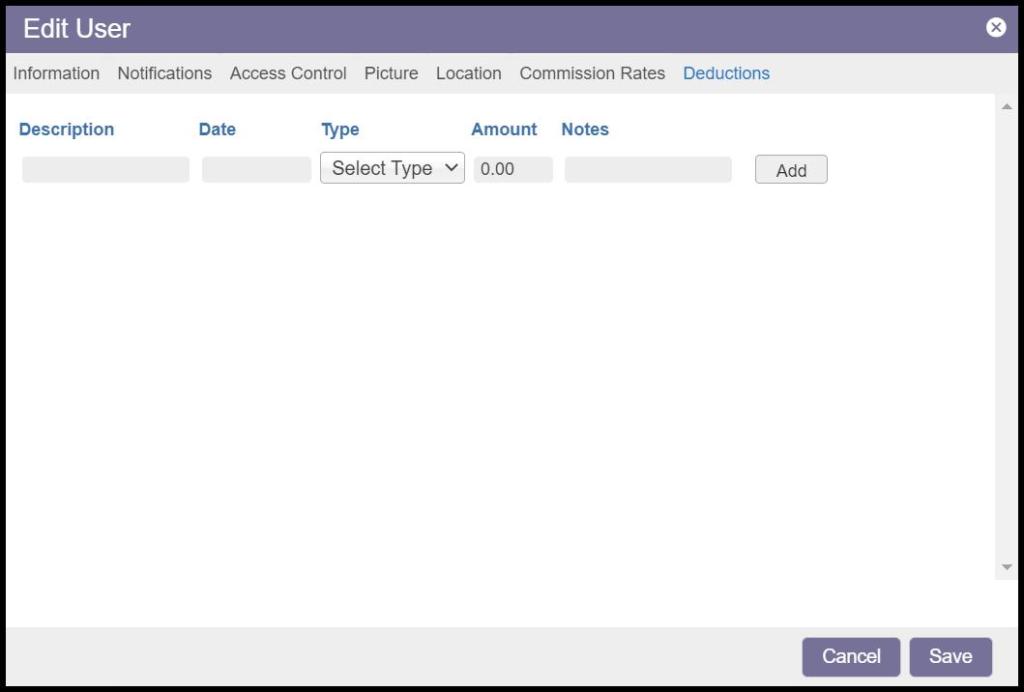
Setting Deductions (Deduction Tab)
The Deduction Tab in the User Card is used to set custom commission deduction rates. See the Commission Rates guide for more information.
Deactivating a User
A user can be deactivated anytime by opening the user card and selecting “De-Active” under the Information tab.
When an employee leaves the company, it is important to deactivate the user to prevent them from logging into the web or mobile applications again.
Why can’t I delete a user account?
User accounts cannot be deleted because when a user account is removed, all the customers (active and inactive), appointments, and other information associated with the account will also be removed. For this reason, our software does not support deleting users.
