Accounts with Credits Report
Summary
The Accounts with Credits Report has the same functions as the Account Receivable report. However, the Accounts with Credits report is designed to display customers with credits on their accounts.
This report is beneficial because the user can easily see every customer with a balance on their account in one place. Effective management of the accounts receivable is critical as it will increase cash flow in the company.
There are two ways to send account statements from this report:
- In bulk
- To individual customers
The user can also send these statements to customers via email, Snail Mail, voice message, SMS message, or print statements.
Important Points:
- Turn off any popup blocks when printing account statements.
- The user can only bulk-print a maximum of 250 statements at once.
- The user can click individual action buttons to toggle them on or off. If the user selects the Toggle button to the upper right of the report, the user can toggle all communications on or off for every customer in the report.
Accessing the Accounts With Credits Report
To access the Accounts With Credits Report, go to:
Billing > Accounts With Credits.

Filtering the Accounts With Credits Report (Basic)
To filter the Accounts With Credits Report, toggle these filters.
- As Of Date: View the amount due based on this date.
- Acct. Status: Filter the report by account status, whether they are either active or frozen customers.
- Auto Pay: Filter by customer’s AutoPay preferences.
- Status: The AutoPay state will allow users to filter the report by successful transactions, soft or hard declines, and invalid/missing AutoPay attempts.
- Prop. Type: Filter the report by property type, specifically all properties, residential properties, or commercial properties.
- Credit Type: Filter the report by customers by Credits, Prepayments, or both.
Select Refresh to run the report or select Advanced Filters for more options.

Filtering the Accounts With Credits Report (Advanced)
To filter the Accounts With Credits Report more deeply, toggle these filters.
- Pref. Paper: Filter by customers who prefer paper, do not prefer paper, or both. To flag a customer that prefers paper, open the customer card, go to the flags tab, and select yes for prefers paper.
- Has Email: Filter by customers who have an email under the Billing tab of the customer card.
- Max Monthly: Filter the report by customers with a max monthly charge. To see if a customer has a max monthly charge, open the customer card and go to the Billing tab.
- Service Types: Include results with specific service types.
- Incl. Collections: Filter the report by the customer’s collections stage – Not Set, Pending, or Sent.
- Incl. Flags: Include specific customer flags.
- Excl. Flags: Exclude specific customer flags.
To apply desired filters, select Refresh.

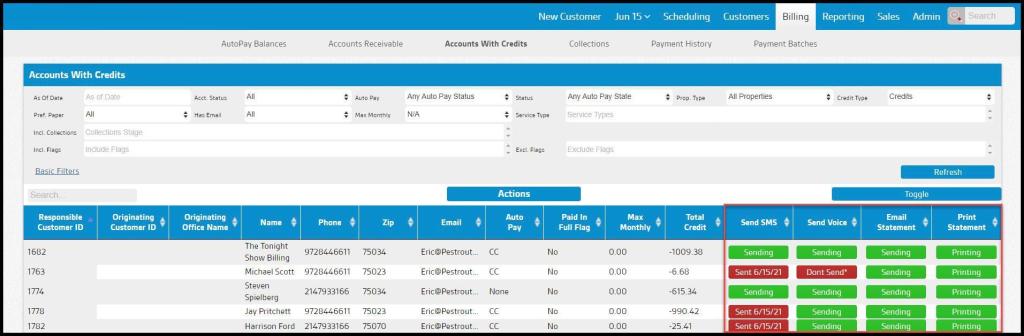
Using the Action Buttons in the Report
When viewing the Account with Credits report, notice how each customer has an action button for each type of communication. This action button will determine if the customer will receive the account statement when sending out communications.
- Sending: If the action button is green and says Sending, the customer will receive the notification when the user sends out the account statement.
- Sent on a Specific Date: If the action button is red and says Sent for a specific date, it means the notification has already been sent to the customer on that particular date. When the user sends out statements, the customer will not receive the statement until the hold date is over. To adjust the Accounts Receivable hold time, go to Admin > Preferences > Customer Communication. For more information, please see the guide on Customer Communication.
- Don’t Send*: If the action button is red and says Don’t Send*, the customer will not receive the account statement when the user sends it.
The user can click individual action buttons to toggle them on or off. If the user selects the Toggle button to the upper right of the report, the user can toggle all communications on or off for every customer in the report.
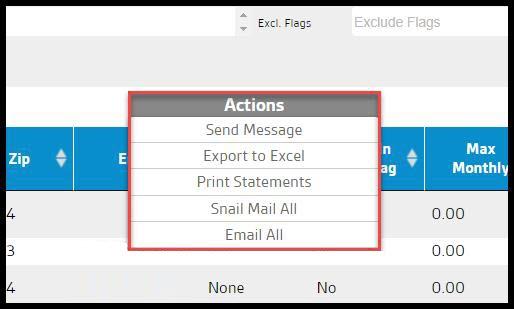
Executing Actions in Accounts with Credits
To send the statements to customers, select the “Actions” button at the report’s top.
- Send Message: This brings up another Send Customer Message box which will let the user select an SMS, Voice, or Email message. The user can also choose to Ignore Contact Preferences and send one of these types of messages regardless of what is checked on the customer card for contact preferences.
- Export to Excel: This will create a file in CSV format that the user can open in a spreadsheet application or Excel.
- Print Statements: This will open a new tab, allowing the user to print all the account statements.
- Snail Mail All: We use a third-party company to print and mail all statements to the user’s customers.
- Email All: This will email the account statement to all customers in the report.
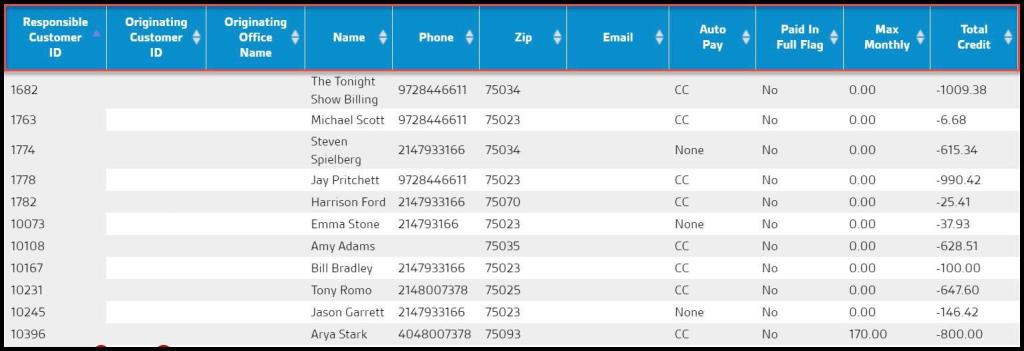
Viewing the Accounts With Credits Report’s Data Columns
The Accounts With Credits Report can display several data columns.
- Responsible Customer ID: Shows the unique identification number of the responsible customer.
- Originating Customer ID: Displays the unique identification number of the originating customer.
- Originating Office Name: View the name of the originating office.
- Name: View the name of the customer.
- Phone: Shows the phone number of the customer.
- Zip: Shows the zip code of the customer.
- Email: See the email address of the customer.
- Auto Pay: Shows the account has auto pay.
- Paid in Full Flag: Shows if the customer has been flagged as paid in full.
- Max Monthly: View the account’s maximum monthly charge.
- Total Credit: See the account’s total credit.
See Using the Action Buttons in the Report section above for the actions in each communication column.